| | | | |
How to Make & Use a Woven Wrap
Cheat Sheet: After reading through the full tutorial, use this printable cheat sheet as a quick reference as you are working on your wrap. WovenWrapCheatSheet.pdf
Pick your length
| Woven Wrap Size | Length in Meters | Length in Inches | Length in Yards | Length Needed Including 20% Extra for Shrinkage |
|---|---|---|---|---|
| Size 1 | 2.0m | 79" | 2.2y | 2.75 yards - 2.5 meters |
| Size 2 | 2.5m | 98" | 2.9y | 3.5 yards - 3.0 meters |
| Size 3 | 3.1m | 122" | 3.4y | 4.0 yards - 3.75 meters |
| Size 4 | 3.7m | 146" | 4.0y | 5.0 yards - 4.5 meters |
| Size 5 | 4.2m | 165" | 4.6y | 5.5 yards - 5.0 meters |
| Size 6 | 4.6m | 181" | 5.0y | 6.0 yards - 5.5 meters |
| Size 7 | 5.2m | 205" | 5.7y | 7.0 yards - 6.25 meters |
| Size 8 | 5.6m | 220" | 6.1y | 7.5 yards - 6.75 meters |
| Size 9 | 6.3m | 248" | 6.9y | 8.25 yards - 7.5 meters |
Woven wraps come in a variety of sizes, and most sizes are usable to some degree by most wearers. It just changes what carries you can do. Most people learn on their "base size," which for a medium-sized person is usually a 6, but could be anywhere from a 4 to a 9. Click here to learn more about wrap sizing to choose the perfect size for you!
Woven wrap widths vary from 26-32" wide (70-80cm.) 29"-30" is generally considered a great width that will be good for newborn through toddlerhood.
Choose your fabric
Choose a strong fabric with no stretch made out of natural fibers. Expand this section for more details, or check out our entire page on picking out safe fabric. In the US, osnaburg is an incredibly popular and inexpensive fabric for woven wraps.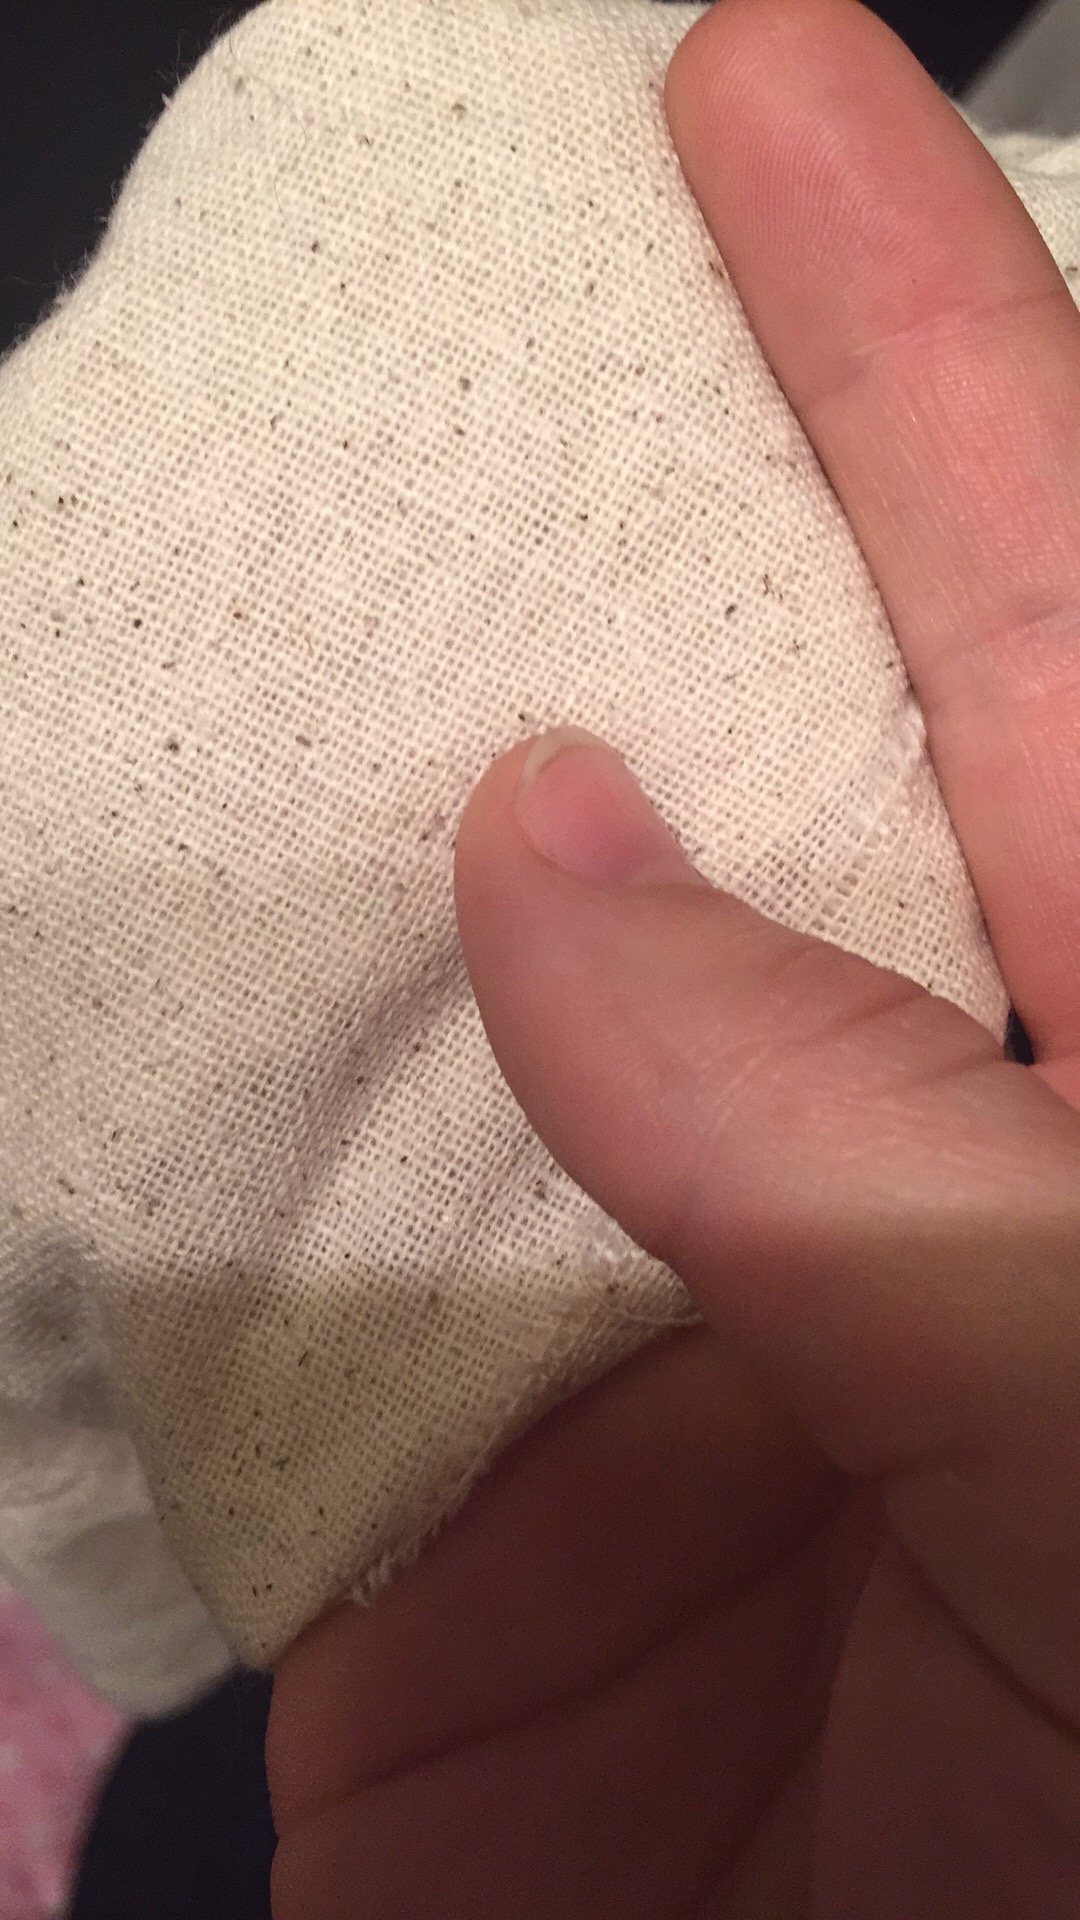
There are a number of safe fabrics to use for a DIY woven wrap. Below are a few of the more popular choices. Whatever you choose, make sure to review the 4 Rules of Safe Fabric Selection to make sure it's safe to use! Search our Facebook Group for the hashtag #fabric for a lot more guidance on fabric selection! Check out this page if you are interested in various fabrics' specific wrapping qualities.
Essentially, fabric for a wrap must pass 4 rules:
- Fiber Content (Natural fibers like cotton or linen; no polyester, no spandex)
- Weight (men's pants or sturdy tote bag thickness; 185-220gsm or 5-7oz/square yard)
- Weave (thick, visible threads; no stretch; tight weave)
- Care Instructions (machine washable)
A few specific recommendations that make great wraps:
Osnaburg
One of the most popular choices for DIY woven wraps because of it's low cost and great wrap qualities. Osnaburg is light, breathable, and easy to work with. It typically only comes naturally colored (with a few exceptions, especially internationally) which makes it an excellent dye blank. It does require scouring to clean it since it is not cleaned and processed like most fabrics, but scouring is not nearly as scary as it sounds. The downside is that most fabric store employees are not familiar with it and may not be able to help you find it. Either have them look it up in their computer, or simply search around the burlap or muslin. The bolt will say "osnaburg" clearly on the tag. It will usually be 100% cotton, although Walmart sells osnaburg with a 3% polyester blend which is fine to use. It will be a natural-colored fabric with small brown flecks.Duck cloth
Duck is a canvas-like fabric. While it is a little stiffer than osnaburg and slightly less breathable (although only slightly; cotton in general is a breathable fiber), duck is often used because it breaks in for a nice floppy, supportive wrap and, more importantly, comes in gorgeous, colorful prints. The higher gsm and tight weave means that duck is particularly "toddler-worthy." The downside to duck is that the prints are one sided, so your wrap will have a blank "wrong" side.Linen
100% linen is the gold standard for breathability in the heat, and known for its strength. It can crease (which is mostly just a visual issue) and takes longer to break in, but the linen from Fabrics-store.com comes pre-softened. Keep in mind that a lot of "linen" sold in fabric stores is actually "linen-like" fabric that is made from cotton, rayon, or even polyester, so always check the fiber content. You also have to make sure the linen you are buying is an appropriate weight, as many places sell "tissue linen" that is much too thin to be safe.Scour (osnaburg only)
 If you bought osnaburg, is MUST be scoured before hemming and using! This is a non-optional cleaning step necessary because osnaburg is an unprocessed fabric full of a lot of leftovers from the manufacturing process, and it will be in direct contact with your baby's skin (and likely their mouth.)
For in-depth instructions on how to scour osnaburg, click here.
Wash & Dry
Regardless of your fabric choice, you'll want to wash your fabric before you start in order to get any and all shrinkage out of the way up front and remove anything built up in the fabric from the manufacturing process or from being handled at the store. Use a detergent without any added fabric softeners, and avoid Optical Brighteners if you plan to dye.
The general recommendation is to wash your fabric however you plan to wash it in the future, but I prefer to start with a very hot wash and hot dry to get any and all shrinkage out of the way in case someone were to "help" and wash my wrap for me.
You'll want to use a wrap-safe detergent. In general, wrap-safe detergents:
- Are free of dyes and fragrances (These can irritate baby's skin since they will be in lots of contact!)
- Have no added fabric softener (which can build up in the fabric and make knots slip)
- Are liquid, not powdered (powder can build up in the fibers and wear them out faster)
- Have no optical brighteners (OBs are avoided to protect the color. I have not yet found any evidence that they actually damage fabric.) Popular brands include Ecos (despite the label, there are not any unsafe fabric softeners in this detergent) or Seventh Generation.
Dye (Optional)
(Optional) Dye with a baby-safe dye. Join the Facebook group Dyed Baby Carriers for more info. Wraps CAN be dyed after hemming, but keep in mind that if you hem your wrap with a polyester thread, the thread will not take dye.Cut to width/length and (optional) add tapers
Standard woven wrap width is between 26”-32” or 66cm-81cm. Make sure to leave a little excess for the seam allowance of your hems.If you plan to taper the tails of your wrap, make sure the angles are parallel.

Re-measure after washing and drying and cut to length if needed. Cut the width down to between 28-34” or 71cm-86cm (for a finished hemmed width of 26”-32” or 66cm-81cm.) If you bought a 57"-60” wide tablecloth or bolt fabric, you will simply need to cut it in half lengthwise to be (approximately, after shrinkage) 28” wide. Some fabrics, including osnaburg and duck, will “snip and rip” straight. Simply snip about 1" of the fabric at the right width and then rip it down the length. If you aren’t sure, test near an edge. Otherwise, you can measure and iron a straight line and then cut along the crease.
Click here for info on tapering your ends (optional, mostly just aesthetic.)
Hem your edges
Hem all 4 edges using. Any thread and any stitch is fine to use. Have a dry cleaners or alterations shop hem for you if you are unable to do so.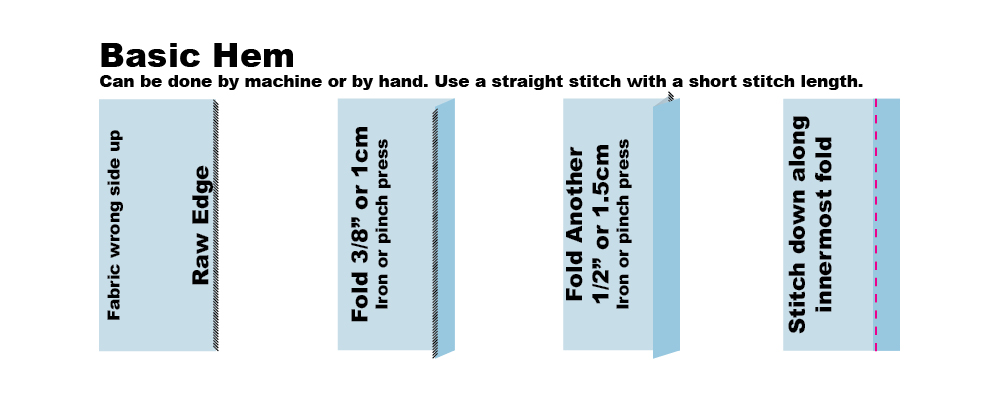 For professional-looking corners, miter the corners before stitching your hems down.
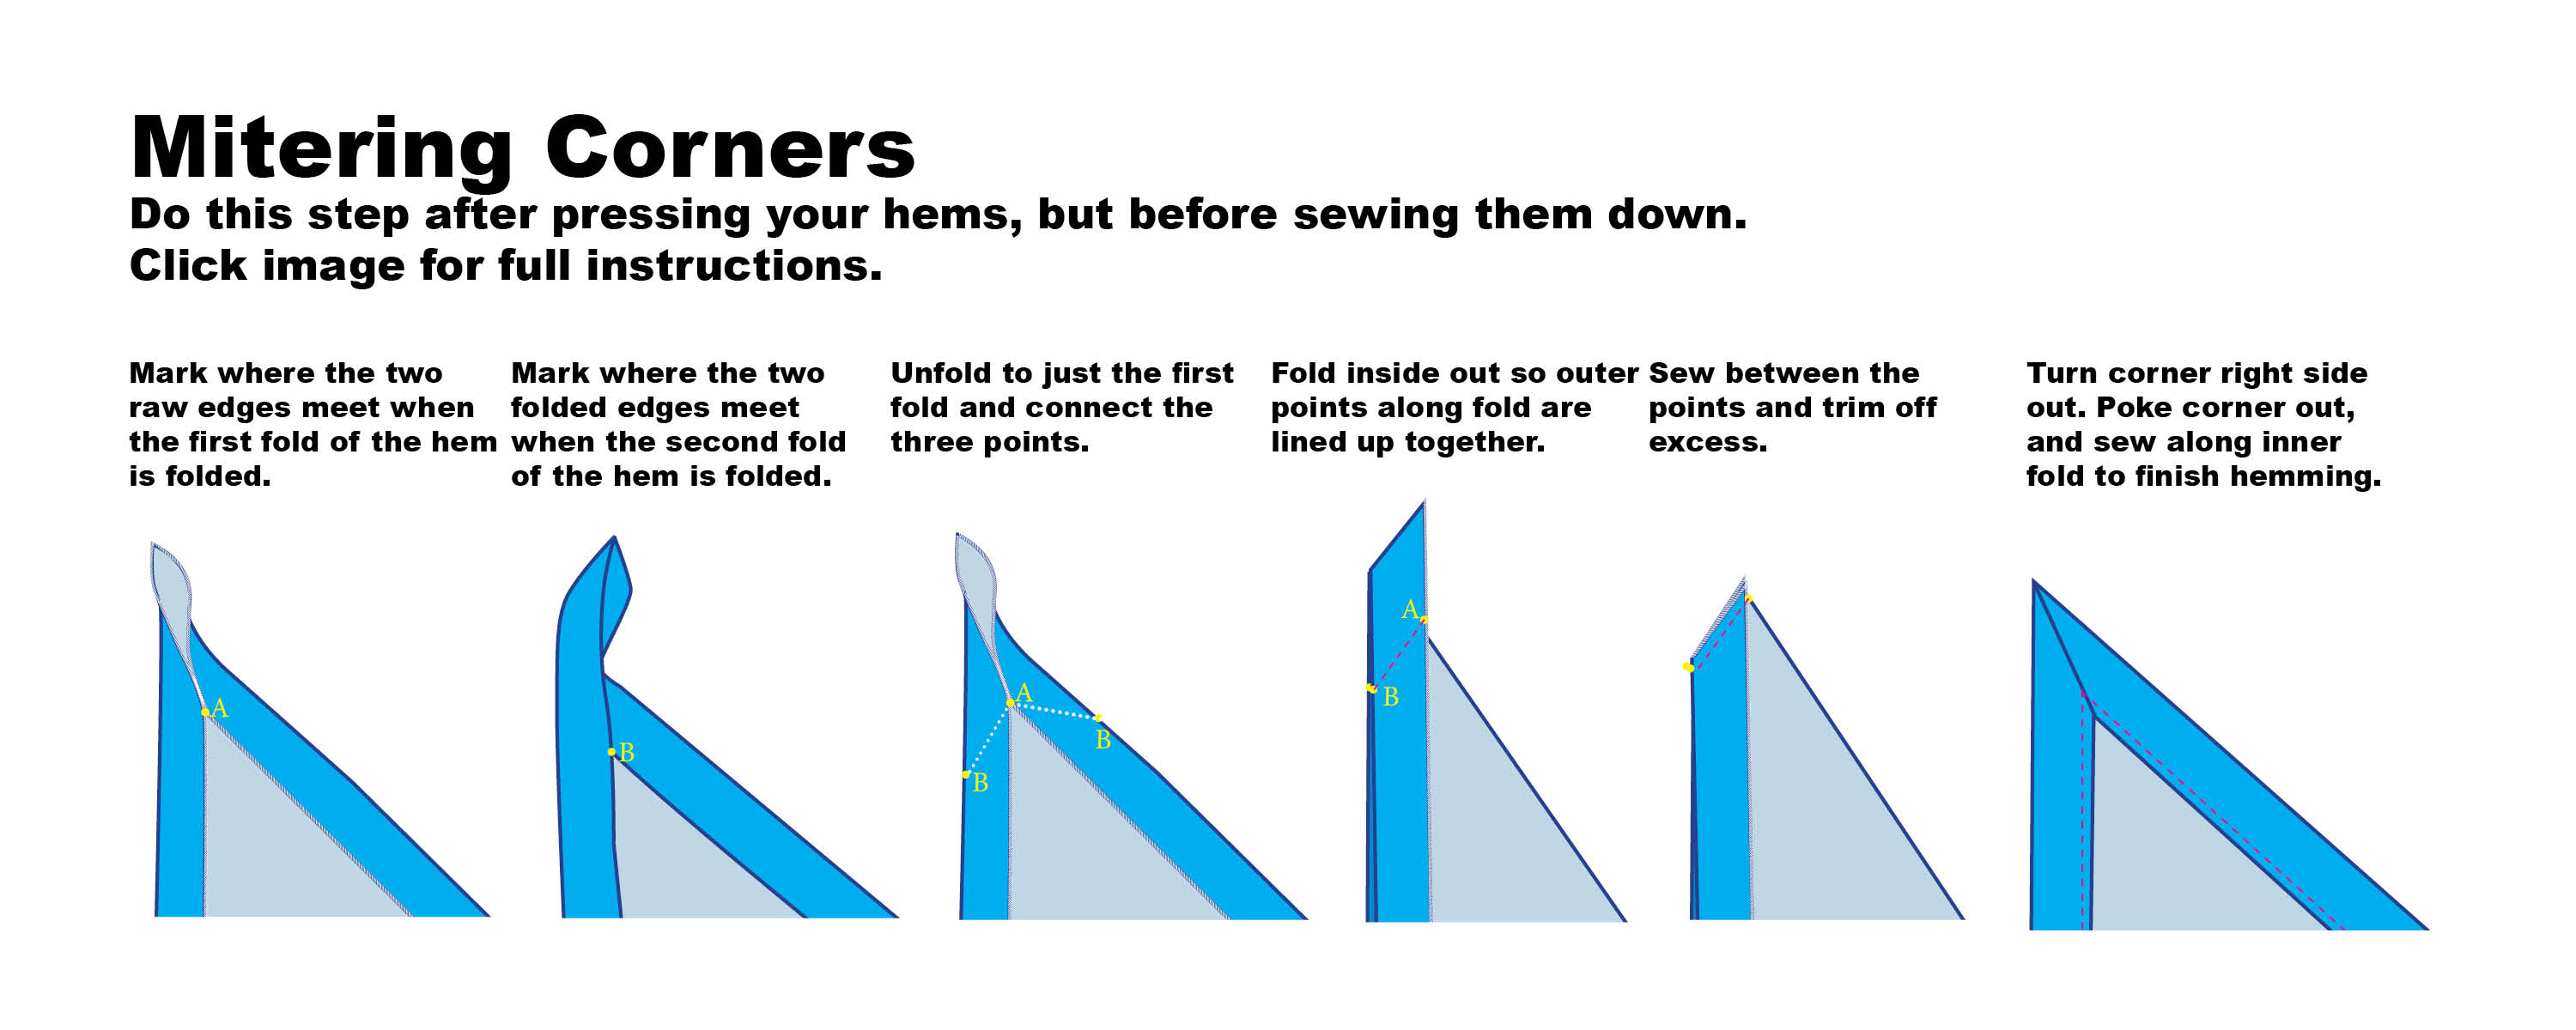
Once your fabric is clean and the correct size, hem all four edges.
Hem with whatever method you are comfortable with. A double folded hem of between 1/4”-1/2” is typical. You can iron and pin your hems before sewing, use a rolled hemming foot, or just pinch press them like Jan does in this video. Serging not preferred, but is okay (although the rails will not be as strong, may irritate baby's skin, and may be more prone to damage in the long run.) Hemming by hand is tedious but safe.
If you really want perfect mitered corners, check out this graphic-and-text tutorial: Mitered Hems. If you prefer videos, this is my favorite video that shows how to do it (yes, the video is about dinner napkins. The technique still applies.)
It doesn’t matter too much what thread you use for the hems. An all-purpose thread is fine. Just keep in mind that while polyester thread is stronger and less likely to break as you are tightening your rails (especially if your fabric has any give to it), if you plan on dyeing your wrap, polyester won’t take dye, so use a thread matching the FINAL color of your wrap. Unless you are an experienced sewer, avoid “heavy duty” thread, as these can jam up your machine if you aren’t used to adjusting the tension. Again, since hems aren’t “structural,” feel free to use a straight stitch, zigzag, or even a decorative stitch for your hems. The main point of the hem is just to keep the folded fabric in place.
If you don't have a sewing machine, after cutting your wrap to size, take the fabric to your local dry cleaners or alterations shop to have it hemmed! You can call for an estimate, but many in the USA will do it for anywhere between $5-$20.
Since the short ends of the tails do not receive the same kind of abuse and wear that the long rails do, you can choose to fringe the ends instead of hemming them.
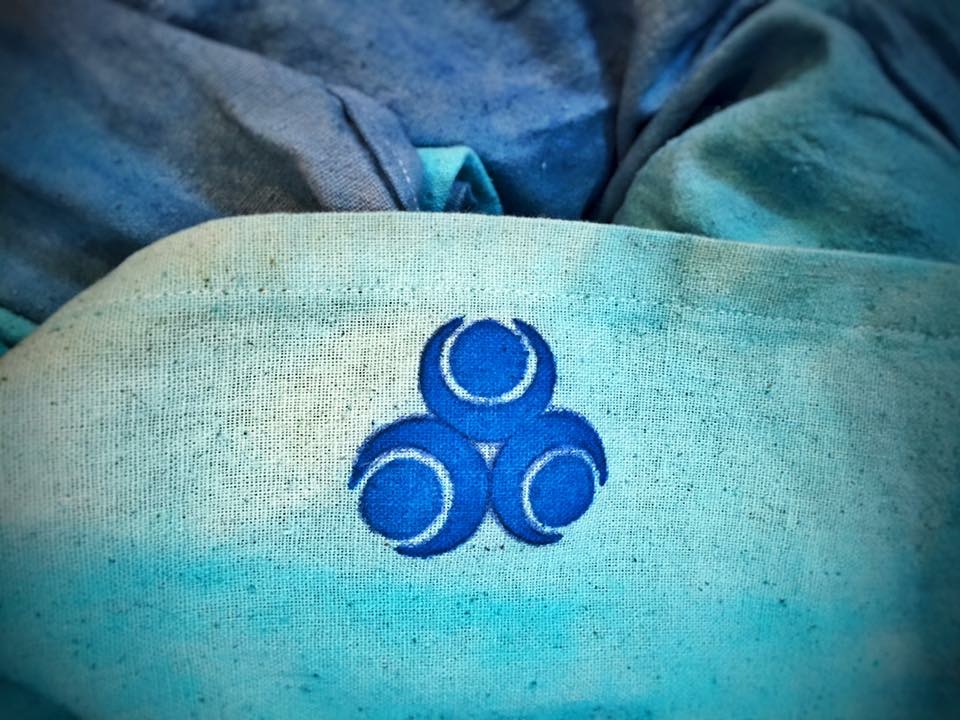
A "middle marker" is helpful with woven wraps to remember where the exact center of your wrap is. One common method of adding a middle marker is folding a small piece of ribbon into the hem while sewing it to make a "tag." Other methods include sewing a small flat button, drawing a design with fabric markers, or adding a very small bit of embroidery within the hem. Embroidery is not recommended within the width of the wrap as it weakens the fabric, however.
If you chose to taper the ends of your wrap, make sure the middle marker is at the center of the WRAP (measured through the middline of it's width) not at the center of one of the individual RAILS, as the middle of each rail is skewed a few inches off from center.
Softening/"Breaking in" your wrap
New fabric is going to be very stiff and difficult to wrap with. Breaking in will help conquer onsaburg's scratchiness, linen's stiffness, and duck's thickness.
New fabric is going to be very stiff and difficult to wrap with. Breaking in will help conquer onsaburg's scratchiness, linen's stiffness, and duck's thickness.
Good techniques to soften your wrap:
- Washing & tumble drying with tennis balls/dryer balls*
- Steam ironing
- Sitting on it while you watch tv or drive
- Sleeping on it
- Leaving it in a warm car (out of the sun; sunlight can damage the fibers)
- Braiding and unbraiding repeatedly
- Running it back and forth through the crib rails
- Making a "wrap hammock" for your kids to play with by tying it around a sturdy table
- Knot dragging
*Note: linen and linen blends can actually be made stiffer by over-drying. Tumble dry linen until it is just barely dry, then finish drying by steam ironing. This method also helps keep osnaburg from getting scratchy after drying.
Learn to use it
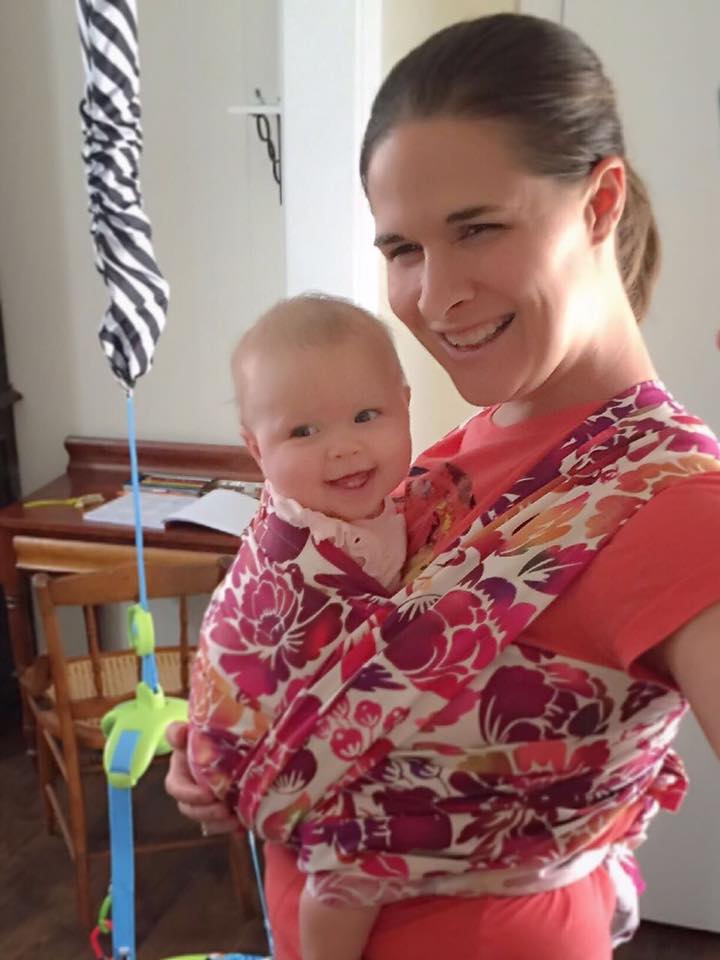 Current BWI safety recommendations include wearing babies upright tummy to tummy (not in a cradle carry position) to help ensure a clear airway and legs outside of the wrap in an M position from birth to make sure the baby’s weight is on their bum instead of their feet. Make sure you are always following the TICKS rules for safe babywearing.
If you cannot learn in person at a local Babywearing International meeting, try joining a Facebook group dedicated to wrap techniques like Geeky Wrappers. Wraplena on Youtube has a playlist for beginner carries.
Good starter carries to learn:
 - Front Wrap Cross Carry (FWCC) is the "standard" starter carry for a base-sized wrap.
- FWCC Tied Under Bum is good if your wrap is just barely too short for a FWCC, or if you have a base-1 or base-2 wrap.
- A Traditional Sling Carry can be done with even the shortest of wraps. Similar to a ring sling without the rings.
- Kangaroo (for a short wrap) or Reinforced Kangaroo (for a longer wrap) is a little more challenging, but good practice for tightening before moving onto back carries.
For an extensive list of woven wrap carries and an explanation of wrap passes and sizes, click here! For a beginner's guide to acronyms and wrap anatomy, check out this page at Wraplena.com!
| I | Attachment | History | Action | Size | Date | Who | Comment |
|---|---|---|---|---|---|---|---|
| |
Photo_Feb_12_11_57_45_AM.jpg | r1 | manage | 199.9 K | 2017-07-01 - 17:51 | AlyssaLeonard | |
| |
Photo_May_22_9_26_52_AM.jpg | r1 | manage | 536.2 K | 2017-07-01 - 17:38 | AlyssaLeonard | |
| |
WovenWrapCheatSheet.pdf | r3 r2 r1 | manage | 33.9 K | 2017-03-16 - 01:13 | AlyssaLeonard | |
| |
Woven_Wrap_Tutorial.pdf | r1 | manage | 1060.1 K | 2016-07-16 - 14:57 | AlyssaLeonard | Woven Wrap Tutorial |
| |
fwcc.jpg | r1 | manage | 64.4 K | 2017-07-01 - 17:51 | AlyssaLeonard | |
| |
hems.jpg | r1 | manage | 115.7 K | 2017-06-30 - 20:12 | AlyssaLeonard | |
| |
miteredcornerspreview.jpg | r1 | manage | 245.4 K | 2018-06-09 - 16:20 | AlyssaLeonard | |
| |
miteredhems.pdf | r1 | manage | 58.3 K | 2018-06-09 - 16:25 | AlyssaLeonard | |
| |
tapers.png | r1 | manage | 17.3 K | 2017-07-01 - 17:31 | AlyssaLeonard |
This topic: Main > WebHome > WovenWrap
Topic revision: r16 - 2018-06-09 - AlyssaLeonard
Ideas, requests, problems regarding TWiki? Send feedback


