Results from Main web retrieved at 06:28 (GMT)
| |
|
|
|
|
Accurate Terminology for Baby Carriers (and why it's important)
"The problem with defending the purity of the English language is that English is about as pure as a cribhouse whore. We don't just borrow words; on occasion, English has pursued other languages down alleyways to beat them unconscious and rifle their pockets for new vocabulary." -James NichollFor the majority of those growing up in the US, Canada, and most of Europe, babywearing is not a terribly ingrained part of our culture. Many of us are the first generation to wear our babies in a very long time (which is why things like TICKS safety rules are so helpful.) That said, while there are some baby carriers whose history is very American/European such as German-style woven wraps, ring slings, and full buckle soft structured carriers, there are several carrying styles that we have borrowed from other cultures who have been wearing their babies for many, many generations. As such, it is a sign of respect to those cultures from whom we are borrowing not to bastardize their language, misrepresent their culture, or water down the meaning of their words. As much as possible, we try to refer to carriers by their true, full names.
This page is under regular construction as we are constantly learning more. The rest of the website is slowly being updated; please forgive us while we make all of these changes, as all work is done on a volunteer basis with a screaming toddler underfoot. If you find a page on our website that needs cultural updates, please let us know in our Facebook group!
Rebozo
What a rebozo is: a rectangular garment, typically worn by women, and native to Mesoamerican culture. Rebozos are handwoven and have a lot of significance to Mesoamerian culture. One of their purposes is to carry a small child, but it is not their only purpose. What a rebozo ISN'T: a short woven wrap, a tablecloth shorty, a specific type of carry, or a specific type of wrap pass. Shorty wraps are just that: shorty wraps. The carry reminiscent to the way a rebozo would be used to carry a baby is called a Traditional Sling Carry. The similar pass used in multi-pass carries is referred to as a sling pass. As such, some woven wrap carries have had their names changed to reflect this. (Double Rebozo Shoulder to Shoulder, DRS2S, is now called Double Sling Shoulder to Shoulder, DSS2S, for example.) While the Mesoamerican Rebozo initially inspired the current German-style woven wraps, the two are not the same and the terms are not interchangeable. For more information: A Statement on Rebozos from Babywearing InternationalKanga
Africa has one of the oldest traditions of babywearing. It is so ingrained in their culture that it is not something that is really discussed, the way Westerners refer to "babywearing" and "babywearers." That would be like us talking about moms who "stroller" or "carseating moms." It's just normal for us, just like babywearing is for them. Most African cultures utilize a low back torso carry for their babies. The most readily recognized term for the cloth used for this purpose is a Kanga, a rectangular garment used by women of the Africa Great Lakes region, such as Kenya, Rwanda and Uganda. It typically has a contrasting border and a quote in the center. There are several names for the fabric used to carry a baby in Africa depending on the area, though. The kanga originated from the "leso" which was essential 6 handkerchiefs pieced together 2x3. The Yoruba women use two pieces of fabric, a large "iro" and then a sash-like "oja." That is all to say that the Kanga is more than just a short, wide piece of cloth. A short woven wrap used for torso carries is not a a kanga. A peshtemal or towel used for torso carries is not a kanga. A torso carry with tucks is not a "kanga carry."Meh Dai/Bei Dai
A meh dai (Cantonese, pronounced "meh dye") or bei dai (Mandarin, pronounced "bay dye") is a carrier native to China. The meh dai we know in the western world consists of a rectangular body panel, two horizontal waist straps at the bottom, and two angled shoulder straps. While some Chinese mei tais reflect this design as well, some have all straps horizontal and worn around the body like belts, and some related carriers like the Hmong "Nyia" lack the waist strap entirely and are worn more like the Korean Podaegi.When meh dais first gained popularity in Western culture, they were referred to simply as "Asian-Style Baby Carriers" or ABCs; however, the term "Mei Tai" was later used in order to properly give credit to the culture from which we were borrowing from. Unfortunately, "mei tai" was not an accurate transcription of the word's original pronunciation, and so we now use either "meh dai" or "bei dai" to more properly represent the carrier's source.
That said, a meh dai is a meh dai, and the name should not be butchered and pieced apart (such as referring to a "wrap-tai" - the correct term is a wrap-strap meh dai.) For more information, click here.
Onbuhimo
The Onbuhimo is the traditional Japanese baby carrier. The term "onbu" means "on the back" and "himo" refers to a long, flat strap. Some babies were carried using a kimono, with the baby simply tucked into the back of the garment and held up by the "obi" belt of the kimono. The Onbuhimo was a carrier with straps on the top and loops (or modern, rings) on the bottom. Modern variations include "reverse onbuhimos" (with double rings on the top and the straps on the bottom) or "full buckle onbuhimos" that have backpack-like buckle straps. "Onbu" is appropriate to refer to "carrying on one's back" but is not an accurate or appropraite shorthand for the actual carrier. The word should not be further chopped as a modifier. For example, a full buckle onbuhimo should not be referred to as a "buckle-bu." A reverse onbuhimo should be referred to as such, not as a "reverse onbu" or "ruck-bu." For more information, click here.Podaegi
A podaegi (poh-deh-gee, with a hard G sound) is a traditional Korean carrier, made up of a wide blanket (much wider than most standard baby carrier body panels; the blanket typically wraps around both wearer and wearee) and two horizontal straps along the top, horizontal to the ground. A "narrow blanket podaegi," whose blanket width is much more consistent with most Western-style baby carriers, is based more on the Hmong Nyia and should be referred to as such. A podaegi should be referred to as such, and the language should not be chopped, such as referring to the carrier as a "pod." For more information, click here.Other Examples
There are many examples of traditional baby carriers that have great history to specific cultures. The Peruvian Manta, the Inuit Amauti, the Indonesian Selendang, the Welsh Siol Fagu. These are all fantastic pieces of cultures that can be adapted to our own child-rearing. The important part is to remember where these traditions originated, and to try to properly represent the original culture and language and not butcher or bastardize their language.Related: The Didymos Prima
For the sake of education, the Didymos Prima will also be included on this page, although it is not a traditional carrier of any particular culture. The original name of the Didymos Prima was the "Didymos Indio," which was one of the first of the modern German-style woven wraps on the market. The problem is that "Indio" (unbeknownst to the founder) actually has a deep negative connotation within Mesoamerican culture and is used as a racial slur. Recently, Didymos has addressed the issue and renamed their original wrap as the "Didymos Prima." As such, the wrap should always be referred to by the new name.» All Authenticated Users Group
This is a special group all authenticated users belong. The main use of this group is to lift a web level restriction at the topic level. This is close to AllUsersGroup. The difference is that unauthenticated users belong to AllUsersGroup but not to AllAuthUsersGroup. Let's say a web is viewable only by the members of the DarkSideGroup by the following line on WebPreferences.* Set ALLOWWEBVIEW = Main.DarkSideGroupBy putting the following line on a topic, you can make it viewable by anybody authenticated.
* Set ALLOWTOPICVIEW = Main.AllAuthUsersGroupThis topic is not necessary for the group to work because the group is implemented in the code instead of a topic that has members. Related topics: TWikiGroups, AllUsersGroup, TWikiAccessControl
» All Users Group
This is a special group literally all users belong. The main use of this group is to lift a web level restriction at the topic level. This is close to AllAuthUsersGroup. The difference is that unauthenticated users belong to AllUsersGroup but not to AllAuthUsersGroup. Let's say a web is viewable only by the members of the DarkSideGroup by the following line on WebPreferences.* Set ALLOWWEBVIEW = Main.DarkSideGroupBy putting the following line on a topic, you can make it viewable by anybody.
* Set ALLOWTOPICVIEW = Main.AllUsersGroupThis topic is not necessary for the group to work because the group is implemented in the code instead of a topic that has members. Related topics: TWikiGroups, AllAuthUsersGroup, TWikiAccessControl
My Links
- WelcomeGuest - starting points on TWiki
- TWikiUsersGuide - complete TWiki documentation, Quick Start to Reference
- Sandbox - try out TWiki on your own
- AlyssaLeonardSandbox - just for me
My Personal Preferences
- Preference for the editor, default is the WYSIWYG editor. The options are raw, wysiwyg:
- Set EDITMETHOD = wysiwyg
- Fixed pulldown menu-bar, on or off. If off, the menu-bar hides automatically when scrolling.
- Set FIXEDTOPMENU = off
- Show tool-tip topic info on mouse-over of WikiWord links, on or off:
- Set LINKTOOLTIPINFO = off
- More preferences

 TWiki has system wide preferences settings defined in TWikiPreferences. You can customize preferences settings to your needs: To overload a system setting, (1) do a "raw view" on TWikiPreferences, (2) copy a
 Set VARIABLE = valuebullet, (3) do a "raw edit" of your user profile page, (4) add the bullet to the bullet list above, and (5) customize the value as needed. Make sure the settings render as real bullets (in "raw edit", a bullet requires 3 or 6 spaces before the asterisk).
Related Topics
- ChangePassword for changing your password
- ChangeEmailAddress for changing your email address
- UserList has a list of other TWiki users
- UserDocumentationCategory is a list of TWiki user documentation
- UserToolsCategory lists all TWiki user tools
- Comment:
| | | | |
Onbuhimo vs Meh Dai/Bei Dai vs Podeagi vs Nyia
A common confusion within the babywearing community is the difference between the different styles of traditionally Asian baby carriers. Hopefully this will clear it up and help you decide if one of these styles would work for you!Side note: These carriers are an integral part of the cultures they are from, and as such, it is our job to respect those cultures by using these terms accurately. Part of this includes not shortening the words, coming up with our own nicknames for the carriers, or hacking the words apart to form "modifiers." For example, an onbuhimo made with buckles is a buckle onbuhimo, not a buckle-bu. A meh dai with wrap straps is a wrap strap meh dai, not a wrap-dai or wrap-tai.For more information on different carrier types, check out this page: Carrier Types
Meh Dai
| Description | Appropriate Age | Versatility | Comfort | Ease & Speed | Instructional Videos | |
|---|---|---|---|---|---|---|
 | Roughly rectangular body panel. Two top corners each have a long-length strap. Two bottom corners each have a medium-length waist strap. Variations include one waist strap being replaced by double rings, or the waist being replaced by a full buckle waist. | Birth through toddler | Good for front, hip or back carries at nearly any age, dependent on wearer's skill. | If well adjusted and tightened, meh dais can be one of the most comfortable carriers for long wearing. Waist straps and shoulder straps distribute weight evenly, and long shoulder straps can be used for further reinforcement. | Fairly easy to learn to use, but takes more time to put on each time. Waist strap must be tied first, which means the carrier cannot be put on while holding the baby. Takes a little more time to get all the straps wrapped and knotted. | Instructional Videos: |
Onbuhimo
| Description | Appropriate Age | Versatility | Comfort | Ease & Speed | Instructional Videos | |
|---|---|---|---|---|---|---|
 | Roughly rectangular body panel. Two top corners each have a medium-length strap. Two bottom corners each have a fabric loop, single ring, or double rings. | Sitting independently through toddler | Designed for back carries only. Can do front carries, too, but can be awkward to thread behind your back. | If worn high and well tightened, can be fairly comfortable, but puts all of the child's weight onto the wearer's shoulders. This may mean the back muscles may need to work up to being able to wear for longer stretches of time. Longer shoulder straps allow for more supportive tie-offs. | Moderate learning curve, but fairly quick to put on once the wearer is comfortable with it. | Instructional Videos: |
Reverse Onbuhimo
| Description | Appropriate Age | Versatility | Comfort | Ease & Speed | Instructional Videos | |
|---|---|---|---|---|---|---|
 | Roughly rectangular body panel. Two top corners each have a short, typically padded strap with two sling rings attached near the ends. Two bottom corners each have a medium-length strap. | Sitting independently through toddler | Designed for back carries only. Can do front carries, too, but can be awkward to thread behind your back. | If worn high and well tightened, can be fairly comfortable, but puts all of the child's weight onto the wearer's shoulders. This may mean the back muscles may need to work up to being able to wear for longer stretches of time. A reverse onbuhimo with longer bottom straps can allow for more supportive tie-offs to assist in weight distribution. | Moderate learning curve, but fairly quick to put on once the wearer is comfortable with it. | Instructional Videos: |
Buckle Onbuhimo
| Description | Appropriate Age | Versatility | Comfort | Ease & Speed | Instructional Videos | |
|---|---|---|---|---|---|---|
 | Roughly rectangular body panel. Each top corner is attached to the adjacent bottom corner by a padded back-pack like strap with webbing. Straps are connected by a chest clip. Variations include buckle closures or ladder-lock adjustment. | Sitting independently through toddler | Designed for back carries only. Can do front carries in a pinch. Front carries easier with buckle-closure (as opposed to ladder locks) which allow the straps to be crossed in the back. | If worn high and well tightened, can be fairly comfortable, but puts all of the child's weight onto the wearer's shoulders. This may mean the back muscles may need to work up to being able to wear for longer stretches of time. | Moderate learning curve, but extremely quick to put on once the wearer is comfortable with it. Can be tricky to learn how to wear baby high enough. | Instructional Video: |
Podaegi
| Description | Appropriate Age | Versatility | Comfort | Ease & Speed | Instructional Videos | |
|---|---|---|---|---|---|---|
 | "Body panel" is an unstructured blanket wide enough to wrap around both child and wearer. Horizontal strap runs along the top of the blanket and extends off both sides. | Birth through toddler | Good for front, hip or back carries at nearly any age, dependent on wearer's skill. | If worn properly and well tightened, can be very comfortable. The unstructured, wrap-like nature of this carrier means that comfort is entirely dependent on how well it is wrapped. | Moderate learning curve mainly due to scarce educational resources, but fairly quick to put on once the wearer is comfortable with it. | Instructional Video: |
Nyia
| Description | Appropriate Age | Versatility | Comfort | Ease & Speed | Instructional Videos | |
|---|---|---|---|---|---|---|
 | "Body panel" is an unstructured blanket wide enough to cover the child. Horizontal strap runs along the top of the blanket and extends off both sides. Modern variations include angled shoulder straps anchored to a more meh-dai-like body panel. | Birth through toddler | Good for front, hip or back carries at nearly any age, dependent on wearer's skill. | If worn properly and well tightened, can be very comfortable. The unstructured, wrap-like nature of this carrier means that comfort is entirely dependent on how well it is wrapped. | Moderate learning curve mainly due to scarce educational resources, but fairly quick to put on once the wearer is comfortable with it. | Instructional Video: |
Where to Find Babywearing Materials: USA
This list is just a start for some of the most common materials needed for DIY Babywearing. None of these sources are guaranteed, and this isn't a comprehensive list. This is simply a list of suggestions from the members of our Facebook groupMaterials Covered
- Osnaburg
- Duck Cloth
- Bottomweight Linen
- C&C
- Tablecloths
- Athletic mesh
- Sling Rings
- Webbing & Buckles
- Foam for shoulder padding
Osnaburg
 Osnaburg is a natural-colored, bottomweight muslin-like fabric. It is highly recommended for beginners because of the low cost and excellent wrap qualities once broken in. It works great for wraps and ring slings and breaths nearly as well as linen. Because osnaburg doesn't come in a lot of varieties, it is almost always an excellent choice, and the bolt tags are always clearly labled (although sometimes hard to find.) The only thing to look out for is "J Thompson" brand osnaburg, which has a reputation for being much thinner than other brands and less desireable. Roc-lon is the brand most people use and love. Although "traditional" osnaburg is made from linen, most of the osnaburg available in stores is 100% cotton.
Osnaburg is notoriously difficult to find outside of the USA. Heavyweight calico is probably the easiest to find and most comparable fabric. Unlike osnaburg, however, calico comes in a wide variety of weights, so make sure what you are buying is thick enough.
Sources:
Osnaburg is a natural-colored, bottomweight muslin-like fabric. It is highly recommended for beginners because of the low cost and excellent wrap qualities once broken in. It works great for wraps and ring slings and breaths nearly as well as linen. Because osnaburg doesn't come in a lot of varieties, it is almost always an excellent choice, and the bolt tags are always clearly labled (although sometimes hard to find.) The only thing to look out for is "J Thompson" brand osnaburg, which has a reputation for being much thinner than other brands and less desireable. Roc-lon is the brand most people use and love. Although "traditional" osnaburg is made from linen, most of the osnaburg available in stores is 100% cotton.
Osnaburg is notoriously difficult to find outside of the USA. Heavyweight calico is probably the easiest to find and most comparable fabric. Unlike osnaburg, however, calico comes in a wide variety of weights, so make sure what you are buying is thick enough.
Sources: - Katipatch
- Spotlight
- Everything Fabric
- Lincraft (source for heavyweight calico)
Duck Cloth
 Duck cloth is a 100% cotton fabric similar to canvas. It is a great choice because even very lightweight duck is heavy enough to be safe. Duck comes in a variety of weights, all the way up to 18oz per square yard (for purposes such as sandbags and hammocks) but most of the duck cloth sold in stores will be closer to the 5-7oz variety. Printed/patterned duck is typically closer to 5oz (185 gsm.) Solid colored duck at most stores is usually sold as "duck canvas" and is stiffer and heavier, but will eventually break in to be usable.
Sources:
Duck cloth is a 100% cotton fabric similar to canvas. It is a great choice because even very lightweight duck is heavy enough to be safe. Duck comes in a variety of weights, all the way up to 18oz per square yard (for purposes such as sandbags and hammocks) but most of the duck cloth sold in stores will be closer to the 5-7oz variety. Printed/patterned duck is typically closer to 5oz (185 gsm.) Solid colored duck at most stores is usually sold as "duck canvas" and is stiffer and heavier, but will eventually break in to be usable.
Sources: - Spotlight (near the upholstery fabrics)
- Ikea - while not specifically labeled as duck, most of their fabric has the weight listed and is appropriate to use.
Bottomweight Linen
Linen (the fiber made from flax plants; not to be confused with "linens" like bedsheets or "linen-like" fabrics like rayon) is an incredibly strong fabric and the gold standard for breathability in the heat. It takes a little work to break it in and soften it and tends to crease a lot, but is generally a well recommended fabric for any project. Sources:- Lincraft
- Spotlight
- Ikea (Aina fabric - 240gsm, $12.99/m)
Colimaçon et Cie
C&C is a French company that sells woven wrap material by the meter. This is your best option for a DIY that will feel exactly like a purpose-woven wrap, because it essentially is. It is also great for making soft structured carriers and mei tais that will feel like wrap conversions. Source:Tablecloths
Tablecloths are a great budget option that are typically cheaper than fabric by the yard. A jacquard woven tablecloth will feel nearly identical to a woven wrap: nice and floppy, cushy and breathable. A printed tablecloth, so long as it is an appropriate thickness, will be similar to working with duck cloth. Sources:- Trade Secret
- Spotlight
Athletic Mesh
Athletic mesh for water wraps and slings can be tricky to find. Make sure you are buying the right stuff. Not utility mesh, athletic knit, wicking mesh, etc. Sources:- The Fabric Store
- Spotlight
Sling Rings
Rings for ring slings, onbuhimos and other carriers need to be weight tested and smooth. While it is possible to find rings at a hardware store with proper weight rating and a smooth weld, these will likely be at least triple the weight of an equivalent aluminum sling ring and even a smooth weld can eventually wear a weak spot in your fabric. If at all possible, it is always preferable to use a ring that is designed for babywearing. NEVER use rings purchased from a craft store. Sources:- Frangipanibaby
- Karri Tree Lane
- The Sleepstore
- Woven (NZ)
Webbing & Buckles
Webbing and buckles for SSCs should always be weight tested! Sources:- BestBuckle.com
- Anaconda
- Woven (NZ)
- Super Cheap Auto
- Army supply stores
- DDC Australia
Foam Padding
A lot of people use foam, yoga mats, or fleece for padding the straps of their structured carriers. Sources:- Wool blanket from the op shop
- Open celled foam from Clark Rubber
- Woven (NZ)
| |
|
|
|
|
Common Babywearing & DIY Abbreviations & Lingo
If you start hanging around with seasoned babywearers and/or sewers, you may start running into a lot of lingo you don't understand. Never be afraid to ask! We just get lazy when we type. Here's an alphabetized list that might help you with the more common ones. If you think there are some that need to be added to this list, ask in our Facebook groupFiber Reactive Dye - Dyes that chemically bond to the fabric fibers in a permanent way, making them safe for a baby to have in their mouth. Dyes like Dylon and Dharma are fiber reactive. Dyes like RIT and iDye do not chemically bond to the fibers but simply sit on top of them, and can bleed when they come in contact with water (or saliva.) Flat Felled Seam - A strong, reinforced seam, like the kind found on the inseam of strong jeans or work pants. French Seam - A strong, reinforced seam, like the kind found on the inside of many clothes FWCC - Front Wrap Cross Carry (a front carry for a full-length woven wrap; a good beginner carry.) GSM - Grams per square meter; a measurement of the weight of a fabric (a fairly good indicator of strength) Hem - the edge of a fabric that has been finished by either folding it over twice and stitching the fold down, or by serging, a process of stitching close to the edge that seals the edges to keep them from unraveling. For most babywearing purposes, a rolled/folded hem is preferred because it is stronger and better prevents tearing. Hybrid Shoulder - A ring sling shoulder type in which the center is left gathered and the edges are pleated. Hybrid Wrap - A cross between a woven wrap and a stretchy wrap, in which the fabric has some stretch from rail-to-rail but no stretch from tail-to-tail, offering more support than a traditional stretchy wrap and allowing for back carries. Brand example: Wrapsody. Linen - a type of fiber (like cotton or polyester) derived from the flax plant. Sometimes the term is erroneously or confusingly used to describe fabrics that are simply linen-like, or to refer to "bed linens" or "table linens," or even just as a descriptor of a light, natural-colored fabric. LO - "Little One" (referring to your own child) LPMU - "Little Pick-Me-Up" A purchasable sewing pattern for a soft structured buckle carrier (or the carrier made from such pattern) sold by Sew Toot MD - " Meh dai," a baby carrier of Chinese origin. Also known as a "bei dai" MT - Short for "mei tai," an outdated mistranslation of Meh Dai, a traditional Chinese carrier. See Carrier Types: Meh Dai Natty - Natural (colored); used to describe fabric that is or looks undyed, usually in tones of beige or white. NBC - Narrow Based Carrier, such as a classic BabyBjorn. A soft structured buckle carrier with a narrow base that allows the baby's legs to hang down. They have the disadvantage of not holding baby's hips in a more ergonomic "M" shape (which is typically more comfortable for both baby and wearer) but have the advantage of typically fitting newborns better and allow older babies to forward face without over-extending their hips. See Carrier Types: Soft Structured Carrier OBs - Optical Brighteners. Found in most clothing detergents, OBs or "bluing agents" are used to make whites look whiter by "bluing" them. These are undesirable because they can cause discoloration. There is some believe that they can also damage carriers structurally, but citation for this belief is limited and usually based on hearsay. (Please correct me in our Facebook group if you can find better citation for this claim!) Onbu - Onbuhimo, a Japanese style carrier. This is a chopped version of the original term and its use is frowned upon as it does not preserve the carrier's heritage. It is listed here for clarification only. See Carrier Types: Onbuhimo Pod - Podaegi, a traditional Korean carrier. Pronounced "poh-deh-gee." This is a chopped version of the original term and its use is frowned upon as it does not preserve the carrier's heritage. It is listed here for clarification only. See Carrier Types: Podaegi Purpose-Woven Wrap - A woven wrap that was woven (by hand or by machine) for the purpose of being used as a babywearing wrap. Usually commercially sold as such. (The opposite of a "DIY woven wrap," which is made from standard off-the-bolt fabric.) Rail (top rail, bottom rail, middle rail) - In a sling or wrap (or even a wide wrap strap), the wrap is divided lengthwise into 3 "rails." The top third (the third of the wrap closest to the wearer's face; in a ring sling, this starts on the inside of the rings, follows the sling around the top of the back, and comes up behind baby's neck) is the top rail. The bottom rail in a ring sling would be the side on the outside of the rings, going around the middle of the wearer's back, and under baby's bum. The middle rail is the middle third between these. Rails should be thought of as several inches wide when tightening - not just the 1/2" of the hem. Tightening just the hem will lead to the edges of the wrap or sling digging and feeling uncomfortable. RS - Ring Sling. See Carrier Types: Ring Sling Ruck-Bu - A reverse onbuhimo (an onbuhimo with double rings on the top straps and wrap straps on the bottom.) This is a chopped version of the original term and its use is frowned upon as it does not preserve the carrier's heritage. It is listed here for clarification only. See Carrier Types: Reverse Onbuhimo Ruck Strap - in a woven wrap carry, the part of a back carry where the wrap comes over the wearer's shoulder and then back under the same shoulder, creating a backpack-like "strap" SBP - Sleeping Baby Productions - a website that sells compliant ring slings but also is a great source for DIY information. SBS - Strand by Strand. A process of tightening a wrap or sling by pulling a little bit at a time, starting from one edge and working to the other edge, to make sure that the wrap/sling is tightened evenly throughout its width (as opposed to tightening by just grabbing the whole tail at one time and pulling.) Seat - In a wrap or sling, the portion of the wrap that tucks underneath baby's bum, and then up between baby and wearer, supporting baby knee-to-knee like a little hammock. Selvedge - The tightly woven, finished edges of bolt fabric or some handwoven wraps. For a DIY wrap, it is preferred to hem the selvedge edge to add strength. In a hand-woven wrap, the selvedge is fine on its own. Sew Toot - A company that specializes in sewing patterns for baby carriers. Their most popular patterns are their soft structured carrier and meh dai patterns. Known for clear instructions and a very helpful private Facebook support group for pattern purchasers. Shoulder - On a ring sling, the "shoulder" is the section where the top edge of the fabric is passed through the rings, folded under, and then stitched down with three lines of reinforcment stitches. The fabric can be folded or pleated in a number of different ways (or not at all) before being passed through the rings and folded over, hence terms such as "gathered shoulder" (no pleats), "pleated shoulder" (pleated all the way across), or "hybrid shoulder" (some pleats, but not all the way across.) SSC - Soft structured carrier (typically refers to a full-buckle carrier like an Ergo or a Tula with a waistband and shoulder straps.) See Carrier Types: Soft Structured Carrier STIH - Soft tape in hand; a method for accurately measuring a woven wrap's length (especially for advertising for sale.) Stretchy/Stretchy Wrap - A long wrap made of a material that stretches both length-wise and width-wise (like a Solly, Moby, or Boba wrap.) See Carrier Types: Stretchy Wrap TAS - "Tied at Shoulder" (a modifier for woven wrap carries, ie "Rucksack back carry TAS") TC - Tablecloth. (As in, TC RS - a ring sling converted from a tablecloth.) Often used for babywearing since they are a cheaper source for pretty, sturdy fabric. See Tablecloth Babywearing. TICKS - A mnemonic device for remembering the 5 rules of safe babywearing TIF - "Tied in Front" (a modifier for woven wrap carries, ie "Rucksack back carry TIF") TOL - Tree of Life, a woven tablecloth pattern produced by Mahogany. Available in Black & Gray, Tan & White ("natty"), or Blue. TSC - Traditional Sling Carry (a simple slipknot carry for a short woven wrap; formerly called a " rebozo carry.") TT - "Tied Tibetan" a finish for woven wrap carries or wrap-strap carriers in which the tails come up from under the wearer's arms, cross over the chest, and are tucked under the opposite arm's shoulder straps. The tails can be either tucked under, then brought back over and tied together for a traditional Tibetan finish, or cross over the shoulder straps and tuck back under and left hanging for a "knotless Tibetan" finish. Where the wrap crosses the chest may be either bunched above the breasts or spread over them based on the wearer's comfort and preference. TUB - "Tied under bum" (a modifier for woven wrap carries, ie "Rucksack back carry TUB." Also used with wrap-strap carriers such as a meh dai, in which the shoulder straps would normally be crossed over babies legs, cross in the middle, and under the opposite legs and then tied on the opposite side of the wearer as the baby (in front for a back carry, in back for a front carry.) If the straps are too short to do this, the straps can simply go over each leg and then be "tied under bum" (instead of in the middle of baby's back.) Twill - a strong, woven fabric with a diagonal appearance to the weave; denim and most standard work uniform pants are a twill weave. VBE - Volunteer Babywearing Educator; a volunteer who has received training through Babywearing International in how to safely use all standard types of baby carriers and is certified to teach others. WAHM - Work at home mom. (A WAHM ring sling would be a ring sling made and sold by a mom as a side business. These slings are not inherently dangerous, but not always legally compliant. A buyer should be ready to ask about what materials were used, what rings were used, and construction techniques.) WC - Wrap conversion - a carrier made out of a woven wrap. WC SSC = Wrap Conversion Soft Structured Carrier, a soft structured buckle carrier made out of the fabric of a purpose-woven wrap. Woven fabric - Fabrics like denim, duck cloth, quilter's cotton, muslin, etc that have no stretch either lengthwise or widthwise (but may have some "give" along the bias or diagonal.)
Woven wrap - A wrap made from a woven, non-stretchy fabric. See Carrier Types: Woven Wrap WS - Wrap Strap (a carrier with 10"-15" wide, single-layer, wrap-like straps. Often used in conjunction with another carrier name/abbreviation, such as a "WS onbuhimo" or "WS meh dai") Wrap Straps - Straps that are wide (10"-15") and typically a single layer of fabric, allowing the strap to be spread out for more wrap-like reinforcement. Common in meh dais and onbuhimos. WV DK - Waverly brand woven duck cloth, an upholstery-weight fabric sold (among other places) at Walmart. An excellent choice for wraps, slings, and structured carriers. WV PR - Waverly brand woven printed cotton (equivalent to quilter's cotton) X-bu - X-onbuhimo or blanketless onbuhimo. This is a chopped version of the original term and its use is frowned upon as it does not preserve the carrier's heritage. It is listed here for clarification only. See Carrier Types: Onbuhimo
Pop quiz: Can you read the following sentences? DH had DD in our new WC BD but the WSs were too short for him so he had to TUB. They are long enough for me to TT. He prefers a NBC so that LO can FF, but I prefer my TC RS.--
| | | |
Misc Babywearing Accessories
Feel free to suggest additions in our Facebook group!Other Babywearing Accessory Pages
- Structured Carrier Accessories (Suck pads, slipcovers, drool bibs, hoods, etc)
- Cold/Wet Weather Accessories (Blankets, covers, jackets, ponchos)
Hip Pouches and Bags
- SewToot Carrier SSC Storage Pouch
- "NotAFannyPack" Ring Waist Hip Pouch by Alyssa Leonard: hip_pouch.pdf (Big enough for a diaper and wipes!)
- Hip Pouch Sew-Along
- Hip Bag, the Anti-Fanny-Pack
- Mini Diaper Bag for a Baby Carrier (see safety note below)
- Walker or Wheelchair Caddy (could be used on a stroller, shopping cart, or possibly an SSC waistband. See safety note below.)
- Belted Waist Pouch
- Running Belt (good for carrying just the essentials while babywearing)
- Running Belt (Different but similar pattern)
- Pink Peony Bag (Small purse/wristlet that can be made from <15" wide wrap scraps and big enough to fit a diaper and wipes)
Et cetera
- Kangaroo Care Halter Top by Djem Ferkenstad (drafted for a 36-37" bust) Made_by_Djem_Kangaroo_Care_Halter.pdf
- Fine and Fair Blog: Narrow Based Carrier to Ergonomic Carrier Scarf Hack
- Weighted Babywearing Doll
- How to Attach KAMsnaps (great for a removable hood or suck pads)
- Bling for your Sling! (Ring Sling pockets and decorative accents)
| |
|
|
|
|
Can I Carry Baby On My Back?
It depends on what carrier you are using, your skill level, and baby's developmental age. The stages here are gross oversimplifications; there are situations in which a baby might not be sitting unsupported but still be safe to carry in a soft structured carrier on your back, for example, but it is important that they have strong head, neck and trunk strength in order to prevent slumping and positional asphyxiation since they cannot be monitored as easily in a low back carrry. For commercial carriers, it is wise to always adhere to the specific brand recommendations.| Carrier Used | Baby Not Yet Sitting Unsupported (Newborn, Tripod Sitting, Sitting in Bumbo) | Baby Can Sit Unsupported For Extended Periods of Time and Self-Correct |
|---|---|---|
| Soft Structured Carrier | Not Recommended or safe. | Yes, so long as baby fits the carrier knee-to-knee (without the legs being forced into an extended position or fabric bunched up unde their knees) in a wide ergonomic setting without any kind of infant insert or booster. Master front carry first and practice over a soft surface |
| Buckle Onbuhimo | Not Recommended or safe. | Yes, so long as baby fits the carrier arms-out and knee-to-knee. Practice over a soft surface |
| Traditional Onbuhimo X-Onbuhimo | Not Recommended or safe. | Yes Practice over a soft surface |
| Reverse Onbuhimo Reverse X-Onbuhimo | Not Recommended or safe. | Yes Practice over a soft surface |
| Woven Wrap Hybrid Wrap (Wrapsody) | Yes, with caveats: Master front carry first and practice over a soft surface. Keep newborns very high and supported to monitor breathing. Single-layer carriers like a Rucksack carry are often better for newborns than multi-layer carries. For first-time wearers, it is recommended to wait until baby develops some neck and trunk control - typically around 4 months old, and the wearer should have several front carries mastered. | Yes Master several front carries first and practice over a soft surface. |
| Ring Sling | Not Recommended. | Yes, with caveats: Master front carry first and practice over a soft surface. Not very lean-proof or leg-straightener-proof, so better for short bursts with older, trustworthy toddlers. |
| Pouch Sling | Not Recommended | Yes, with caveats: Master front carry first and practice over a soft surface. Not very lean-proof or leg-straightener-proof, so better for short bursts with older, trustworthy toddlers. |
| Meh Dai Bei Dai |
Yes, with caveats:
Master front carry first and practice over a soft surface.
Keep newborns very high and supported to monitor breathing. For first-time wearers, it is recommended to wait until baby develops some neck and trunk control - typically around 4 months old. | Yes Master front carry first and practice over a soft surface |
| Podaegi Nyia | Yes, with caveats: Master front carry first and practice over a soft surface. Keep newborns very high and supported to monitor breathing. For first-time wearers, it is recommended to wait until baby develops some neck and trunk control - typically around 4 months old. | Yes Master front carry first and practice over a soft surface |
| Stretchy Wrap | Not Recommended or safe. | Not Recommended or safe. |
Sewing: Where to begin?
So you want to sew, but you've never used a sewing machine and don't know where to start? It can be difficult to learn without someone in person to teach you, but here's some tools that will help.Learn your machine
Start with checking out this page (at least the first 13 steps about the parts of your machine) to familiarize yourself with the different parts of the machine. They will be located differently depending on the brand and model, but they all typically have about the same parts. Bookmark that page - it has a lot of info you may want to come back to. I'm going to assume you have a sewing machine at this point. If not, start with buying one. If you are starting with a brand new machine, that probably means you have the manual, which is great! This will help you a lot. If you don't have the manual to your machine, try to find the brand and model number of your machine (the brand will probably be clearly labeled on the front of the machine, but the model number may be hidden on the bottom of the machine, on the back, or even possibly somewhere inside the casing.) Once you have found that, search Google for "(your sewing machine brand and model) manual" and see if you can find a (hopefully free) PDF of the manual. If you are still coming up empty on finding a manual, try searching Youtube for "how to thread (your sewing machine brand and model)" and "how to wind a bobbin with (your sewing machine brand and model)." Still coming up empty? Try asking any local friends if they could come look at it. While every sewing machine is a little different, someone who is familiar with them may be able to figure out how to thread it even without the manual. Or ask in a general sewing group on Facebook. The most important skills you need to learn initially are:- How to thread a bobbin (the small spool of thread that runs along the bottom of your fabric)
- How to thread the top of the machine
- How to insert the bobbin and bring the bobbin thread up
- How to adjust the stitch type and stitch length
- How to "reverse" and sew backstitches
Basic sewing guidelines
Most of your sewing can be done with a straight stitch and a medium stitch length. Any time you start sewing, start with a long tail from both your bobbin thread and your needle thread. Gently press the foot pedal to stitch a couple stitches, and then reverse and stitch a few stitches backwards. Then sew normally until you get to the end of your line, and again, do a couple "reverse" stitches. This "locks" the end of your stitching, like a knot would do, and keeps it from unraveling. To join two pieces of fabric:- Put them right-sides-together.
- Line the edges up.
- Starting at one end, with the needle lined up about 1/2" from the edge, sew a few stitches.
- Reverse a few stitches.
- Sew along the edge, staying an even 1/2" away from the edge, until you get to the other end.
- Reverse a few stitches.
- With the needle up, raise the presser foot and pull the fabric clear.
- Snip both your top and bottom threads.
- Fold and iron about 3/8" of the edge of your fabric over.
- Fold that edge over once again about 1/2" so the raw edge is completely encased. Iron again.
- Pin it in place every 8" or so (approximately)
- Starting at one end, line the needle up just inside the inside fold (so about 3/8" away from the outside edge.)
- Sew a few straight stitches.
- Reverse a few stitches.
- Sew down the entire edge, making sure to stay along the inside edge of the fold (the goal is for your stitches to permanently keep the fold pinned down.)
- As you sew, remove your pins as you get close to them. Do not sew over your pins.
- Once you get to the end, reverse a few stitches.
- With the needle up, raise the presser foot and pull the fabric clear.
- Snip both your top and bottom threads.
Where to Find Babywearing Materials: Great Britain & Ireland
under construction. --Comments
Buckle-Bu (Full Buckle Onbuhimo) Tutorials
(skip to tutorials)What is a Buckle-Bu?
Also referred to as: Full Buckle Onbuhimo |
| SewToot BuckleBu Image sourced from Etsy shopSewToot |
Description
A rectangular body panel with padded backpack-like straps and webbing attaching each top corner to the bottom corner on the same side. A chest clip attaches the two shoulder straps together.Good For
- Front Carries: Not designed for front carries. Possible with babies with decent trunk control, especially if the carrier allows the straps to cross in the back.
- Hip Carries: Not designed for hip carries.
- Back Carries: Babies who can sit independently only. Especially great for walkers.
- Forward Facing: Not designed for forward facing.
Advantages
Quick to put on and an unpoppable seat makes it easier to wear wiggly or difficult toddlers who may not have the patience for wrapping. Lack of waist belt is great for anybody who doesn't want the pressure on their waist, including (but not limited to) expectant mothers. Lack of waist belt and tie offs makes them great for tandem-wearing, since there is nothing to interfere with the front baby.Disadvantages
More limited than other carriers, since onbus are really best for older, independently sitting babies and only designed for back carries. Panel size is dependent on child's size. Therefore a parent who chooses to wear as their baby reaches toddlerhood or preschooler age may need to upgrade to a toddler-size or preschool-size carrier. Puts all the weight high and on the shoulders, which can be difficult for some wearers.Variations
- Ladder lock straps: Instead of buckling closed, a buckle-bu with ladder lock closure is permanently "closed" and simply tightens or loosens with ladder locks like a back pack.
Sizing
Body panel size is based on child's size. Baby needs to be able to fit in the carrier arms-out, but the panel must not be so low that baby can lean backwards. The width should be wide enough to support baby's legs from knee-pit to knee-pit, while still allowing the legs to swing freely at the knee. The shoulder strap lengths are flexible, but determined by wearer's size.How to Use
Tutorials
SewToot Barefoot BuckleBu (paid)Sewtoot's patterns are paid, but upon purchasing, you are added to a support group on Facebook to assist you with any questions you may have as you are sewing.Wonbu (paid) NicoThunders (free tutorial) --
| | | |
Soft Structured Carrier Tutorials
What is a Soft Structured Carrier?
 |  |  |
| Ergobaby Original Baby Carrier Teal Ergonomic Carrier, Front Carry Image sourced from ergobaby.com | Tula Toddler Carrier - Trendsetter Navy Ergonomic Carrier, Back Carry Image sourced from tulababycarriers.com | Babybjorn Miracle Carrier Narrow Based Carrier, Forward Facing Image sourced from johnlewis.com |
Description
A structured, usually shaped body panel attached to a waistband with a buckle closure and shoulder straps which attach to the body panel above the leg holes. Straps use buckles and ladder locks.Good For
- Front Carries: depends on brand; typically good for all ages. Some brands require an infant insert for newborns.
- Hip Carries: depends on brand; for brands that allow it, good for babies with strong truck control
- Back Carries: depends on brand; for brands that allow it, good for babies who fit the carrier without inserts/modification and can sit independently.
- Forward Facing: Depends on brand; requires a carrier with either a narrow base or an ergonomic base that snaps in to a narrow setting. If so, good for babies with strong head and trunk control.
Advantages
The easiest style of carrier to learn to use. Very dad-friendly for fathers reluctant to learn wraps or slings. Usable by multiple sizes of wearers.Disadvantages
Panel size is dependent on child's size. Therefore a parent who chooses to wear as their baby reaches toddlerhood or preschooler age may need to upgrade to a toddler-size or preschool-size carrier. Structured, tailored design means that some brands may fit the wearer better than other brands. Preferable to try carriers on in person before purchasing. Requires child to be fully sitting independently for extended periods of time before they can be used for a back carry.Variations
- Narrow Based Carriers (NBCs) like <a href="http://wiki.babywearingdiy.com/do/edit/Main/BabyBjorn?topicparent=Main.CarrierTypes;nowysiwyg=0" rel="nofollow" title="BabyBjorn (this topic does not yet exist; you can create it)"> BabyBjorn </a>: has a narrower base that does not support baby's legs in an ergonomic "M" position. Not a safety risk for healthy babies, but may possibly exacerbate problems in babies predisposed to hip displasia.
- Unstructured, unpadded carriers like the Connecta or Sew Toot Voyager. Unpadded waist band is worn "apron style" (like a meh dai) and means that the carrier is less bulky and folds up smaller in a diaper bag.
- Hybrid carriers (Emeibaby, XOXO) combine aspects of a wrap with the ease of buckles.
Sizing
Body panel size is based on child's size. Body panel should be tall enough to reach at least up to baby's armpits but not so tall that baby's airway is obstructed. For new babies who still need neck support, panel should come up between the nape of their neck and the base of the ears. Some carriers recommend a brand-specific "infant insert" to provide core support for newborns, transitioning to the use of a "pillow" (or a rolled up receiving blanket) once the child fills out the body panel but is still a little too short for it. The width should be wide enough to support baby's legs from knee-pit to knee-pit (in an ergonomic carrier; narrow based carriers are not designed to do so) while still allowing the legs to swing freely at the knee. Babies whose legs are too short for the knees to swing freely off the sides of the panel should either be using an insert or (if the carrier allows) should be using the carrier snapped in to a narrow base setting. The straps on most soft structured carriers are one-size-fits-most, although some can be made with extra-length straps or can be sold with waist extenders.Patterns & Tutorials
Be sure to use safe, weight-tested webbing and buckles! Buckles from camping stores are a great option. Also, before starting, I recommend reading our pages on choosing a safe fabric (for SSCs, an even heavier weight of 7oz+ is recommended - think heavy tote bag) and general construction safety tips. Paid Patterns- Sew Toot Little Pick-Me-Up (Standard SSC with options for a structured or soft quilted waistband, PFAs, and more)
- Flosstyle Kanga Carrier (Standard SSC)
- Sew Toot Voyager (Unstructured apron-style waistband similar to the Connecta; incudes instructions for making a water-safe SSC)
- Sew Toot Evolution (Standard SSC with an adjustable panel that cinches smaller)
- Sew Toot Easy Breezy Mesh Panel Add-On (a modification to the Little Pick-Me-Up for warm weather)
- Cheaper and Better Pattern
- The Pea Pod hip carrier
- Bea's World Meh Dai with Rings (A meh dai/SSC hybrid using double sling rings instead of buckles)
- A_SSC_Pattern_1_1-min.pdf (Downloadable PDF; unknown creator. If you know the original source for this pattern, please let me know via our Facebook group!)
- Sew Hard or Go Home Toddler Carrier (uses the pdf pattern listed above)
- Sling-SSC_hybrid_3.pdf (Downloadable PDF; unique sling/SSC hybrid carrier created by Sarah Wiley Curtis)
Why are there no DIY patterns for narrow based carriers? While narrow based carriers are perfectly safe to use so long as baby has no pre-existed hip conditions, they are typically so common (especially in second-hand stores) and inexpensive to buy commerically that there is not much of a demand for a pattern to make them. They also do not provide as much support for baby or wearer, so they tend to be less comfortable for older infants. If you are going to take the time to sew a carrier, we recommend it be one that you are going to get a lot of use out of!
If you have a baby who only seems to settle when being held facing forward, the general recommendation is to try a hip carry or, if baby and wearer are ready, to try a back carry. Both of these options give baby a much better view than the traditional tummy-to-tummy positioning, while still giving more support and keeping baby much more in line with the wearer's center of gravity than forward facing allows for.
Also keep in mind that, though there are exceptions, baby's interest in forward facing is often a fairly temporary phase, so constructing a carrier for the sole purpose of getting through a month or two of trying to turn around may not be worth your time.If you are determined to find a DIY way to forward face your child, you may be interested in knowing that a meh dai can be cinched (the same way you would to wear it with a newborn) to use for a forward facing carry, and there are forward facing carries for both woven wraps and ring slings as well.
| | | | |
Full Buckle Onbuhimo Tutorials
What is a Buckle Onbuhimo?
|
| SewToot Riser Buckle Onbuhimo |
Description
A rectangular body panel with padded backpack-like straps and webbing attaching each top corner to the bottom corner on the same side. A chest clip attaches the two shoulder straps together. The straps may have a buckle-closure or be permanently closed with ladder-lock adjustment. Buckle Onbuhimos are modeled off of the traditional Japanese Onbuhimo, which secures with shoulder straps threaded through loops or rings at the bottom corners of the body panel. Sometimes referred to as a " bucklebu," although this term does not give proper respect to the original heritage and language and is best avoided.Good For
- Front Carries: Depends on the design, but not typically designed for front carries. Possible with babies with decent trunk control, especially if the carrier allows the straps to cross in the back.
- Hip Carries: Not designed for hip carries.
- Back Carries: Babies who can sit independently only. Especially great for walkers.
- Forward Facing: Not designed for forward facing.
Advantages
Quick to put on and an unpoppable seat makes it easier to wear wiggly or difficult toddlers who may not have the patience for wrapping. Lack of waist belt is great for anybody who doesn't want the pressure on their waist, including (but not limited to) expectant mothers. Lack of waist belt and tie offs makes them great for tandem-wearing, since there is nothing to interfere with the front baby.Disadvantages
More limited than other carriers, since onbus are really best for older, independently sitting babies and only designed for back carries. Panel size is dependent on child's size. Therefore a parent who chooses to wear as their baby reaches toddlerhood or preschooler age may need to upgrade to a toddler-size or preschool-size carrier. Puts all the weight high and on the shoulders, which can be difficult for some wearers.Variations
- Ladder lock straps: Instead of buckling closed, a buckle-bu with ladder lock closure is permanently "closed" and simply tightens or loosens with ladder locks like a back pack.
Sizing
Body panel size is based on child's size. Baby needs to be able to fit in the carrier arms-out, but the panel must not be so low that baby can lean backwards. It is recommended that the panel come up to at least "bra strap height" on baby's back. The width should be wide enough to support baby's legs from knee-pit to knee-pit, while still allowing the legs to swing freely at the knee, although slightly too narrow is safer than too wide. The shoulder strap lengths are flexible, but determined by wearer's size.How to Use
Tutorials
Free Tutorials:Outside links:These tutorials will take you off-site, and we cannot be held responsible if these patterns do not work for you or if the websites linked go down.
- SewToot Riser Buckle Onbuhimo (paid pattern, includes "Reverse Onbuhimo" modification in the pattern group)
- Baby Bonda Productions Buckle Onbuhimo (paid pattern)
- NicoThunders (free tutorial)
Where to Find Babywearing Materials: Canada
This list is just a start for some of the most common materials needed for DIY Babywearing. None of these sources are guaranteed, and this isn't a comprehensive list. This is simply a list of suggestions from the members of our Facebook groupMaterials Covered
- Osnaburg
- Duck Cloth
- Bottomweight Linen
- C&C
- Tablecloths
- Athletic mesh
- Sling Rings
- Webbing & Buckles
- Foam for shoulder padding
Osnaburg is a natural-colored, bottomweight muslin-like fabric. It is highly recommended for beginners because of the low cost and excellent wrap qualities once broken in, although it is much more expensive in Canada than in the USA. It works great for wraps and ring slings and breaths nearly as well as linen. Because osnaburg doesn't come in a lot of varieties, it is almost always an excellent choice, and the bolt tags are always clearly labled (although sometimes hard to find.) The only thing to look out for is "J Thompson" brand osnaburg, which has a reputation for being much thinner than other brands and less desireable. Roc-lon is the brand most people use and love. Although "traditional" osnaburg is made from linen, most of the osnaburg available in stores is 100% cotton.
Sources: - Fabricland
Duck Cloth
Duck cloth is a 100% cotton fabric similar to canvas. It is a great choice because even very lightweight duck is heavy enough to be safe. Duck comes in a variety of weights, all the way up to 18oz per square yard (for purposes such as sandbags and hammocks) but most of the duck cloth sold in stores will be closer to the 5-7oz variety. Printed/patterned duck is typically closer to 5oz (185 gsm.) Solid colored duck at most stores is usually sold as "duck canvas" and is stiffer and heavier, but will eventually break in to be usable.
Sources: - Ikea (most of their material lists the weight for your convenience)
- Walmart (sells precut 1-yard packages which are good for body panels for structured carriers)
- Fabricland (upholstery section)
- Marshall's Fabric
Bottomweight Linen
Linen (the fiber made from flax plants; not to be confused with "linens" like bedsheets or "linen-like" fabrics like rayon) is an incredibly strong fabric and the gold standard for breathability in the heat. It takes a little work to break it in and soften it and tends to crease a lot, but is generally a well recommended fabric for any project. Sources:- Fabrics-store.com (comes in a variety of colors and is sold pre-softened! 5.3oz or 7.1oz recommended.) Even with shipping, this often comes out better price-wise
- Ikea (Aina fabric - 100% linen, 240 gsm and $8.99/m)
Colimaçon et Cie
C&C is a French company that sells woven wrap material by the meter. This is your best option for a DIY that will feel exactly like a purpose-woven wrap, because it essentially is. It is also great for making soft structured carriers and mei tais that will feel like wrap conversions. Source:Tablecloths
Tablecloths are a great budget option that are typically cheaper than fabric by the yard. A jacquard woven tablecloth will feel nearly identical to a woven wrap: nice and floppy, cushy and breathable. A printed tablecloth, so long as it is an appropriate thickness, will be similar to working with duck cloth. Sources:- Amazon.ca
- Winners
- Sears
- The Bay
- Home Outfitters
- Bed, Bath & Beyond
- Jysk
Athletic Mesh
Athletic mesh for water wraps and slings can be tricky to find. Make sure you are buying the right stuff. Not utility mesh, athletic knit, wicking mesh, etc. Sources:- BabyweaRings.ca

- Mook's Fabric
Sling Rings
Rings for ring slings, onbuhimos and other carriers need to be weight tested and smooth. While it is possible to find rings at a hardware store with proper weight rating and a smooth weld, these will likely be at least triple the weight of an equivalent aluminum sling ring and even a smooth weld can eventually wear a weak spot in your fabric. If at all possible, it is always preferable to use a ring that is designed for babywearing. NEVER use rings purchased from a craft store. Sources:- BabyweaRings.ca (these are the same rings that are sold in the US from SlingRings.com - incredibly safe, high quality, and a family company)
- SlingRings.ca (these are NOT the same as slingrings.com but still appear to have good quality and weight rating)
- Two Mothers in Edmonton
- Babes in Arms in Calgary
- Tiny Tree Hugger in Winnipeg
Webbing & Buckles
Webbing and buckles for SSCs should always be weight tested! Sources:- JTS Outdoor Fabrics
- Mountain Equipment Coop
Foam Padding
A lot of people use foam, yoga mats, or fleece for padding the straps of their structured carriers. Sources:- Fabricland
| | | | |
Different Types of Baby Carriers
Carrier Styles
- Woven Wrap
- Stretchy Wrap
- Ring Sling
- Pouch Sling
- Soft Structured Carrier
- Meh Dai
- Traditional Onbuhimo
- Reverse Onbuhimo
- Buckle Onbuhimo
- Podaegi
- Nyia
Woven Wrap
Also referred to as: wraps, wovens, German-Style wraps | 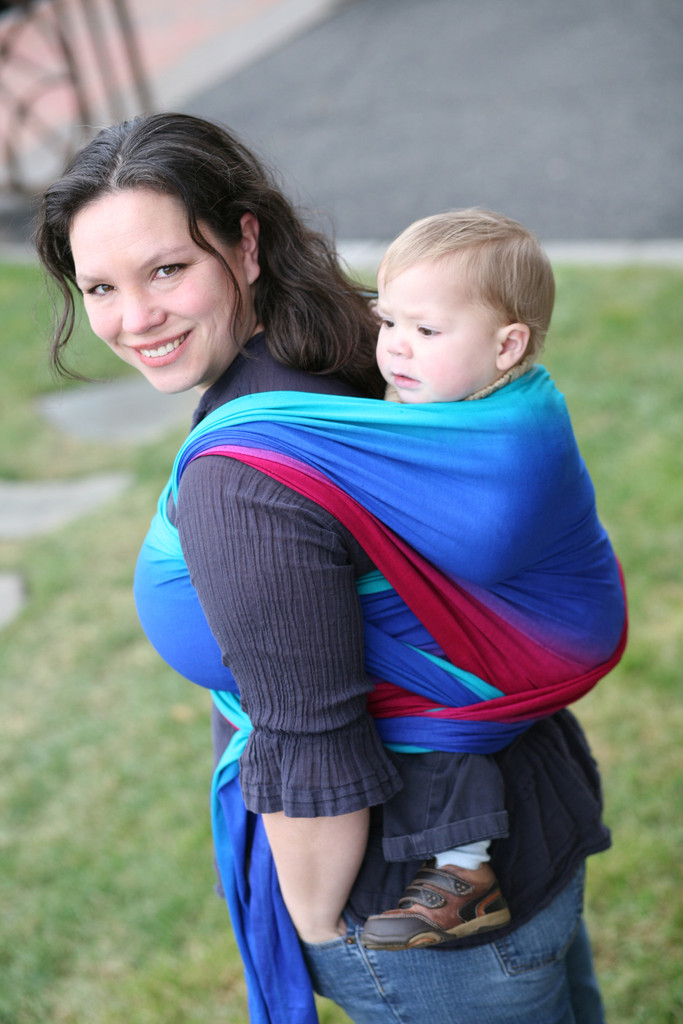 |  |
| Didymos LISCA Rainbow wrap Robins Hip Carry Image sourced from 5mr.com | Wrapsody Hybrid MEIRA stretch wrap Double Hammock Back Carry Image sourced from 5mr.com | Fidella Persian Paisley Smoke wrap Front Wrap Cross Carry Image sourced from 5mr.com |
Description
A long, narrow parallelogram of woven (not stretchy) fabric. Ends may be blunt (making it a long rectangle) or tapered. Used by wrapping around wearer and baby and usually secured with a double knot. Dozens of different ways to wrap depending on personal preference, baby's age and wrap length.Good For
- Front Carries: Good for all ages
- Hip Carries: Good for babies with strong truck control
- Back Carries: All ages (for experienced wrappers only; wearers should master front carries first.)
- Forward Facing: Good for babies with strong head control and decent truck control
Advantages
Incredibly versatile. Good for all ages newborn and up. No upper weight limit. No need to "upgrade" to bigger carriers for toddlers or preschoolers. Nearly all size wraps usable by nearly all size wearers. Good for front, back, hip or even forward facing. One of the few carriers that (with experience and care) can be safely used to back carry a newborn.Disadvantages
Steep learning curve. Takes more time to get baby up.Variations
- Handwoven: high quality, woven by hand. More "beauty marks," more expensive
- Machine woven: made to imitate a handwoven. Fewer "imperfections," more affordable
- Hybrid: stretches a little from rail to rail (no lengthwise stretch) giving it the snuggliness of a stretchy wrap but the versatility of a woven. (Popular brand: Wrapsody.)
- DIY/"Simple Piece of Cloth" - A woven wrap made from bolt fabric such as osnaburg or cotton duck or repurposed fabric like a tablecloth.
- Inoshi: A commercial wrap with a built-in tie waistbelt to make the seat unpoppable.
- Walter's Never Fail Wrap : A commerical wrap with built in leg holes to make the seat unpoppable.
- XOXO Carrier: A commercial carrier which is essentially two narrow cross passes of a wrap attached to a buckle waist band to make the seat unpoppable.
Sizing
Available in a wide variety of sizes from a size 1 (2 meters long) up to a size 8 (5.6 meters long) or longer. All sizes are usable by nearly any size wearer or child. Wrap length simply determines what kind of carries can by done. Most beginners start with their "base size" (whatever size is needed to do a Front Wrap Cross Carry; usually a size 5, 6 or 7 for most wearers) and carries are categorized based on what size is needed in relation to your base size. (For example: a ruck tied in front requires a wrap two sizes smaller than your base size, so it is referred to as a "base minus 2" carry. If you were a base 5, you could do this carry with a size 3 wrap. If you were a base 7, you would need a size 5 wrap to do the same carry.)How to Use
How to Make
Return to TopStretchy Wrap
Also referred to as: Stretchy, brand names Moby, Boba, Solly, or K'Tan |  |
| MOBY Wrap Classic Basic Stretchy Wrap Image sourced from MobyWrap.com | Baby K'tan Original Dual Pouch Style Carrier Image sourced from Baby K'tan |
Description
A long, narrow parallelogram of stretchy fabric; usually similar to a jersey knit.Good For
- Front Carries: Good from newborn and up with 3 reinforcing passes. Rated up to 35lbs, usually starts to get uncomfortable around 15lbs.
- Hip Carries: Good for babies with strong truck control with 3 reinforcing passes. Rated up to 35lbs, usually starts to get uncomfortable around 15lbs.
- Back Carries: Never Safe; Do Not Attempt
- Forward Facing: Debatable; typically considered fine for babies with strong trunk control
Advantages
Poppable and can be pre-tied (tie it once and then pop baby in and out as needed for diaper changes or to nurse.) One-size-fits-most. Good for tandeming with a larger child on your back since you can pre-tie the stretchy wrap, put larger child on your back, and then pop baby into the stretchy wrap without having to readjust.Disadvantages
Tricky to learn how tight to pre-tie. Often only comfortable for the first few months of baby's life before baby is too heavy and it constantly sags (most moms stop liking them around 15lbs.) Must have three passes supporting baby, which means that they can be hot in summer. No way to safely back carry.Variations
- "K'tan" or Huggaloops dual pouch carrier: instead of one long, continuous strip wrapped around three different times, it is instead two closed loops (each crossing the body diagonally) and one waist sash. Easier to put on, but must be carefully sized for the wearer.
Sizing
Regular stretchy wraps are nearly one-size-fits-all. Some companies like Moby do offer plus-sized lengths. Smaller wearers would simply wrap the extra tails around their waist an extra time before tying of. K'tan-style loop carriers must be very carefully sized to the wearer as they have no way to adjust.How to Use
How to Make
_ Return to Top_Ring Sling
Also referred to as: RS |  |  |  |
| Beco Ring Sling - Gathered Shoulder Image sourced from becobabycarrier.com | Forward-facing "Kangaroo Carry" Image sourced from babyslingsandcarriers.com | Maya Comfortfit Sling Image sourced from mayawrap.com | Lenny Lamp Blue Princessa Wrap Conversion RS - Pleated Shoulder Image sourced from 5mr.com |
Description
2-3 meters of woven (non-stretchy) fabric with two aluminum or nylon sling rings sewn onto one of the short ends. The fabric folded through the rings may be simply bunched (gathered), folded into neat pleats, or any combination of the two.Good For
- Front Carries: Good for all ages
- Hip Carries: Good for babies with strong truck control
- Back Carries: Experienced wearers with trustworthy toddlers or older children only. Single-pass back carries are a risk to children who might lean backwards.
- Forward Facing: Good for babies with strong head control and decent truck control. Worn inside the "pouch" of the sling (instead of legs out) sitting cross-legged.
Advantages
Fairly easy to learn to use. Incredibly quick to put baby up or take them down. Easy to adjust one-handed. Incredibly newborn-friendly, but also good for toddlers who want up and down frequently. Easy to nurse in. Affordable. Easy to tandem two small babies on your front with two slings on opposite shoulders. Incredibly flexible sizing.Disadvantages
One-shoulder carries can be less comfortable for larger babies or longer wearing. Not recommended for back carries. Not good for "seat poppers" or babies who tend to straighten their legs when worn.Variations
- Pleated shoulder: the fabric sewn around the rings is first pleated to make the fabric narrower and neater and then sewn a few inches from the rings. Lays more neatly on the shoulder without getting bunched. Pleats may go straight across, be pleated from the center, box pleated, or any other combination.
- Gathered shoulder: the fabric sewn around the rings is simply bunched through the rings and then sewn straight across a few inches from the rings. Allows more "spread" to the fabric across the shoulder and therefore better weight distribution.
- Floating gathered shoulder: Same as gathered, except more fabric is pulled through so the stitching is 12"-16" away from the rings and sits behind the shoulder when worn. Allows for a double layer of fabric across the shoulder and the most spread.
- Hybrid/Eesti: any combination of the above; typically a few pleats along the outside of a gathered shoulder.
- Padded shoulder: padding is sewing into the shoulder and top rail of the sling for cushion.
- Closed-tail ring slings: the tail is a narrow strip that only allows you to loosen and tighten the sling as a whole; does not allow for strand by strand tightening of specific sections of the sling.
Sizing
Sizing simply effects the length of the sling, and therefore how much tail hangs through the rings after it is tightened. 12" of tail minimum is safe, and you want the tail at least 12" above the ground to avoid being a tripping hazard. That said, sizing is incredibly flexible. A 5'7", US size 10 woman can wear anywhere from an XXSmall to and XXLarge ring sling safely.How to Use
- "How to Thread a Ring Sling" by Wrapping Rachel
- "(basics) Newborn ringsling 'classic'" by Wrap You In Love
- "How to use a Ring Sling with a Newborn" by Wrapping Rachel
- "Babywearing (basics) : Ringsling (classic)" by Wrap You In Love (Same technique as above but with an older child)
- "How to do a hip carry in a ring sling with an older baby" by Wrapping Rachel
- "Ring Sling Troubleshooting: Getting a Great Seat" by Wrapping Rachel
- "Ring Sling Troubleshooting: Keeping the rings at corsage level" by Wrapping Rachel
- Ring Sling Back Carry
How to Make
Return to TopPouch Sling
Also referred to as: pouch, brand name SevenSlings, Hot Slings |
| SevenSlings Hip Carry Image sourced from sevenslings.com |
Description
A tube of woven (not-stretchy) fabric is sewn with a reinforcing seam. Worn diagonally like a sash, baby is then placed in the sling like a ring sling. Functions the same as a ring sling, except that there is no size adjustment.Good For
- Front Carries: rated for newborns; typically preferred for babies with strong trunk control due to the lack of support offered unless sizing is absolutely perfect.
- Hip Carries: Good for babies with strong truck control
- Back Carries: Experienced wearers with trustworthy toddlers or older children only. Single-pass back carries are a risk to children who might lean backwards.
- Forward Facing: Good for babies with strong head control and decent truck control. Worn inside the "pouch" of the sling (instead of legs out) sitting cross-legged.
Advantages
Quick to put baby up and get baby out. Folds up incredibly small; can fit in a diaper bag or even a pants pocket for a back-up carrier. Very inexpensive.Disadvantages
No ability to adjust size. Must be sized exactly right in order to provide proper support. One shoulder carries means that it can be less comfortable for longer wearing. Often advertised with newborns in a horizontal "cradle carry" which makes it very difficult to monitor breathing and keep baby from collapsing their chin to their chest. Not good for "seat poppers" or babies who tend to straighten their legs when worn.Variations
- Some brands such as HotSlings do offer some minimal adjustment ability.
Sizing
Sizing is very dependent on both the wearer's and child's size and cannot be adjusted. Therefore, a pouch sling that fits a mom with her newborn may not fit the same mom when her baby is a toddler. If a mom and dad of different sizes wanted pouches to use for two different age children, they therefore may end up needing four different pouches to accomodate all 4 combinations of parent and child.How to use
How to Make
Return to TopSoft Structured Carrier
Also referred to as: SSC, Buckle Carrier, Full Buckle | | |
| Ergobaby Original Baby Carrier Teal Ergonomic Carrier, Front Carry Image sourced from ergobaby.com | Tula Toddler Carrier - Trendsetter Navy Ergonomic Carrier, Back Carry Image sourced from tulababycarriers.com | BabyBjorn Miracle Carrier Narrow Based Carrier, Forward Facing Image sourced from johnlewis.com |
Description
A structured, usually shaped body panel attached to a waistband with a buckle closure and shoulder straps which attach to the body panel above the leg holes. Straps use buckles and ladder locks.Good For
- Front Carries: depends on brand; typically good for all ages. Some brands require an infant insert for newborns.
- Hip Carries: depends on brand; for brands that allow it, good for babies with strong truck control
- Back Carries: depends on brand; for brands that allow it, good for babies who fit the carrier without inserts/modification and can sit independently.
- Forward Facing: Depends on brand; requires a carrier with either a narrow base or an ergonomic base that snaps in to a narrow setting. If so, good for babies with strong head and trunk control.
Advantages
The easiest style of carrier to learn to use. Very dad-friendly for fathers reluctant to learn wraps or slings. Usable by multiple sizes of wearers.Disadvantages
Panel size is dependent on child's size. Therefore a parent who chooses to wear as their baby reaches toddlerhood or preschooler age may need to upgrade to a toddler-size or preschool-size carrier. Structured, tailored design means that some brands may fit the wearer better than other brands. Preferable to try carriers on in person before purchasing. Requires child to be fully sitting independently for extended periods of time before they can be used for a back carry.Variations
- Narrow Based Carriers (NBCs) like BabyBjorn: has a narrower base that does not support baby's legs in an ergonomic "M" position. Not a safety risk for healthy babies, but may possibly exacerbate problems in babies predisposed to hip displasia.
- Unstructured, unpadded carriers like the Connecta or Sew Toot Voyager. Unpadded waist band is worn "apron style" (like a meh dai) and means that the carrier is less bulky and folds up smaller in a diaper bag.
- Hybrid carriers (Emeibaby, XOXO) combine aspects of a wrap with the ease of buckles.
Sizing
Body panel size is based on child's size. Body panel should be tall enough to reach at least up to baby's armpits but not so tall that baby's airway is obstructed. For new babies who still need neck support, panel should come up between the nape of their neck and the base of the ears. Some carriers recommend a brand-specific "infant insert" to provide core support for newborns, transitioning to the use of a "pillow" (or a rolled up receiving blanket) once the child fills out the body panel but is still a little too short for it. The width should be wide enough to support baby's legs from knee-pit to knee-pit (in an ergonomic carrier; narrow based carriers are not designed to do so) while still allowing the legs to swing freely at the knee. Babies whose legs are too short for the knees to swing freely off the sides of the panel should either be using an insert or (if the carrier allows) should be using the carrier snapped in to a narrow base setting. The straps on most soft structured carriers are one-size-fits-most, although some can be made with extra-length straps or can be sold with waist extenders.How to Make
Return to TopMeh Dai or Bei Dai
Pronounced "MEH dye" or "beh dai." Also referred to as: MT ( outdated), mei tai ( outdated) |  |  |
| Infantino Sash Padded Narrow Straps Image sourced from infantino.com | Fidella Wrap Strap Meh Dai Blossom Bubble Gum Padded-to-wrap straps Image sourced from fidella.org | Half Buckle Wrap Conversion Meh Dai with hood Image sourced from Etsy shop Obimama |
Description
A rectangular body panel with two long shoulder straps coming out of the top corners diagonally and two shorter waist straps coming out of the bottom corners horizontally. The carrier is tied around the waist hanging down, "wrong-side" out like an apron, and then pulled up over baby. The shoulder straps go over the shoulders, under the arms, and either tie under baby's bum or cross over baby, under baby's legs and then tie.Good For
- Front Carries: Good for all ages
- Hip Carries: Good for babies with strong truck control
- Back Carries: All ages (for experienced wearers only)
- Forward Facing: Good for babies with strong head control and decent truck control; usually requires the carrier to be modified/cinched narrower.
Advantages
Incredibly easy to learn to use. Flexible sizing can fit multiple parents. Offers wrap-like support with the ease of a buckle carrier. Ability (with experience and care to monitor breathing) to back carry newborns safely. Waist-strap and two shoulder straps offer good weight distribution for long wearing. Easy to adjust panel size (by rolling the waistband or cinching the bottom) to fit a newborn.Disadvantages
Panel size is dependent on child's size. Therefore a parent who chooses to wear as their baby reaches toddlerhood or preschooler age may need to upgrade to a toddler-size or preschool-size carrier.Variations
- Wrap strap: Straps are wide (10"-15") and flat like a woven wrap.
- Narrow or "Tube" strap: Straps are sewn into a flattened tube (narrower, usually around 4", and double layered.)
- Padded straps: Section of the shoulder straps closest to the body panel include padding, usually either fleece or open cell foam.
- Half-buckle: Waist straps include a buckle closure instead of a tie closure.
- Ring-waist: One waist strap is replaced by double sling rings, which the other waist strap is threaded through like a D-ring belt.
Sizing
Body panel size is based on child's size. Body panel should be tall enough to reach at least up to baby's armpits but not so tall that baby's airway is obstructed. (The waist band can be "rolled" an extra time to shorten a too-tall panel.) The width should be wide enough to support baby's legs from knee-pit to knee-pit, while still allowing the legs to swing freely at the knee. (The body panel can be cinched with a ribbon or hair tie to make it narrower for smaller babies.) The strap length is determined by the wearer's size. Most mei tai strap lengths are considered one-size-fits-most.How to Use
- Basic Meh Dai Front Carry
- How to Use a Meh Dai with a Newborn
- Meh Dai High Back Carry
- Meh Dai Hip Carry
How to Make
Return to TopOnbuhimo (Traditional)
Also referred to as: Onbu ( outdated, listed for clarification only) |
| Traditional Onbuhimo with rings Image sourced from cherryberrybaby.co.uk |
Description
A rectangular body panel with two long shoulder straps coming out of the top corners diagonally and two short fabric loops or attached sling rings coming out of the bottom corners horizontally. Baby is put on to the wearer's back high with arms out. The shoulder straps come down, are threaded through the loops/rings and then tied off (typically tied tibetan by crossing the straps back under the opposite shoulder strap and then tying the tails in a double knot.)Good For
- Front Carries: Not designed for front carries. Possible with long enough straps to cross in the back, add support with reinforcing passes and close off the open sides.
- Hip Carries: Not designed for hip carries.
- Back Carries: Babies who can sit independently only.
- Forward Facing: Not designed for forward facing.
Advantages
Quick to put on and an unpoppable seat makes it easier to wear wiggly or difficult toddlers who may not have the patience for wrapping. Lack of waist belt is great for anybody who doesn't want the pressure on their waist, including (but not limited to) expectant mothers.Disadvantages
More limited than other carriers, since onbuhimos are really best for older, independently sitting babies and only designed for back carries. Panel size is dependent on child's size. Therefore a parent who chooses to wear as their baby reaches toddlerhood or preschooler age may need to upgrade to a toddler-size or preschool-size carrier.Variations
- Fabric loops: shoulder straps are threaded through simple fabric loops at the bottom corners
- Ring loops: a small sling ring is attached with a small fabric loop at each of the bottom corners.
- X-onbuhimo or Blanketless Onbuhimo: Functions the same as a traditional onbuhimo, but instead of separate straps and body panel, it is constructed in an "X" shape with two narrow slings.
Sizing
Body panel size is based on child's size. Baby needs to be able to fit in the carrier arms-out, but the panel must not be so low that baby can lean backwards. The width should be wide enough to support baby's legs from knee-pit to knee-pit, while still allowing the legs to swing freely at the knee. The strap length is determined by the wearer's size.How to Use
- High Back Carry with an Onbuhimo
- Wrap Strap Onbuhimo Back Carry
- How to thread an onbuhimo with fabric loops instead of rings
How to Make
Return to TopReverse Onbuhimo
Also referred to as: Reverse Onbu, Ruck-Bu ( both terms outdated, listed only for clarification only) |
| Reverse Onbuhimo Image sourced from cherryberrybaby.co.uk |
Description
A rectangular body panel with two shorter shoulder straps coming out of the top corners diagonally (usually padded) with double sling rings on each, and two long wrap straps coming out of the bottom corners horizontally. The bottom straps are pre-threaded through the double sling rings on the shoulder straps like one would a ring sling. Baby is put on to the wearer's back high with arms out, and the tails of the straps are pulled to tighten the shoulder straps. Tying off is optional (since the double sling rings lock the straps in place) but longer straps allows for reverse reinforcing passes for more support and/or a tibetan tie-off.Good For
- Front Carries: Not designed for front carries. Possible with long enough straps to cross in the back, add support with reinforcing passes and close off the open sides, but incredibly awkward to cross and thread the straps behind your back.
- Hip Carries: Not designed for hip carries.
- Back Carries: Babies who can sit independently only.
- Forward Facing: Not designed for forward facing.
Advantages
Quick to put on and an unpoppable seat makes it easier to wear wiggly or difficult toddlers who may not have the patience for wrapping. Lack of waist belt is great for anybody who doesn't want the pressure on their waist, including (but not limited to) expectant mothers. Lack of waist belt and tie offs makes them great for tandem-wearing, since there is nothing to interfere with the front baby.Disadvantages
More limited than other carriers, since onbuhimos are really best for older, independently sitting babies and only designed for back carries. Panel size is dependent on child's size. Therefore a parent who chooses to wear as their baby reaches toddlerhood or preschooler age may need to upgrade to a toddler-size or preschool-size carrier. Puts all the weight high and on the shoulders, which can be difficult for some wearers.Variations
- Padded Shoulder: rings are attached on top of a padded strap so the rings do not dig into the wearer's shoulder
- Reverse X-onbuhimo or Reverse Blanketless Onbuhimo: Functions the same as a regular reverse onbuhimo, but instead of separate straps and body panel, it is constructed in an "X" shape with two narrow slings.
Sizing
Body panel size is based on child's size. Baby needs to be able to fit in the carrier arms-out, but the panel must not be so low that baby can lean backwards. The width should be wide enough to support baby's legs from knee-pit to knee-pit, while still allowing the legs to swing freely at the knee. The strap length is flexible, but determined by wearer's size and whether or not the wearer wants to be able to do reinforcing passes or tibetan tie-offs.How to Use
- How to Put On a Reverse Onbuhimo
- Achieving a high back carry with a reverse onbuhimo
- Reinforced tibetan tie off for reverse onbuhimo
- Tie Off Options for a Reverse Onbuhimo with Short Straps
How to Make
Return to TopBuckle Onbuhimo
Also referred to as: buckle-bu ( outdated term; listed only for clarification) |
|
Sew Toot Barefoot Buckle Onbuhimo Image sourced from Etsy shop Sew Toot |
Description
A rectangular body panel with padded backpack-like straps and webbing attaching each top corner to the bottom corner on the same side. A chest clip attaches the two shoulder straps together.Good For
- Front Carries: Not designed for front carries. Possible with babies with decent trunk control if the carrier allows the straps to cross in the back.
- Hip Carries: Not designed for hip carries.
- Back Carries: Babies who can sit independently only.
- Forward Facing: Not designed for forward facing.
Advantages
Quick to put on and an unpoppable seat makes it easier to wear wiggly or difficult toddlers who may not have the patience for wrapping. Lack of waist belt is great for anybody who doesn't want the pressure on their waist, including (but not limited to) expectant mothers. Lack of waist belt and tie offs makes them great for tandem-wearing, since there is nothing to interfere with the front baby.Disadvantages
More limited than other carriers, since onbuhimos are really best for older, independently sitting babies and only designed for back carries. Panel size is dependent on child's size. Therefore a parent who chooses to wear as their baby reaches toddlerhood or preschooler age may need to upgrade to a toddler-size or preschool-size carrier. Puts all the weight high and on the shoulders, which can be difficult for some wearers.Variations
- Ladder lock straps: Instead of buckling closed, a buckle onbuhimo with ladder lock closure is permanently "closed" and simply tightens or loosens with ladder locks like a back pack.
Sizing
Body panel size is based on child's size. Baby needs to be able to fit in the carrier arms-out, but the panel must not be so low that baby can lean backwards. The width should be wide enough to support baby's legs from knee-pit to knee-pit, while still allowing the legs to swing freely at the knee. The shoulder strap lengths are flexible, but determined by wearer's size.How to Use
How to Make
Return to TopPodaegi
Pronounced "poh-DEH-gee" (hard G.) Also referred to as: pod ( outdated term, listed only for clarification) |
| Traditional wide-blanket podaegi Back Carry Image sourced from littleseouls.blongspot.com |
Description
A wide rectangular "blanket" is attached to a long, continous strap coming out horizontally from the top corners of the "blanket." The blanket wraps around both the wearer and the wearee and the straps then cross under baby's bum to secure them.Good For
- Front Carries: Good for all ages
- Hip Carries: Good for babies with strong trunk control.
- Back Carries: All ages (for experienced wearers only)
- Forward Facing: Not designed for forward facing.
Advantages
Simple, traditional construction. Less "material" to deal with than a meh dai or a woven wrap.Disadvantages
Less common carrier makes documentation on usage harder to find. Safety standards have not been created for podaegis, so no commercial podaegis exist that pass current carrier safety testing.Variations
- Traditional/Wide-blanket: the "blanket" is wide enough to wrap around both baby and wearer. Baby is wrapped with straps going over both legs and under their bum with legs inside the blanket. Blanket is sometimes quilted.
- Narrow-blanket: the "blanket" is sized more similarly to a mei tai, allowing baby to be worn with a more wrap-like reinforcement with legs out and each reinforcing strap going over the first leg and under the second. Modeled after the traditional Hmong Nyia. The term "narrow blanket podaegi," due to its inaccuracy, has fallen out of favor, and it is preferred to use the more accurate term "Nyia."
Sizing
One size fits most. Total combined strap length should be somewhere between the wearer's "base size" wrap (the length needed in a wrap to do front wrap cross carry) and a base-2, so plus size wearers may occasionally need slightly longer straps.How to Use
How to Make
Return to TopNyia
Pronounced "nee-AH" Also referred to as: Hmong baby carrier, narrow-blanket podaegi ( outdated term, listed only for clarification) |
|
Modern Nyia with angled straps
Image sourced from southlondonslings.co.uk |
Description A narrow and long rectangular "blanket" is attached to a long, continous strap coming out horizontally from the top corners of the "blanket." Some have two angled straps coming out of the top corners more like a meh dai, instead.
Good For
- Front Carries: Good for all ages
- Hip Carries: Good for babies with strong trunk control.
- Back Carries: All ages (for experienced wearers only)
- Forward Facing: Not designed for forward facing.
Advantages
Simple, traditional construction. Less "material" to deal with than a meh dai or a woven wrap. Size is nearly universal for all wearers and wearees.Disadvantages
Less common carrier makes documentation on usage harder to find. Safety standards have not been created for nyia, so no commercial nyia exist that pass current carrier safety testing.Variations
- Straight straps: Top straps are horizontal and sometimes one continuous strap going through the top of the blanket.
- Angled straps: Top straps are two independent straps anchored at an angle to the blanket more like the construction of a modern meh dai.
Sizing
One size fits most. Total combined strap length should be somewhere between the wearer's "base size" wrap (the length needed in a wrap to do front wrap cross carry) and a base-2, so plus size wearers may occasionally need slightly longer straps.How to Use
- Front Carry Podaegi - Kangaroo and FWCC style
- Podaegi Newborn Front Torso Carry
- Podaegi Hip Carry - Robins and Standard
- Basic Ruck Back Carry with a Podaegi
How to Make
_ Return to Top_ --
| | | | |
| | | | |
| | | | |
| | | | |
| | | |
Color Theory
| | | | | |
All of the information on this page was assembled in collaboration with the Facebook group Dyed Baby Carriers. If you have more questions regarding dyeing your baby carrier, join their group for assistance!
Introduction to Color Theory
There are two basic rules in color theory to keep in mind when dyeing.
1) Dye will ADD TO the original color, not replace it.
- Dyes work best on analagous colors - colors on the same side of the color wheel.
- A blue fabric dyed with yellow dye will turn GREEN.
- The combination of complimentary (opposite) colors will typically yield a muddy brown.
- A purple fabric dyed with yellow dye will turn brown.
- Black cannot be dyed any other color. If it is a very faded black, you may be able to get a very dark color like navy blue.
- Dark colors can only be dyed darker.
- If you want to make a wrap or fabric lighter, you must strip it first.
- Structured carriers cannot be stripped.
For more information, read the following article:
More Resources
- Jacquard Dye Mixing Chart
- Paula Burch Procion MX Color Mixing Chart
- JAVA Dye Mixer
- TryColors Simple Color Mixer
- For fun: Test your Color Vision
- ColorSchemer app on iTunes
- Mixing Colors app on Google Play
- Tie Dye Doodle app on iTunes
| | | |
Doll Carriers
These patterns are for use of a child carrying a doll or toy. They should never be used to actually carry a baby.Buckle Carriers, Meh Dais, and other "body panel" carriers
Sew Toot "The 'Mini' Doll Carrier" (paid pattern) Baby Bonda Productions "Just like Mommy" Buckle Onbuhimo Doll Carrier (paid pattern) Baby Bonda Productions Easy Sew Toy Doll Carrier (paid pattern) Childhood Gear (free pattern) The Shopping Mama Meh Dai Doll Carrier Tutorial Ginger Snap Crafts Toddler Baby Doll Carrier No-Sew "Onbuhimo" style carrier from a long-sleeved t-shirt (links to video) Narrow Based Carrier using velcro (links to very long video; watch to end before starting, pattern changes at the end. Corrected pattern explained at 19:01 in video) Narrow Based Carrier using snaps (links to video)Slings
Child Size Doll Ring Sling Hipababy Doll Slings- Pouch Sling
- Ring Sling
- Meh dai
- Baby carriers for barbie-sized dolls
| | | |
Dye Tutorials
| | | | | |
All of the information on this page was assembled in collaboration with the Facebook group Dyed Baby Carriers. If you have more questions regarding dyeing your baby carrier, join their group for assistance!
General Reference Websites
Paula Burch: All About Hand Dyeing
- Lots of info about different dye techniques
- Includes non-babywearing-specific techniques, so not all may be safe
- Beware of methods using unsafe dyes or bleach
- Lots of different techniques explained
- Sells extremely high quality and safe dye
Vat Dye/Tub Dye/Immersion Dye
A vat dye is a simple method that results in solid coverage with one color. Acid Dyeing is a method of vat dyeing necessary when dyeing animal fiber, like silk or wool. Doing a regular dye with soda ash on silk or wool is very harsh and may ruin the texture.Gradient Dye/Ombre
A grad dye is a way to fade one or more colors across the length or width of a wrap.- Peaceful & Creative Living Grad Dye Wrap
- It's Not Spaghetti Single Color Grad
- It's Not Spaghetti Rainbow Grad
- Peaceful & Creative Living Sunset/Rainbow Grad
- Siphon Method Grad Dye
- Dharma Trading Co - Ombre
- New Earth Designs - "Let's Talk Grad Dyes"
Low Water Immersion
This method results in a splotchy, uneven almost marbled color pattern.Ice Dye
Similar to low water immersion, ice dying allows for a splotchy, uneven color pattern, but gives you more control over color placement. This technique is popularly used with jewel tones combined with black in order to achieve a "galaxy" look.- Dharma Trading Co - Ice/Snow Dyeing
- Happy Wrappings - Ice Dyed SSC
- Video on how to scrunch fabric for an ice dye (visible only to Dyed Baby Carrier group members)
- Text Tutorial - Ice Dye (visible only to Dyed Baby Carrier group members)
Resist Dyeing
Resist dyeing uses wax, glue, or string to create a "resist," allowing certain areas of the fabric to remain untouched by dye. Batik Glue Resist Shibori- Art Threads Shibori
- Kaizen Journey - Itajime Shibori Process
- RIT Shibori Pole-wrapping Technique (side note: RIT dyes are not recommended for baby carriers)
- File Under Fiber - Shibori Circles
- HonestlyWTF - DIY Shibori
- Design Sponge - Shibori Designes 4 Ways
- Silk Shibori Blog (several shibori posts)
- Brenda Gael Smith blog (several shibori posts)
- Dharma Trading Co Tie Dye Basics
- Paula Burch How to Tie Dye
- Dharma Trading Co - Basic Spiral Tie Dye
- 4 Spiral Tie Dye Techniques (Youtube video)
- Dharma Trading Co - Peace Sign Tie Dye
- Peace Sign (Youtube video)
- Heart (Youtube video)
- Yin Yang (Youtube video)
- Mandala (Youtube video)
- Star or Mandala (Youtube video)
- Sky Fold (Youtube video)
- Lotus (Facebook album)
- 5-Pointed Star (Youtube video)
- DNA Pattern (Facebook album)
- "Radio Wave" tie dye pattern (Youtube video)
- Accordion Fold tie dye (Youtube video)
- Fish Scales (Youtube video)
Marble Dyeing
Using shaving cream to "swirl" the dye gives a marbled texture.- Dharma Trading Co Shaving Cream Dyeing
- Marble Rainbow Shaving Cream Dye (visible to Dyed Baby Carrier group members only)
Painting with Thickened Dye
Painting with thickened fiber reactive dye will give you the control of paint without the stiff texture often associated with it. This is great for places where you want a design or just need to "spot-dye" - for example, painting dye onto the straps of a structured carrier to counteract fading without harming the design on the body panel.- Dharma Trading Co - Painting or Printing with Fiber Reactive Dye
- How to Use Thickened Dye (visible to Dyed Baby Carrier group members only)
- New Earth Designs - Painting Fabric with Thickend Dye
Where to Find Babywearing Materials: Continental Europe
This list is just a start for some of the most common materials needed for DIY Babywearing. None of these sources are guaranteed, and this isn't a comprehensive list. This is simply a list of suggestions from the members of our Facebook groupMaterials Covered
- Osnaburg
- Duck Cloth
- Bottomweight Linen
- C&C
- Tablecloths
- Athletic mesh
- Sling Rings
- Webbing & Buckles
- Foam for shoulder padding
Osnaburg
Osnaburg is a natural-colored, bottomweight muslin-like fabric. It is highly recommended for beginners because of the low cost and excellent wrap qualities once broken in. It works great for wraps and ring slings and breaths nearly as well as linen. Because osnaburg doesn't come in a lot of varieties, it is almost always an excellent choice, and the bolt tags are always clearly labled (although sometimes hard to find.) The only thing to look out for is "J Thompson" brand osnaburg, which has a reputation for being much thinner than other brands and less desireable. Roc-lon is the brand most people use and love. Although "traditional" osnaburg is made from linen, most of the osnaburg available in stores is 100% cotton.
Osnaburg is INCREDIBLY difficult to find outside of the USA. Heavyweight calico - while not exactly the same thing - is often a good, easier to find alternative. Just keep an eye on the weight/thickness, since calico can vary in weight.
Sources: - No consistent sources suggested
Duck Cloth
Duck cloth is a 100% cotton fabric similar to canvas. It is a great choice because even very lightweight duck is heavy enough to be safe. Duck comes in a variety of weights, all the way up to 18oz per square yard (for purposes such as sandbags and hammocks) but most of the duck cloth sold in stores will be closer to the 5-7oz variety. Printed/patterned duck is typically closer to 5oz (185 gsm.) Solid colored duck at most stores is usually sold as "duck canvas" and is stiffer and heavier, but will eventually break in to be usable.
Sources: - Stoffkontor (10oz cotton canvas, German website)
- Ikea - while not specifically labeled as duck, most of their fabric has the weight listed and is appropriate to use.
Bottomweight Linen
Linen (the fiber made from flax plants; not to be confused with "linens" like bedsheets or "linen-like" fabrics like rayon) is an incredibly strong fabric and the gold standard for breathability in the heat. It takes a little work to break it in and soften it and tends to crease a lot, but is generally a well recommended fabric for any project. Sources:- Stoffkontor.eu
- Stoffe.de
- Ikea's Aina fabric
Colimaçon et Cie
C&C is a French company that sells woven wrap material by the meter. This is your best option for a DIY that will feel exactly like a purpose-woven wrap, because it essentially is. It is also great for making soft structured carriers and mei tais that will feel like wrap conversions. Source:Tablecloths
Tablecloths are a great budget option that are typically cheaper than fabric by the yard. A jacquard woven tablecloth will feel nearly identical to a woven wrap: nice and floppy, cushy and breathable. A printed tablecloth, so long as it is an appropriate thickness, will be similar to working with duck cloth. Sources:- Ikea
Athletic Mesh
Athletic mesh for water wraps and slings can be tricky to find. Make sure you are buying the right stuff. Not utility mesh, athletic knit, wicking mesh, etc. Sources:- no consistent sources found
Sling Rings
Rings for ring slings, onbuhimos and other carriers need to be weight tested and smooth. While it is possible to find rings at a hardware store with proper weight rating and a smooth weld, these will likely be at least triple the weight of an equivalent aluminum sling ring and even a smooth weld can eventually wear a weak spot in your fabric. If at all possible, it is always preferable to use a ring that is designed for babywearing. NEVER use rings purchased from a craft store. Sources:Webbing & Buckles
Webbing and buckles for SSCs should always be weight tested! Sources:- No consistent sources found
Foam Padding
A lot of people use foam, yoga mats, or fleece for padding the straps of their structured carriers. Sources:- No consistent sources found
| | | | |
Can My Fabric Stretch?
Fabric used for seamed, structured carriers like SSCs and Meh Dais should have no stretch in any direction, besides maybe a little diagonal give. Stretchy Wraps like a Moby wrap or a K'tan-style dual pouch carrier that always have three supporting passes over baby's back and are only used for front carries can stretch in all four directions. For most wraps and ring slings, you want no stretch, but a little from selvedge-to-selvedge is okay. This most specifically applies when choosing mesh for a water ring sling. --
-- International Babywearing Week Scavenger Hunt Grand Prize
You did it! You finished the scavenger hunt! (Or just lucked out and stumbled upon this page on your own.) DON'T share a link to this page just yet - we'll share at the end of the week! But you can go back to the original post in our Facebook group and just comment "Found it!" Finally, the prize! The Admin team has been working together to come up with a new tutorial: a FREE buckle onbuhimo pattern! This type of carrier is great for carrying toddlers (or older babies who can get themselves into a sitting positiion) high on your back and is popular due to the lack of a waistbelt and how quickly they can be put on. Enjoy!| |
Can I Sell My DIY Carriers?
DIY Carriers are exactly that: Do It Yourself (For Yourself.) The babywearing industry has many regulations in place to keep mamas safe, meaning that carriers sold in the US must be tested and labeled very specifically. If you sold a DIY carrier and anything happened (even if it was due to a user error by the buyer) you would personally (and financially) be held responsible. While DIY swaps are still very common and woven wraps have less regulations on them than most carriers, it is still in your best interest to never sell a carrier you made unless you fully understand what it means to be legally CPSIA & ASTM compliant and carry the appropriate insurance. As soon as you sell (or even gift) a carrier, you are legally responsible for anything that happens to the child who is being worn. For more information, check out this page. While most of these regulations are US-specific, be sure to check your country's laws regarding selling baby carriers, fabric items or items for babies. For example, while Canada does not regulate baby carriers as strictly as the US, they do have specific laws regarding textile labeling which would apply to any fabric-made baby carrier. Currently, Canadian government encourages buyers to only purchase baby carriers that have passed ASTM testing, but does not actually require sellers to have this testing done. --| | | |
General Construction Safety Tips & FAQs
Fabric Choices
Structured carriers (any carrier that attaches straps to a body panel) call for very strong fabric - not only does it have to bear weight, it also has to bear weight along several seams. Recommended fabrics are 7oz linen, cotton duck (the 185gsm Waverly duck sold at Walmart is fine for most of a structured carrier, but not strong enough for the interior layer that the straps are anchored to), heavy twills, 7oz+ denim, and upholstery fabrics. Any fabric that is safe for a wrap or sling is typically fine for use for most of a structured carrier, but it is preferred to use a heavier weight fabric, such as 7 or 9oz cotton canvas or denim for at least one body panel to anchor the straps to. NO weight bearing piece of your carrier should be made from anything with ANY stretch or a thin fabric like muslin, quilters cotton, or lightweight apparel fabric. That includes wrap straps! Knits are tempting for wrap straps on a MT, but are EXTREMELY difficult to seam safely, sag under weight, and should NOT be used. Leave the knits for three-pass stretchy wraps. For more information on choosing a safe fabric, read the 4 Rules of Fabric Selection page.Thread Choice
tl;dr: buy 100% polyester Gutterman brand thread For hems and non-structural stitches, you can use just about any thread you like, and any stitch type. Most people do a standard straight stitch, but some people choose to use a decorative stitch or zigzag along one rail of a wrap in order to tell the two rails apart. Polyester thread will be stronger and less likely to break under tension, but keep in mind that if you dye your wrap later, polyester thread will not take the dye. Cotton thread will dye, but if your fabric has any "give" to it, it might snap under the tension of simply tightening the wrap.
For anything structural, including the x-boxes used to secure straps to a body panel, a flat felled seam to make a long tablecloth wrap, or the three lines of reinforcement stitches on a ring sling, you will want 100% polyester all-purpose thread. Avoid heavy-duty threads unless you have a lot of experience working with them - they tend to jam up home sewing machines pretty bad and the extra thickness is not necessary if your carrier is properly reinforced. Gutterman is the gold standard for high quality, but any brand is typically fine.
For hems and non-structural stitches, you can use just about any thread you like, and any stitch type. Most people do a standard straight stitch, but some people choose to use a decorative stitch or zigzag along one rail of a wrap in order to tell the two rails apart. Polyester thread will be stronger and less likely to break under tension, but keep in mind that if you dye your wrap later, polyester thread will not take the dye. Cotton thread will dye, but if your fabric has any "give" to it, it might snap under the tension of simply tightening the wrap.
For anything structural, including the x-boxes used to secure straps to a body panel, a flat felled seam to make a long tablecloth wrap, or the three lines of reinforcement stitches on a ring sling, you will want 100% polyester all-purpose thread. Avoid heavy-duty threads unless you have a lot of experience working with them - they tend to jam up home sewing machines pretty bad and the extra thickness is not necessary if your carrier is properly reinforced. Gutterman is the gold standard for high quality, but any brand is typically fine.
Wrap Conversions
You can safely make a sling or structured carrier out of a purpose-woven wrap. It is recommended to serge/overcast stitch the cut edges to keep them from unraveling before assembling your carrier. (This same rule applies when using a jacquard-woven tablecloth.) If you don't have a serger, you can simply run a zigzag stitch close to the edges. Since you will either need to sew through both layers of a 2-layer body (leaving visible x-boxes) or have a third hidden layer (which would waste wrap you cant see) most people choose to hide their x-boxes on a hidden layer inside of something cheap and boring, like twill or heavyweight linen. (More on x-boxes below.) Similarly, with a wrap conversion ring sling, you would work with it just like any other fabric, but it is usually a good idea to serge or zigzag the cut edge while you are sewing your shoulder to keep it from unraveling while you work.Attaching Straps
 Most structured carriers have two main elements: straps and a body panel. While those vary in style (a meh dai might have long wrap straps, where a buckle carrier would have short padded straps with webbing and buckles, and the bottom of an onbuhimo would have very short straps sewn into loops or around rings) what they have in common is that these straps MUST be well anchored to the body panel.
The general rule is to have enough extra strap to overlap it with your main body panel piece by at least 3"-5 and then attach it with an x box (literally a rectangle with an X going from corner to corner, all sewn with one continuous line of stitching) and go over the x box with 2 or 3 lines of stitching. Use an all-purpose 100% polyester thread for strength.
The strap should be either X-boxed to a heavy duty, tightly-woven body panel layer, and then sandwiched between that layer and another sturdy panel layer with the decorative panel on the opposite side, OR the strap can be sandwiched between two moderately heavy body layers and x-boxed through all of the layers at once. (See 2layer_vs_3layer.pdf)
Straps should ALWAYS be attached using a machine, never sewn by hand. Machines offer more consistent tension and stitch length than can be achieved by hand.
Most structured carriers have two main elements: straps and a body panel. While those vary in style (a meh dai might have long wrap straps, where a buckle carrier would have short padded straps with webbing and buckles, and the bottom of an onbuhimo would have very short straps sewn into loops or around rings) what they have in common is that these straps MUST be well anchored to the body panel.
The general rule is to have enough extra strap to overlap it with your main body panel piece by at least 3"-5 and then attach it with an x box (literally a rectangle with an X going from corner to corner, all sewn with one continuous line of stitching) and go over the x box with 2 or 3 lines of stitching. Use an all-purpose 100% polyester thread for strength.
The strap should be either X-boxed to a heavy duty, tightly-woven body panel layer, and then sandwiched between that layer and another sturdy panel layer with the decorative panel on the opposite side, OR the strap can be sandwiched between two moderately heavy body layers and x-boxed through all of the layers at once. (See 2layer_vs_3layer.pdf)
Straps should ALWAYS be attached using a machine, never sewn by hand. Machines offer more consistent tension and stitch length than can be achieved by hand.

How Many Body Panels?
Text & Graphics Tutorial on 3- and 2-layer body panel assembly: 2layer_vs_3layer.pdf A common question regarding soft structured buckle carriers, meh dais, and onbuhimos. Do I need 2 body panels or 3? The generally accepted answer is that you have two options. Click the link above for a graphic demonstration, but the short answer is to either sandwhich the straps between 2 layers that are both 220gsm or above and x-box through both body layers and the straps in between, or you can do 3 layers: straps attached to an internal layer of 220gsm or above, an additional heavyweight layer on top of the straps (185gsm or above), and a decorative layer on the opposite side (any weight, quilter's cotton is fine for this application. This method hides the x boxes and allows for a greater variety of fabrics to be used.Choosing Foam for SSC Straps and Waistbands
Check out this article from SewToot about choosing padding for your soft structured carrier!Ring Sling Shoulders
While a no-sew ring sling is safe with plenty of fabric pulled through the rings, if you are sewing in your shoulder it is recommended to use 100% polyester all-purpose thread for strength (heavy duty thread is unnecessary and will likely snarl up in your machine if you aren't used to working with it) and to use a sewing machine to sew the reinforcement stitches. Hand sewing does not offer the consistent stitches and tension that a machine can. A ring sling shoulder should have at least three horizontal lines of stitching securing the shoulder in place.Hems
The hem is the finished edge of fabric. A serger finishes the edge of the fabric with overcast stitches, and is fine for keeping edges from unraveling in the wash, or especially for keeping pieces of a carrier made from a woven wrap from unraveling while you work. However, for most applications, a rolled or folded hem (in which the fabric is folded over twice, usually just about 1/4" or 1/2", and then stitched down with a straight stitch) is preferred. The folds offer more strength to prevent tears from happening, and are smoother against baby skin. Unlike most baby carrier sewing, hems CAN be safely sewn by hand, and CAN be sewn using 100% cotton thread. For neater-looking corners, especially with tapered wraps whose corners are not square, check out this graphic-and-text tutorial: Mitered Hems For neat, professional looking corners, you can "miter" the corners. This is done after ironing the two folds for your hems but before sewing them down.

Wrap Conversion Carrier Definitions
For a description of canvas, full wrap conversion, half warp conversion, and semi wrap conversion SSCs, you can check this post on Tula's website.More Info
Check out this page for more detailed safety information with your DIYs! --| | | |
Nyia Tutorial
What is a Nyia?
|
|
Modern Nyia with angled straps
Image sourced from southlondonslings.co.uk |
Description
A narrow and long rectangular "blanket" is attached to a long, continous strap coming out horizontally from the top corners of the "blanket." Some have two angled straps coming out of the top corners more like a meh dai, instead.
Good For
- Front Carries: Good for all ages
- Hip Carries: Good for babies with strong trunk control.
- Back Carries: All ages (for experienced wearers only)
- Forward Facing: Not designed for forward facing.
Advantages
Simple, traditional construction. Less "material" to deal with than a meh dai or a woven wrap. Breathable in warm weather. Size is nearly universal for all wearers and wearees.Disadvantages
Less common carrier makes documentation on usage harder to find. Safety standards have not been created for nyia, so no commercial nyia exist that pass current carrier safety testing.Variations
- Straight straps: Top straps are horizontal, parallel with the top of the carrier, and sometimes one continuous strap going through the top of the blanket.
- Angled straps: Top straps are two independent straps anchored at an angle to the blanket more like the construction of a modern meh dai.
Sizing
One size fits most. Total combined strap length should be somewhere between the wearer's "base size" wrap (the length needed in a wrap to do front wrap cross carry) and a base-2, so plus size wearers may occasionally need slightly longer straps. Unstructured "blanket" fits newborn-toddler.How to Use
Tutorial
Basic Steps
- Choosing strap fabric
- Choosing blanket fabric
- Bonus: Cutting layouts
- The Strap
- The Blanket
- Assembly
- Learn to use it
- More tutorials
Choosing Strap Fabric
Summary: Cut one strip of bottomweight fabric approximately 15" wide and 180" long, or two strips 15" wide and 90" long.Choosing Blanket Fabric
Summary: cut a blanket for a nyia approximately 20" wide and 36" long from a woven fabric. For a podaegi, cut a blanket approximately 60" wide and 36" long.Bonus: Cutting Layouts
Trying to figure out how much fabric you need? Hopefully these cutting layouts will help: nyia_cuttinglayouts.pdfThe Strap
Summary: If you started with 2 shorter strap pieces, seam them together with a french or flat felled seam. Hem around all 4 edges. Pleat the center portion of the strap that wil be inside the blanket, and add padding if desired.Start with the edges you are going to join together parallel, but offset from each other by about 1/4". Stitch a straight line of stitches approximately 1/2" from the top fabric's edge (3/4" from the bottom layer's edge). Fold the overhang from the bottom layer over the end of the top layer and iron it down flat. Then spread the wrap out flat and fold the flap over the opposite way so the raw, folded over edge is hidden. Iron that down flat. Then run another straight line of stitches right along the fold to stitch the "flap" down.
 Strap: Step 2 - Hemming
Once you have on long, continuous length of fabric, you simply need to hem all four edges. You can be thorough by folding each edge over about 1/4", iron, and then fold that over another 1/2", iron, and then pin before sewing the fold down with a straight stitch. However, if you are comfortable with your sewing machine, you can just fold it by hand as you go. You could also use a hemming foot if you have one and are familiar with it.
The short edges at the end of the strap can be hemmed normally, tapered and hemmed, serged, or even fringed, all based on personal taste. If you fringe the ends, either tie the fringe into a series of knots or run a line of stitching along the fabric above the fringe to keep any more of the fabric from unraveling.
Strap: Step 3 - Pleating
Time to pleat your strap! You'll want to pleat whatever will be inside the blanket. Since my blanket is about 20" wide, I pleated about 22" of my strap right in the center, which meant marking my strap at the center with chalk or a fabric pencil and then 11" from the center on either side. Then measure along the width of your strap and mark the center in this direction. Mark each half in thirds. Repeat this along the midline, and then again along your lines 11" from the center on either side. My strap was just over 12" wide, so my marks were all about 2" apart.
Then, to pleat, I brought the top-most mark and folded it down to meet the center mark, then ironed it down. I then brought the bottom-most mark up to the center and ironed that in place. I repeated with the marks 11" to each side, so that the entire 22" was pleated.
Strap: Step 2 - Hemming
Once you have on long, continuous length of fabric, you simply need to hem all four edges. You can be thorough by folding each edge over about 1/4", iron, and then fold that over another 1/2", iron, and then pin before sewing the fold down with a straight stitch. However, if you are comfortable with your sewing machine, you can just fold it by hand as you go. You could also use a hemming foot if you have one and are familiar with it.
The short edges at the end of the strap can be hemmed normally, tapered and hemmed, serged, or even fringed, all based on personal taste. If you fringe the ends, either tie the fringe into a series of knots or run a line of stitching along the fabric above the fringe to keep any more of the fabric from unraveling.
Strap: Step 3 - Pleating
Time to pleat your strap! You'll want to pleat whatever will be inside the blanket. Since my blanket is about 20" wide, I pleated about 22" of my strap right in the center, which meant marking my strap at the center with chalk or a fabric pencil and then 11" from the center on either side. Then measure along the width of your strap and mark the center in this direction. Mark each half in thirds. Repeat this along the midline, and then again along your lines 11" from the center on either side. My strap was just over 12" wide, so my marks were all about 2" apart.
Then, to pleat, I brought the top-most mark and folded it down to meet the center mark, then ironed it down. I then brought the bottom-most mark up to the center and ironed that in place. I repeated with the marks 11" to each side, so that the entire 22" was pleated.
 Strap: Step 4 - Padding
Padding your strap is completely optional. I decided to add 3 layers of fleece I had leftover from another project. I folded a single layer over 3 times to equal the width of my pleated strap (so about 12" of fleece folded in thirds to be 4" high) and then cut the length to just a bit narrower than my blanket (19".) If I were making a traditional podaegi with a wide blanket, I would probably only pad the 15"-20" right in the center, personally. The padding is for baby's benefit; I personally thing that padding along the straps over your shoulders would simply keep the straps from spreading well and be cumbersome.
I then simply put it inside the pleats, and then pinned it into place. At this point, I took it to the sewing machine and ran a few vertical lines of stay stitching in the center and along each edge just to keep my pleats and padding in place.
Strap: Step 4 - Padding
Padding your strap is completely optional. I decided to add 3 layers of fleece I had leftover from another project. I folded a single layer over 3 times to equal the width of my pleated strap (so about 12" of fleece folded in thirds to be 4" high) and then cut the length to just a bit narrower than my blanket (19".) If I were making a traditional podaegi with a wide blanket, I would probably only pad the 15"-20" right in the center, personally. The padding is for baby's benefit; I personally thing that padding along the straps over your shoulders would simply keep the straps from spreading well and be cumbersome.
I then simply put it inside the pleats, and then pinned it into place. At this point, I took it to the sewing machine and ran a few vertical lines of stay stitching in the center and along each edge just to keep my pleats and padding in place.

The Blanket
Summary: Hem the two long sides of your nyia blanket (or the two short sides of your podaegi blanket.) Either hem or fringe the bottom of your blanket.
Assembly
Summary: Fold the top of the blanket over the center of the strap and secure with both vertical and horizontal stitches. What I should have done
Were I to do it again, I would make my life a little easier by doing this, instead. If this is unclear, check out the " Nyia_Basic.pdf" tutorial, which explains this method with pictures.
Lay the blanket out, right-side-down. Fold over the top 1/2" and iron. Measure the width of your pleated wrap (in my case, 4.5") and fold the top of the blanket down about a 1/2" more than your pleated strap width (so in my case, about 5".) Pin along the folded edge and iron it down. Take to the sewing machine and stitch the edge down, so you have a 4"-5" pocket running along the top of the blanket.
At this point, feed the strap through this pocket, being careful to center it. Then, pin it in place, and run a straight line of stitching along the two open sides of the blanket to hold the strap in place.
Finishing Up
A couple extra lines of stitching along the "headrest" (the portion of the blanket with the strap running through it) will keep the strap from bunching and will add some support. I just ran some simple horizontal lines along mine, but you could also do some quilted designed, decorative stitches, or other shapes.
What I should have done
Were I to do it again, I would make my life a little easier by doing this, instead. If this is unclear, check out the " Nyia_Basic.pdf" tutorial, which explains this method with pictures.
Lay the blanket out, right-side-down. Fold over the top 1/2" and iron. Measure the width of your pleated wrap (in my case, 4.5") and fold the top of the blanket down about a 1/2" more than your pleated strap width (so in my case, about 5".) Pin along the folded edge and iron it down. Take to the sewing machine and stitch the edge down, so you have a 4"-5" pocket running along the top of the blanket.
At this point, feed the strap through this pocket, being careful to center it. Then, pin it in place, and run a straight line of stitching along the two open sides of the blanket to hold the strap in place.
Finishing Up
A couple extra lines of stitching along the "headrest" (the portion of the blanket with the strap running through it) will keep the strap from bunching and will add some support. I just ran some simple horizontal lines along mine, but you could also do some quilted designed, decorative stitches, or other shapes.

Learn to use it
External Links to Other Tutorials
The following are more podaegi tutorials. These have some different tips and construction styles. Most of the techniques used in this tutorial were based on the first tutorial, which uses a turkish towel.- (Downloadable PDF) Angelas_Turkish_Towel_Podaegi.pdf (Created by Angela McReynolds)
- (Downloadable PDF) Nyia_Basic.pdf (Same method as above, with less descriptions and more pictures. Printable!)
- (Downloadable PDF) Nyia_Angled_Strap_Basic.pdf Nyia with angled straps like a meh dai
- Pod Tutorial
- Reversible Wrap Pod or Mei Pod
- Good Families Do Blog Podaegi Tutorial
- Sew She Sews Blog Podaegi Tutorial
| |
Hybrid Carriers and Carrier Conversions
While many carriers fit into the broader categories of wraps/slings, Asian style baby carriers, or full buckle carriers, the babywearing world is full of constant innovation. As such, there are carriers that are either too obscure to get their own page, or are a hybrid of two major carrier types. Most major carriers started as some sort of hybrid to begin with (standard ergonomic soft structured carrier are essentially a hybrid of the narrow based buckle carriers and the more traditional meh dai, for example) this page is a place for carriers like this that have not yet become "standard." This page will also include tutorials for converting one style of carrier into another style.Please use caution when using a hybrid carrier. Because many of them have not been commercially safety tested, there are not "standards of use" for many of them, like their are for standard commercial carriers, so the rules for age appropriateness, back carries, and positioning may be up to the wearer to determine. These are not always the best option for beginner wearers who may not be fully well-versed in all of the intricacies of wearing. When in doubt, getting help from a Volunteer Babywearing Educator with your local Babywearing International group can be helpful in making sure you are using your carrier safely and effectively.
Carrier Conversions
Meh Dai to Ring Onbuhimo Conversion: MDtoRingOnbuhimo.pdf Meh Dai to Loop Onbuhimo Conversion: MDtoLoopOnbuhimo.pdf Tie Waist Meh Dai to Ring Waist Meh Dai Conversion: MDtoRingWaist.pdfHybrid Carriers
Onbuimo/Nyia Hybrid - Tutorial by Anglea McReynolds - Download: Turkish-Towel-fabric-loop-Onbuhimo-pattern.pdf A carrier that can be worn as a nyia or an onbuhimo, with or without the bottom of the panel flipped up between child and wearer to limit body contact. Pattern utilizes a turkish towel as the material.Buckle Waist Woven Wrap - Walkthrough by Alyssa Leonard - Download: buckle_wrap_walkthrough.pdf Inspired by the XOXO Buckle Wrap Baby Carrier, this carrier comebines the ease of a buckle waistband with the cozy, flowy snugness of woven wraps.
Sling/SSC Hybrid - Walkthrough by Sarah Wiley Curtis - Download: Sling-SSC_hybrid_3.pdf Similar to the Emeibaby Carrier, this carrier is essentially a full buckle ergonomic soft structured carrier, but replaces the majority of the body with an unstructured sling with ring adjustments on the side, allow the panel to adjust for any age child with no insert needed.
Meh Dai/SSC Hybrid with Rings ( formerly but innappropriately called a "ring tai") - Walkthrough from Bea's World blog, originally created by Heidi (last name?) This carrier is essentially constructed exactly like a modern ergonomic soft structured carrier, except anywhere a SSC would have buckles or ladder locks combined with webbing, this carrier instead uses double sling rings and fabric straps.
Chunei (podaegi/SSC hybrid) - Photo Progress Album by Jané Fourie (album only visible to DIY Babywearing group members) A Chunei is a more obscure type of carrier designed like a simplified podaegi with velcro and buckles. Jané shared her experience in trying to make her own in a photo album within the group.
Pea Pod Hip Carrier by Sew Mama Sew
- This carrier is somewhat of a hybrid between the ease of a buckle carrier and the convenience of throwing a kid on your hip in a sling.
--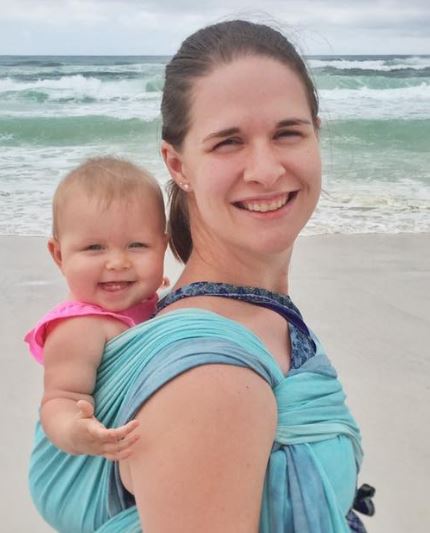 Alyssa Leonard - 2017-04-07
| | | | |
Where to Find Babywearing Materials by Country
This list is just a start for some of the most common materials needed for DIY Babywearing. None of these sources are guaranteed, and this isn't a comprehensive list. This is simply a list of suggestions from the members of our Facebook groupOsnaburg
Osnaburg is a natural-colored, bottomweight muslin-like fabric. It is highly recommended for beginners because of the low cost and excellent wrap qualities once broken in. It works great for wraps and ring slings and breaths nearly as well as linen. Because osnaburg doesn't come in a lot of varieties, it is almost always an excellent choice, and the bolt tags are always clearly labled (although sometimes hard to find.) The only thing to look out for is "J Thompson" brand osnaburg, which has a reputation for being much thinner than other brands and less desireable. Roc-lon is the brand most people use and love. Although "traditional" osnaburg is made from linen, most of the osnaburg available in stores is 100% cotton.
Because osnaburg is sold raw and unprocessed, it has a lot of "gunk" on it from the manufacturing process and it is recommended to scour the fabric before using it for your child. It is a fairly simple process but should not be skipped.
Outside of the US, osnaburg can be insanely hard to find and sometimes very expensive. A decent alternative is heavyweight calico, but make sure you shop by feel since calico varies by weight. You want something sturdy enough that you could make pants out of.
"Calico" outside of the US is a raw, sturdy, unfinished fabric that comes in varying weights, many of which are suitable for babywearing. However, in the US, "calico" refers to thin, printed quilter's cotton which is never safe to use for weightbearing purposes.
- Walmart (USA)
- JoAnn Fabrics (USA)
- Hobby Lobby (USA)
- Amazon.com (online - look for Roc-lon brand)
- Fabric.com (online/USA)
- Fabricland (Canada)
- Abakhan (UK)
- Empress Mills (UK)
- The Cotton Patch (UK)
- Habbydays (UK)
- Katipatch (Australia)
- Spotlight (Australia)
- Everything Fabric (Australia)
- Lincraft (Australia - carries heavyweight calico, not osnaburg)
Duck Cloth
- Walmart (USA - Waverly brand says "wv dk" on the tag)
- Walmart (Canada - sells 1 yard pre-cut pieces big enough for body panels)
- JoAnn Fabrics (USA - tags labeled as "HD" home decor fabric)
- Hobby Lobby (USA)
- Fabric.com (online - avoid "dry clean only" fabrics)
- Cotton Candy Fabrics (online - check their section of "Canvas - Twill Slub" - not all duck but similar weights.)
- Ikea (international)
- Fabricland (Canada - in the upholstery section)
- Marshall's Fabric (Canada)
- Cath Kidson (UK)
- Spotlight (Australia - near the upholstery fabrics)
- Stoffkontor (Germany - 10oz cotton canvas)
Bottomweight Linen
- JoAnn Fabrics (USA - check fiber content carefully!)
- Fabrics-store.com (online - 5.3oz and 7.1oz presoftened linen highly recommended!)
- Ikea (International - look for their "Aina" fabric)
- Dunelm (UK)
- Fabricland (UK)
- MyFabrics (UK)
- Empress Mills (UK)
- Lincraft (Australia)
- Spotlight (Australia)
- Stoffkontor.eu (Germany?)
- Stoffe.de (Germany)
Woven Wrap Fabric by the meter
- Colimaçon et Cie (France)
- Honeycomb Loom (UK)
Tablecloths
- Amazon.com and Amazon.ca (online - look for Mahogany jacquard tablecloths; check frequently as prices sometimes fluctuate)
- Christmas Tree Shops (USA, online - much cheaper jacquard options)
- Target (USA, online - Threshold brand; double check fiber content for polyester)
- LinenTablecloth.com (online)
- LinenSource (online)
- Marshalls, Ross, TJMaxx, Homegoods (USA)
- Ikea (international - especially recommended are the Stilful tablecloths)
- Winners (Canada)
- Sears (Canada)
- The Bay (Canada)
- Home Outfitters (Canada)
- Bed, Bath & Beyond (USA & Canada)
- Jysk (Canada)
- Cath Kidson (UK)
- Dunelm (UK)
- Trade Secret (Australia)
- Spotlight (Australia)
Athletic Mesh
- Stylishfabric.com (online - look for their "football mesh")
- Amazon.com (online - look for Stylishfabric brand football mesh)
- Etsy.com (online - look for Stylishfabric brand football mesh)
- JoAnn Fabrics (USA - hit or miss on availability)
- Walmart (USA - hit or miss on availability)
- Babywearings.ca (Canada - precut pieces)
- Mook's Fabric (Canada)
- Fabricland (UK)
- Spotlight (Australia)
Sling Rings
- Slingrings.com (USA-based, family owned company - fast free shipping!)
- Upscale cloth diaper boutique stores
- Slingrings.ca (Canada)
- diybabywearing.com (Canada - online)
- Two Mothers (Edmonton, Canada)
- Babes in Arms (Calgary, Canada)
- Tiny Tree Hugger (Winnepeg, Canada)
- ringsforbabyslings.co.uk (UK)
- Oscha (Scotland)
- FrangipaniBaby (Australia)
- Karri Tree Lane (Australia)
- The Sleepstore (Australia)
- Woven (New Zealand)
- Snugglebugs (Ireland)
Webbing and Buckles
- Strapworks.com (online - USA)
- Allielane in Abbyville (online - USA)
- SewToot (online - USA)
- Plastic-Buckle.com (minimum $100 order, online - USA)
- JoAnn Fabrics (USA - packages do not list weight rating; contact manufacturer. Some have found weight rated buckles here.)
- Walmart (USA - packages do not list weight rating; contact manufacturer. Some members have found decent WEBBING and LADDER LOCKS here, but not buckles)
- JT's Outdoor Fabrics (Canada)
- Mountain Equipment Co-op (Canada)
- diybabywearing.com (online - Canada)
- Pennine Outdoors (UK)
- Fabricland (UK)
- Anaconda (Australia)
- Woven (New Zealand)
- Super Cheap Auto (Australia)
- Army Supply Stores (Australia)
- DDC Australia (Australia)
Foam Padding
- JoAnn Fabrics (USA)
- SewToot (USA - online)
- Allielane in Abbyville (USA - online)
- Fabricland (Canada)
- diybabywearing.com (Canada - online)
- John Lewis (UK)
- Dunelm (UK)
- John Small Wholesale Furnishings (Southampton, UK)
- Op Shop (Australia - wool blankets for padding)
- Clark Rubber (Australia)
- Woven (New Zealand)
| | | | |
Meh Dai Tutorial
What is a Meh Dai?
| | |
| Infantino Sash Padded Narrow Straps Image sourced from infantino.com | Fidella Wrap-Strap Mei Dai in Blossom Bubble Gum Padded-to-wrap straps Image sourced from fidella.org | Half Buckle Wrap Conversion Meh Dai with hood Image sourced from Etsy shop Obimama |
Description
A rectangular body panel with two long shoulder straps coming out of the top corners diagonally and two shorter waist straps coming out of the bottom corners horizontally. The carrier is tied around the waist hanging down, "wrong-side" out like an apron, and then pulled up over baby. The shoulder straps go over the shoulders, under the arms, and either tie under baby's bum or cross over baby, under baby's legs and then tie.Good For
- Front Carries: Good for all ages
- Hip Carries: Good for babies with strong truck control
- Back Carries: All ages (for experienced wearers only)
- Forward Facing: Good for babies with strong head control and decent truck control; usually requires the carrier to be modified/cinched narrower.
Advantages
Incredibly easy to learn to use. Flexible sizing can fit multiple parents. Offers wrap-like support with the ease of a buckle carrier. Ability (with experience and care to monitor breathing) to back carry newborns safely. Waist-strap and two shoulder straps offer good weight distribution for long wearing. Easy to adjust panel size (by rolling the waistband or cinching the bottom) to fit a newborn.Disadvantages
Panel size is dependent on child's size. Therefore a parent who chooses to wear as their baby reaches toddlerhood or preschooler age may need to upgrade to a toddler-size or preschool-size carrier.Variations
- Wrap strap: Straps are wide (10"-15") and flat like a woven wrap.
- Narrow or "Tube" strap: Straps are sewn into a flattened tube (narrower, usually around 4", and double layered.)
- Padded straps: Section of the shoulder straps closest to the body panel include padding, usually either fleece or open cell foam.
- Half-buckle: Waist straps include a buckle closure instead of a tie closure.
- Ring-waist: One waist strap is replaced by double sling rings, which the other waist strap is threaded through like a D-ring belt.
Sizing
Body panel size is based on child's size. Body panel should be tall enough to reach at least up to baby's armpits but not so tall that baby's airway is obstructed. (The waist band can be "rolled" an extra time to shorten a too-tall panel.) The width should be wide enough to support baby's legs from knee-pit to knee-pit, while still allowing the legs to swing freely at the knee. (The body panel can be cinched with a ribbon or hair tie to make it narrower for smaller babies.) The strap length is determined by the wearer's size. Most mei tai strap lengths are considered one-size-fits-most.How to Use
- Basic Meh Dai Front Carry
- How to Use a Meh Dai with a Newborn
- Meh Dai High Back Carry
- Meh Dai Hip Carry
- Printable Instruction Card: mehdai_instructioncard.pdf (Great for including with gifts)
External Tutorials
If you are interested in drafting your own pattern, check out the construction basics (specifically x boxes and body panel layers) and the basic measurements of straps and body panels. A basic beginner's tutorial: Meh_Dai_Wrap_Strap_Basic.pdf This tutorial is a great place to start if you want to combine elements from different tutorials. Start here, and use other tutorials to figure out how to add shaping to your body panel, padding to your shoulder straps, a ring waist, or other features.Watch our Sew Along videos in our Facebook group by searching the group for "#sewalong #mehdai" (must be a member to watch.)Tutorials and external Links:
- Downloadable PDF: Meh_Dai_Wrap_Strap_Basic.pdf (Printable, no frills, very simple.)
- Sew Along Video Series in our Facebook Group
- Very Basic Tutorial from Sleeping Baby Productions
- SewToot (paid pattern; includes lots of features, Facebook support group and numerous variations)
- Wrap Strap Tablecloth Conversion Meh Dai
- Fine & Fair Tablecloth Conversion Meh Dai Pattern
- Meh Dai with Interchangeable panels
- Barefoot & Pregnant Adjustable Panel Meh Dai
- Hobo Mama Meh Dai with padded straps
- Bea's World Meh Dai with rings (note: a ring meh dai is technically more like a SSC than a meh dai and should be considered as such for safety purposes)
- McCall's M5678 (Note: we do NOT recommend the pouch sling in this pattern for numerous reasons!)
Mei Tai Tutorial
(skip to tutorials)What is a Mei Tai?
Pronounced "MAY-tie." Also referred to as: MT, brand names Fidella Fly Tai, Infantino Sash, Sew Toot Versatai Traditional Chinese origin. | | |
| Infantino Sash Mei Tai Padded Narrow Straps Image sourced from infantino.com | Fidella Fly Tai Blossom Bubble Gum Padded-to-wrap straps Image sourced from fidella.org | Half Buckle Wrap Conversion Mei Tai with hood Image sourced from Etsy shop Obimama |
Description
A rectangular body panel with two long shoulder straps coming out of the top corners diagonally and two shorter waist straps coming out of the bottom corners horizontally. The carrier is tied around the waist hanging down, "wrong-side" out like an apron, and then pulled up over baby. The shoulder straps go over the shoulders, under the arms, and either tie under baby's bum or cross over baby, under baby's legs and then tie.Good For
- Front Carries: Good for all ages
- Hip Carries: Good for babies with strong truck control
- Back Carries: All ages (for experienced wearers only)
- Forward Facing: Good for babies with strong head control and decent truck control; usually requires the carrier to be modified/cinched narrower.
Advantages
Incredibly easy to learn to use. Flexible sizing can fit multiple parents. Offers wrap-like support with the ease of a buckle carrier. Ability (with experience and care to monitor breathing) to back carry newborns safely. Waist-strap and two shoulder straps offer good weight distribution for long wearing. Easy to adjust panel size (by rolling the waistband or cinching the bottom) to fit a newborn.Disadvantages
Panel size is dependent on child's size. Therefore a parent who chooses to wear as their baby reaches toddlerhood or preschooler age may need to upgrade to a toddler-size or preschool-size carrier.Variations
- Wrap strap: Straps are wide (10"-15") and flat like a woven wrap.
- Narrow or "Tube" strap: Straps are sewn into a flattened tube (narrower, usually around 4", and double layered.)
- Padded straps: Section of the shoulder straps closest to the body panel include padding, usually either fleece or open cell foam.
- Half-buckle: Waist straps include a buckle closure instead of a tie closure.
- Ring-waist: One waist strap is replaced by double sling rings, which the other waist strap is threaded through like a D-ring belt.
Sizing
Body panel size is based on child's size. Body panel should be tall enough to reach at least up to baby's armpits but not so tall that baby's airway is obstructed. (The waist band can be "rolled" an extra time to shorten a too-tall panel.) The width should be wide enough to support baby's legs from knee-pit to knee-pit, while still allowing the legs to swing freely at the knee. (The body panel can be cinched with a ribbon or hair tie to make it narrower for smaller babies.) The strap length is determined by the wearer's size. Most mei tai strap lengths are considered one-size-fits-most.How to Use
- Basic Mei Tai Front Carry
- How to Use a Mei Tai with a Newborn
- Mei Tai High Back Carry
- Mei Tai Hip Carry
External Tutorials
The following are some links to specific tutorials. These are all great tutorials. However, if you want to draft your own pattern or want more details about your options, scroll past these for information on all your different variation options.- Downloadable PDF: Mei_Tai_Wrap_Strap_Basic.pdf (Printable, no frills, very simple.)
- Very Basic Tutorial from Sleeping Baby Productions
- SewToot Versa-Tai (paid pattern; includes lots of features, Facebook support group and numerous variations)
- Wrap Strap Tablecloth Conversion Mei Tai
- Fine & Fair Tablecloth Conversion Mei Tai Pattern
- Mei Tai with Interchangeable panels
- Barefoot & Pregnant Adjustable Panel Mei Tai
- Hobo Mama Mei Tai with padded straps
- Bea's World Ring Tai (note: a ring tai is technically more like a SSC than a MT and should be considered as such for safety purposes)
Tutorial Sections
Fabric Needed
Tablecloths are popular choices for mei tai conversions for their combination of strength, floppiness, and pretty patterns. Make sure your tablecloth is safe to use and choose an appropriate size. Most tutorials need a minimum of a 60"x84" tablecloth, but you may want a longer tablecloth if you are larger than a US 10-12 or if you prefer longer straps for supportive finishes. If you are working with bolt fabric like duck or twill, it will depend on what your fabric's width is. A good generalization would be about 4 yards of a sturdy, bottomweight fabric, plus a 1/2" yard of whatever fabric you want on the outside of the body panel.Side note - a mei tai needs 2 layers of supportive, bottomweight fabric for the body panel. Many patterns do 3 layers, for a number of reasons. First of all, the third layer can be quilter's cotton or another "unsafe" material that is decorative and gives you the pattern you want. Many licensed character fabrics, for example, are quilter's cotton and generally not strong enough to use on their own, but can be layered over bottomweight fabric and paired with bottomweight straps to give you the look you want. Second of all, a three-layer construction allows you to hide all of your reinforcement stitching on the inside layer, giving your finished carrier a clean, seamless look. If you choose to do 3 layers, you will need less than a square yard (half a yard if you making an infant size and the pattern can be cut out sideways) of your decorative outer layer fabric. The internal layer needs to be particularly strong to hold reinforcement stitches. While osnaburg is a good, wrap-safe bottomweight fabric, it does not do particularly well as a middle layer of a body panel. Duck cloth, canvas, or heavy twill are better options. Just a 1/2 yard is plenty.
Panel Styles & Sizes
A mei tai panel can be incredibly simple - just a plain rectangle. Many people choose to do a rounded edge on top, similar to the Infantino Sash mei tai, for a cleaner look and a little extra neck support. You can also make an "hourglass" shaped body panel that curves in at the middle of the sides; not only does this create more airflow for a cooler carrier, but it also means that if you are using it for a little baby that requires you to roll the waistband an extra time to shorten the panel, you are also automatically narrowing the base for their little legs and may not need to "cinch" the bottom like you normally would for a newborn. The goal for the body panel is to extend from the neck (for a young baby) or armpits (for an older baby or toddler) down to under their bum and back up between the two of you several inches to create a "hammock." The width should fully support baby knee-to-knee but still allow the legs to bend freely at the knee. If the panel is too narrow, as long is your child is of a walking age, this is more of a comfort issue than an actual danger. If it is too wide, you can cinch the bottom (just by scrunching it with your hands while putting baby up if the fabric is particularly floppy, or tied with a ribbon or hair tie with a stiffer/newer carrier.) The easiest way to size your panel is to measure a carrier that you know fits well, but for many DIYers this is not an option. Luckily, the lovely mama who writes the Fine and Fair blog created a Tablecloth Mei Tai Tutorial and suggests these panel measurements:| Size | Width | Height |
|---|---|---|
| Infant | 14-15" | 20" |
| Toddler | 17-18" | 22" |
Shoulder Straps
While there are a couple ways you can make your shoulder straps, there are two basic designs: wide, single-layer "wrap straps," (Like the Fidella Fly Tai, which also includes some padding at the base of the strap) or narrow, flattened tube-like straps (like the Infantino Sash mei tai.) Either of these may or may not include padding at the base of the strap where it attaches to the carrier to cushion the shoulders. Wrap style straps are typically a minimum of 80" long (finished; don't forget to account for shrinkage and the 5" of strap that will be sunk into the body panel) and may be done much longer for plus-size mamas, broad dads, or wearers who prefer the extra length for supportive finishes, such as a tibetan tie-off. 10"-15" is a fairly standard width for wrap straps (finished - add an extra inch or two when cutting them from your fabric.) Wrap straps simply need three sides hemmed with a double folded hem. You can leave the short end that will be inside the carrier unhemmed, or just run a zigzag stitch along that edge if you are concerned about it. Wrap straps will need to be pleated at the end that will be inserted into the body panel. This can be done however you wish, but a good goal is to pleat them down to about 3"-4" wide. A flattened tube strap, like what the Infantino Sash Mei Tai uses, is typically a minimum of 70" long (or longer, as stated above.) Jan from Sleeping Baby Productions suggests cutting them 12"-17" inches wide (giving you a finished width of about 6 1/2") but you can go narrower. The Infantino Mei Tai's straps are only 4" wide, which means you would start with your fabric only 8 1/2" or 9" wide. Instead of hemming the edges, you would fold your fabric lengthwise, right-sides-together, and run a straight stitch along the open edge down the length of the fabric and across one short end. You would then turn the tubes right-side-out, like a pillowcase. You can leave the ends blunt, or taper them at a 45 degree angle. This is simply a matter of appearances and has no functional difference. Either style of straps can be made with padding in the 15" or so closest to the body panel for more cush on the shoulders. This is easiest to do with a tube-style strap because you simply stuff the open end with a few layers of fleece. (Stitch the layers of fleece together before stuffing so they don't bunch up quite as much while trying to get them in.) The Barefoot and Pregnant tutorial is very in depth with a lot of extra features. One of these features that she explains is how to do a hybrid padded-to-wrap style should strap (in parts 9 and 10 of her tutorial.)Waist Straps
Mei tais have a number of waist strap options. For the most part, the options are:- Wrap Straps
- Flattened Tube Straps
- Wrap Strap with Ring Waist
- Buckle Waist
Construction - 2 layer body
The most important part of constructing a mei tai after choosing safe fabric is making sure that your straps are well anchored to your body panel. There are two methods to do this. The first is if you are using two body panel layers. Both of these layers should be strong, woven, bottomweight material. Lay your two body panel pieces together, right sides together, and topstitch around the outside edges, leaving the four strap holes open. Turn the body right-side-out through one of the openings and iron flat (turn the open edges around the strap opening inside the carrier and iron these edges flat, too.) Insert your shoulder straps through the top holes, coming out of the top of the carrier at about a 45 degree angle and sunk into the body about 5". Pin these into place, and then secure them to the body by sewing an x box through all of the layers - simply a rectangle with an X going from corner to corner. These stitches in multiple directions secure the strap from stress from multiple directions. Insert your waist straps similarly at the bottom, running horizontal to the bottom edge. Secure with x boxes as well. Now top stitch around the entire outside edge of the body panel.Construction - 3 layer body
This method hides your reinforcement stitches and also allows you to use a typically unsafe fabric like quilter's cotton for a decorative outside layer. Pin your straps to the inner (hidden) layer of your mei tai. Shoulder strap should be coming out of the top corners and about a 45 degree angle and sunk in about 5". The Waist straps should be coming out of the bottom corners horizontal to the bottom of the body panel, again sunk in 5". Secure all the straps with x boxes. Here's where it gets tricky. Lay your internal layer (that has all the straps reinforced to it) with the straps on the UNDERSIDE, and the right sides of the straps UP. Lay your decorative, pretty layer on top, right side UP. Lay your bottom layer, that will be against baby's back, right side DOWN on top of all this. Pin these three layers together and then top stitch around the top and side edges, leaving the strap holes and bottom open. Then turn the carrier right side out (reaching between the decorative layer and the layer that will be against baby) and make sure you pull the straps through the holes. Iron the carrier flat, turning the strap hole edges and bottom edge in. Top stitch around the entire carrier.Learn to use it!
Make sure you are always using the TICKS rules for Safe Babywearing! Here are a few YouTube videos to get you started.- Basic Mei Tai Front Carry
- How to Use a Mei Tai with a Newborn
- Mei Tai High Back Carry
- Mei Tai Hip Carry
| |
No Sewing Machine? No Problem!
If you don't have a sewing machine, you can still join the DIY community! Here are some things you can make without a sewing machine!Stretchy Wrap
A stretchy wrap is the simplest diy out there. Simply buy 5 or 6 yards of an appropriate fabric (100% cotton jersey is the most popular, or 100% lycra or polyester athletic mesh if you want to use it in the water) and cut it down to 20"-30" wide. Done! Jersey and athletic mesh do not need to be hemmed as they will not unravel. Bonus: most of these fabrics come 60" wide so you can get 2 or 3 wraps out of the fabric you bought.Dual Pouch Carrier
Similar to the K'tan-brand baby carriers, a Dual Pouch Carrier is an easy no-sew, 5-minute carrier made out of 3 t-shirts that is great for newborns and small infants!Woven Wrap
A woven wrap does need to be hemmed to keep the edges from unraveling and protect the edges from tears. However, hems are not weight bearing and can either be done by hand, or you can take your cut-to-size fabric to a local dry cleaners or alterations shop and have them hem it. This is generally around $15 but may vary based on the size of your wrap and your local business's prices. If you want a short wrap, you can buy a 60"x120" tablecloth, cut it in half to 30" wide and then only have one edge that needs hemming.Pouch Sling (sort of)
If you sew a short woven wrap (again, hemming by hand or having a dry cleaners do it) you can tie it into a simple hip carry and keep it knotted forever and use it just like a pouch sling for quick ups.Ring Sling (no sew)
A no sew ring sling is essentially a carry for a short woven wrap, which can be hemmed by hand or by a dry cleaners, but you can keep it threaded permanentaly and use it just like you would a ring sling with sewn-in rings. The tension of baby's weight keeps the shoulder in place and it is just as safe as a sewn ring sling.Modify a store-bought carrier
Another budget option is to buy a budget store-bought carrier and modify it to make it personal with suck pads or a slipcover. These can both be safely hand-sewn, or you can use a 5T t-shirt as a no-sew slipcover for most mei tais and buckle carriers. Infantino makes several budget carriers that are sold in big-box stores like Walmart and Target. The Infantino Sash Mei Tai is especially popular. In addition, if you can find an Infantino Slingrider or Wendy Bellissimo pouch sling (both recalled) in a resale shop (they typically sell for $1-$5) you can send it in to Infantino and they will send you a brand new Infantino Sash meh dai in return!Safety Reminder: While hems are safe to sew by hand, it is not recommended to sew any kind of reinforcement stitches by hand. A sewing machine can provide more even tension and therefore more consistent, even and strong stitches.--
» Nobody Group
- Member list:
- Set GROUP =
- Persons/group who can change the list:
- Set ALLOWTOPICCHANGE = TWikiAdminGroup
| | | |
No Sew Ring Sling
A no sew ring sling is a great way to make a ring sling without the difficulty of sewing the shoulder, and also a way to use a shorty wrap. To make a No Sew Ring Sling, first make a short woven wrap - a base-3 or base-4 (size 2 or 3 for an average sized woman.)Contrary to popular belief, a no sew ring sling does still require the edges of your fabric to be hemmed. If you don't own a sewing machine, this can be done by hand or by a local dry cleaners.Then, using a pair of large sling rings, follow these instructions
Onbuhimos vs Meh Dais/Bei Dais vs Podeagis
A common confusion within the babywearing community is the difference between the different styles of traditionally Asian baby carriers. Hopefully this will clear it up and help you decide if one of these styles would work for you!Side note: These carriers are an integral part of the cultures they are from, and as such, it is our job to respect those cultures by using these terms accurately. Part of this includes not shortening the words, coming up with our own nicknames for the carriers, or hacking the words apart to form "modifiers." For example, an onbuhimo made with buckles is a buckle onbuhimo, not a buckle-bu. A meh dai with wrap straps is a wrap strap meh dai, not a wrap-dai or wrap-tai.For more information on different carrier types, check out this page: Carrier Types
Meh Dai
| Description | Appropriate Age | Versatility | Comfort | Ease & Speed | Instructional Videos | |
|---|---|---|---|---|---|---|
| |
Roughly rectangular body panel. Two top corners each have a long-length strap.
Two bottom corners each have a medium-length waist strap. Variations include one waist strap being replaced by double rings, or the waist being replaced by a full buckle waist. |
Birth through toddler | Good for front, hip or back carries at nearly any age, dependent on wearer's skill. | If well adjusted and tightened, meh dais can be one of the most comfortable carriers for long wearing. Waist straps and shoulder straps distribute weight evenly, and long shoulder straps can be used for further reinforcement. | Fairly easy to learn to use, but takes more time to put on each time. Waist strap must be tied first, which means the carrier cannot be put on while holding the baby. Takes a little more time to get all the straps wrapped and knotted. | Instructional Videos: |
Onbuhimo
| Description | Appropriate Age | Versatility | Comfort | Ease & Speed | Instructional Videos | |
|---|---|---|---|---|---|---|
| |
Roughly rectangular body panel. Two top corners each have a medium-length strap. Two bottom corners each have a fabric loop, single ring, or double rings. |
Sitting independently through toddler | Designed for back carries only. Can do front carries, too, but can be awkward to thread behind your back. | If worn high and well tightened, can be fairly comfortable, but puts all of the child's weight onto the wearer's shoulders. This may mean the back muscles may need to work up to being able to wear for longer stretches of time. Longer shoulder straps allow for more supportive tie-offs. |
Moderate learning curve, but fairly quick to put on once the wearer is comfortable with it. | Instructional Videos: |
Reverse Onbuhimo
| Description | Appropriate Age | Versatility | Comfort | Ease & Speed | Instructional Videos | |
|---|---|---|---|---|---|---|
| |
Roughly rectangular body panel. Two top corners each have a short, typically padded strap with two sling rings attached near the ends. Two bottom corners each have a medium-length strap. |
Sitting independently through toddler | Designed for back carries only. Can do front carries, too, but can be awkward to thread behind your back. | If worn high and well tightened, can be fairly comfortable, but puts all of the child's weight onto the wearer's shoulders. This may mean the back muscles may need to work up to being able to wear for longer stretches of time. A reverse onbuhimo with longer bottom straps can allow for more supportive tie-offs to assist in weight distribution. |
Moderate learning curve, but fairly quick to put on once the wearer is comfortable with it. | Instructional Videos: |
Buckle Onbuhimo
| Description | Appropriate Age | Versatility | Comfort | Ease & Speed | Instructional Videos | |
|---|---|---|---|---|---|---|
| |
Roughly rectangular body panel.
Each top corner is attached to the adjacent bottom corner by a padded back-pack like strap with webbing. Straps are connected by a chest clip. Variations include buckle closures or ladder-lock adjustment. |
Sitting independently through toddler | Designed for back carries only. Can do front carries in a pinch. Front carries easier with buckle-closure (as opposed to ladder locks) which allow the straps to be crossed in the back. | If worn high and well tightened, can be fairly comfortable, but puts all of the child's weight onto the wearer's shoulders. This may mean the back muscles may need to work up to being able to wear for longer stretches of time. | Moderate learning curve, but extremely quick to put on once the wearer is comfortable with it. Can be tricky to learn how to wear baby high enough. | Instructional Video: |
Podaegi
| Description | Appropriate Age | Versatility | Comfort | Ease & Speed | Instructional Videos | |
|---|---|---|---|---|---|---|
| |
"Body panel" is an unstructured blanket wide enough to wrap around both child and wearer. Horizontal strap runs along the top of the blanket and extends off both sides. |
Birth through toddler | Good for front, hip or back carries at nearly any age, dependent on wearer's skill. | If worn properly and well tightened, can be very comfortable. The unstructured, wrap-like nature of this carrier means that comfort is entirely dependent on how well it is wrapped. | Moderate learning curve mainly due to scarce educational resources, but fairly quick to put on once the wearer is comfortable with it. | Instructional Video: |
Nyia
| Description | Appropriate Age | Versatility | Comfort | Ease & Speed | Instructional Videos | |
|---|---|---|---|---|---|---|
| |
"Body panel" is an unstructured blanket wide enough to cover the child. Horizontal strap runs along the top of the blanket and extends off both sides. Modern variations include angled shoulder straps anchored to a more meh-dai-like body panel. |
Birth through toddler | Good for front, hip or back carries at nearly any age, dependent on wearer's skill. | If worn properly and well tightened, can be very comfortable. The unstructured, wrap-like nature of this carrier means that comfort is entirely dependent on how well it is wrapped. | Moderate learning curve mainly due to scarce educational resources, but fairly quick to put on once the wearer is comfortable with it. | Instructional Video:
|
| Web | Description | Links |
|---|---|---|
| TWiki home with users and groups for access control | |
|
| TWiki documentation, welcome guest and user registration | |
|
| Sandbox web to experiment in an open hands-on area | |
|
| |
||
| Legend: |
|
| | | | |
Wrap Qualities Comparison Charts
The following charts, based on a survey taken, will give you an idea of the wrap qualities of the most popular fabrics for a DIY woven wrap. A lot of these qualities also apply to ring slings and may be useful to know for other types of carriers. If any of these terms seem unfamiliar, check out this blog post by Amy Wraps Babies. |
 |
 |
 |
 |
 |
 |
--
| | | | |
Outside Resources
All of these links are unaffiliated, but can be good resources. This page is still under construction.Related Facebook Groups
These are great if you have questions that cannot be answered by our Facebook group, or are too off-topic to post in our group.- B-S-T DIY Babywearing Supplies
- DIY Baby Carrier Swap
- Everyday Babywearing (An inclusive global babywearing group; great for fit checks!)
- Geeky Wrappers (dedicated to woven wrapping; great for detailed troubleshooting!)
- Dyed Baby Carriers
- Just Sew (great for general sewing troubleshooting)
- Fluff Love Sewing (sew group centered around cloth diapering)
- DIY Home and Baby
- Peace, Love, Babywearing
- Australia & New Zealand Babywearing DIY
- Babywearing on a Budget (a buy/sell/trade group for carriers $100 and under)
Common Group Searches
These are all links to search queries or popular posts within our Facebook group that are common topics of discussion. All of these are visible by group members- Discussions about fabric selection
- Sew Along Videos for various carrier types
- Favorite Ring Sling Materials
- Hot weather babywearing options
- Our group photo albums, sorted by carrier types
- Small Business Links
- If you are curious about the "double ring sling" for twins, read the comments on this post
Outside Links
Outside websites that you may find helpful.- Sleeping Baby Productions has a lot of information on DIY slings and shoulder styles
- Wraplena is an under-construction website with some great beginner woven wrap info
- Find a local Babywearing International chapter by looking on their website
- Fabrics-Store.com - A great source for quality, weight-listed linen
- StylishFabric.com - Their "football mesh" makes good water slings
- Colimaçon et Cie - woven wrap fabric sold internationally by the meter
- Honeycomb Loom - woven wrap fabric sold internationally by the meter -- Alyssa Leonard - 2017-06-30
| | | | |
Ring Sling Shoulders: Pleated vs Hybrid vs Gathered
Shoulder styles are a completely personal decision. What works for one wearer may not be comfortable for another, and vice versa. There are infinite ways to sew the shoulder, which further complicates the matter. That said, the three most popular shoulder styles are Pleated, Hybrid, and Gathered. This chart highlights some of the advantages and disadvantages of each. In an ideal world, before making a ring sling, you should find a local babywearing group so that you can try on different shoulder styles to see what you like. In reality, though, not everyone has a local babywearing group or can make it to a meeting. A couple options for reality:- Using a tablecloth cut in half, make both a pleated sling and a gathered sling so you can try both
- Sew the rings in using a wide basting stitch with a contrasting thread and try it on with a doll or a weighted purse so you can get a feel for how the shoulder spreads. The wide stitches and constrasting color will allow you to easily remove the thread to change the shoulder. Once you are confident in the shoulder style, re-sew the shoulder with matching thread and 3 lines of smaller stitches.
- Make your ring sling with a little extra length to the tail, so if you hate the shoulder, you can simply chop the shoulder off and re-do it. Hem the tail shorter once you are confident that you like the shoulder.
- Stick to a hybrid shoulder. Most people who LOVE pleated and HATE gathered, as well as most people who LOVE gathered and HATE pleated, can agree that a hybrid style is wearably comfortable.
| Pleated | Hybrid (including Eesti) | Gathered (including Floating Gathered) |
|---|---|---|
| Shoulder is pleated evenly across the width to bring width down where it goes through the rings. It is then folded under and three lines of reinforcement stitching are sewn very close to the rings. Uses the least amount of fabric for the shoulder. Can be sewn with as little as 3" of extra length folded under. Lays neatly on the wearer's shoulder - no bunching or tangling. Easy to get the shoulder portion spread evenly, but does not spread very wide. Less likely to have the edges dig, but also does not distribute the weight of the baby quite as much as a gathered would. Generally (but not always) preferred by very small, thin wearers who feel overwhelmed by the wide spread of a gathered shoulder. On some smaller wearer, the "capped shoulder" of a gathered sling can extend from the neck all the way to the elbow, and pleats help contain this spread. | A few pleats on each rail, with the center of the wrap left straight to gather naturally. The fabric is folded through the rings and the three lines of reinforcement stitching are typically sewn fairly close to the rings. A "floating eesti" shoulder can be done with the stitching 9"-16" away from the rings; in this situation, you can add stitches lengthwise along the folds of the pleats in order to keep them neat and in place. Qualities are typically a balance between pleated and gathered. Less potentially diggy and spread than a gathered, but better weight distribution than a pleated. "Eesti" is a specific style of hybrid shoulder developed by Karen Hoppis. | Shoulder is left to bunch/spread naturally. Fabric is pulled through the rings, folded over and can either be sewn straight across with three lines of reinforcment close to the rings (5" or so) for a traditional gathered shoulder or further away (9"-16") for a floating gathered shoulder. Easiest style to sew. Can be more finicky to adjust on the shoulder; floating gathered especially, due to the double layer over the shoulder, can get bunched and tangled. Floating gathered has two layers of fabric across the shoulder, which adds cush and padding, and puts the seam on your back instead of on the front, where it risks causing a pressure point on your collarbone. While a poorly adjusted gathered shoulder can result in diggy rails, a well-adjusted gathered will give the best, most even weight distribution for longer wearing. |
| | | |
Podaegi Tutorial
What is a Podaegi?
|
| Traditional wide-blanket podaegi Back Carry Image sourced from littleseouls.blongspot.com |
Description
Traditionally, a rectangular "blanket" is attached to a long, continous strap coming out horizontally from the top corners of the "blanket." The blanket is wide enough to wrap around both the wearee and the wearer.Good For
- Front Carries: Good for all ages
- Hip Carries: Not designed for hip carries.
- Back Carries: All ages (for experienced wearers only)
- Forward Facing: Not designed for forward facing.
Advantages
Simple, traditional construction. Cozy for colder weather.Disadvantages
Less common carrier makes documentation on usage harder to find. Safety standards have not been created for podaegis, so no commercial podaegis exist that pass current carrier safety testing.Sizing
One size fits most. Total combined strap length should be somewhere between the wearer's "base size" wrap (the length needed in a wrap to do front wrap cross carry) and a base-2, so plus size wearers may occasionally need slightly longer straps.How to Use
Tutorials
- (Downloadable PDF) Podaegi_Basic.pdf
- Sleeping Baby Productions wide blanket podaegi
| | | |
Pouch Sling Tutorial
What is a pouch sling?
|
| SevenSlings Hip Carry Image sourced from sevenslings.com |
Description
A tube of woven (not-stretchy) fabric is sewn with a reinforcing seam. Worn diagonally like a sash, baby is then placed in the sling like a ring sling. Functions the same as a ring sling, except that there is no size adjustment.Good For
- Front Carries: rated for newborns; typically preferred for babies with strong trunk control due to the lack of support offered unless sizing is absolutely perfect.
- Hip Carries: Good for babies with strong truck control
- Back Carries: Experienced wearers with trustworthy toddlers or older children only. Single-pass back carries are a risk to children who might lean backwards.
- Forward Facing: Good for babies with strong head control and decent truck control. Worn inside the "pouch" of the sling (instead of legs out) sitting cross-legged.
Advantages
Quick to put baby up and get baby out. Folds up incredibly small; can fit in a diaper bag or even a pants pocket for a back-up carrier. Very inexpensive.Disadvantages
No ability to adjust size. Must be sized exactly right in order to provide proper support. One shoulder carries means that it can be less comfortable for longer wearing. Often advertised with newborns in a horizontal "cradle carry" which makes it very difficult to monitor breathing and keep baby from collapsing their chin to their chest. Not good for "seat poppers" or babies who tend to straighten their legs when worn.Variations
- Some brands such as <a href="http://wiki.babywearingdiy.com/do/edit/Main/HotSlings?topicparent=Main.CarrierTypes;nowysiwyg=0" rel="nofollow" title="HotSlings (this topic does not yet exist; you can create it)"> HotSlings </a> do offer some minimal adjustment ability.
Sizing
Sizing is very dependent on both the wearer's and child's size and cannot be adjusted. Therefore, a pouch sling that fits a mom with her newborn may not fit the same mom when her baby is a toddler. If a mom and dad of different sizes wanted pouches to use for two different age children, they therefore may end up needing four different pouches to accomodate all 4 combinations of parent and child.How to use
Tutorials
- Pouch Sling Tutorial (similar to SevenSling brand slings): Pouch_Sling_Tutorial.pdf
- Mobius Sling Tutorial (single twist for better fit!): Mobius_Sling_Tutorial.pdf
- For our Pouch Sling Sew Along Videos, search in the DIY Babywearing Facebook Group for the hashtag "#pouchsling" or use the links below:
- Pouch Sling Sew Along Part 1: Picking Fabric (applies to wraps and slings, too!)
- Pouch Sling Sew Along Part 2: Materials (the other stuff you'll need!)
- Pouch Sling Sew Along Part 3: Measurements (the hardest part of making a pouch sling!)
- Pouch Sling Sew Along Part 4: Sewing the Curve
- Pouch Sling Sew Along Part 5: The Final Product
Sizing Information
Pouch slings must be carefully sized to the wearer. The sizing here gives the range including the shorter circumference (around the top and bottom rail of the pouch.) The widest part of the pouch (around the middle of the curve) would be about 2" wider. Search our Facebook group for the hashtag "#pouchsling" to find a video on measuring yourself for a pouch! Again, this is total circumference - when the sling is laying flat, the length is half of this since it is looped over on top of itself. "Sizing" typically approximately matches what size unisex t-shirt you wear, but this can be affected by a number of factors, include build and baby's size.| Pouch Sling Sizing | Meters | Inches | Yards |
|---|---|---|---|
| WIDTH | 0.5m | 21" | 0.6y |
| Small | 1.2m | 48" | 1.4y |
| Medium | 1.4m | 53" | 1.5y |
| Large | 1.5m | 58" | 1.6y |
| XLarge | 1.6m | 64" | 1.8y |
| | | |
Reverse Onbuhimo Tutorials
What is a Reverse Onbuhimo?
|
|
Reverse Onbuhimo Image sourced from cherryberrybaby.co.uk |
Description
A rectangular body panel with two shorter shoulder straps coming out of the top corners diagonally (usually padded) with double sling rings on each, and two long wrap straps coming out of the bottom corners horizontally. The bottom straps are pre-threaded through the double sling rings on the shoulder straps like one would a ring sling. Baby is put on to the wearer's back high with arms outside of the carrier, and the tails of the straps are pulled to tighten the shoulder straps. Tying off is optional (since the double sling rings lock the straps in place) but longer straps allows for reverse reinforcing passes for more support and/or a tibetan tie-off.Good For
- Front Carries: Not designed for front carries. Possible with long enough straps to cross in the back, add support with reinforcing passes and close off the open sides, but incredibly awkward to cross and thread the straps behind your back.
- Hip Carries: Not designed for hip carries.
- Back Carries: Babies who can sit independently only.
- Forward Facing: Not designed for forward facing.
Advantages
Quick to put on and an unpoppable seat makes it easier to wear wiggly or difficult toddlers who may not have the patience for wrapping. Lack of waist belt is great for anybody who doesn't want the pressure on their waist, including (but not limited to) expectant mothers. Lack of waist belt and tie offs makes them great for tandem-wearing, since there is nothing to interfere with the front baby.Disadvantages
More limited than other carriers, since onbuhimos are really best for older, independently sitting babies and only designed for back carries. Panel size is dependent on child's size. Therefore a parent who chooses to wear as their baby reaches toddlerhood or preschooler age may need to upgrade to a toddler-size or preschool-size carrier. Puts all the weight high and on the shoulders, which can be difficult for some wearers.Variations
- Padded Shoulder: rings are attached on top of a padded strap so the rings do not dig into the wearer's shoulder
- Reverse X-onbuhimo or Reverse Blanketless Onbuhimo: Functions the same as a regular reverse onbuhimo, but instead of separate wrap straps, ring straps and body panel, it is constructed in an "X" shape with two narrow slings, where the overlap of the two slings acts as the "body panel."
Sizing
Body panel size is based on child's size. Baby needs to be able to fit in the carrier arms-out, but the panel must not be so low that baby can lean backwards. The width should be wide enough to support baby's legs from knee-pit to knee-pit, while still allowing the legs to swing freely at the knee. The strap length is flexible, but determined by wearer's size and whether or not the wearer wants to be able to do reinforcing passes or tibetan tie-offs.How to Use
Tutorials
Downloadable/Printable PDF: Reverse_Onbuhimo_Basic_Updated.pdfLinks to unaffiliated, outside sources. Flavorful Experiences - Tablecloth Conversion Reverse Onbuhimo Scraps By Heather - Reverse Onbuhimo with hidden "cinching" system in the body Crafty Mum - Turkish Towel Reverse Onbuhimo --
| | | | |
How to Make a Ring Sling
Cheat Sheet: After reading through the full tutorial, use this printable cheat sheet as a quick reference as you are working on your sling. RingSlingCheatSheet.pdf
Note: The tutorial below is for a single-layer ring sling made of one layer of bottomweight fabric. If you are using lighter weight fabrics and want to make a double layer ring sling, take extra care as the fabrics are not made less prone to tearing by being doubled, but Sleeping Baby Productions does have a few tutorials to do so:
- Reversible sling pairing a lightweight fabric with a bottomweight fabric (Video tutorial)
- Reversible sling pairing a lightweight fabric with a bottomweight fabric (Text and pictures tutorial)
- Double layer sling of two lightweight fabrics (Video tutorial)
- Double layer sling of two lightweight fabrics (Text and pictures tutorial)
Basic Breakdown of Steps
- Pick a safe fabric
- Buy the right amount of fabric
- Buy safe rings
- Scour your fabric (mandatory for osnaburg)
- Wash your fabric
- Dye your fabric (optional)
- Cut to width
- Hem 3 edges
- Pick & sew the shoulder
- Pockets and Accents (optional)
- "Breaking in" or softening your sling
- Learn to use it
Make sure to "expand" each section and read the full details the first time you read through.
1) Pick a safe fabric
Pick a bottomweight fabric that passes the Four Rules of Fabric Selection. It should be made of natural fibers and feel sturdy, like pants or a tote bag, not thin like bedsheets or a handkerchief.- FIBER CONTENT - Natural fibers; no spandex, polyester, or acrylic
- WEIGHT - bottomweight; sturdy like jeans or a tote bag; 185-220gsm or 5-7oz per sq yd
- WEAVE - no stretch; thicker threads; tight weave
- CARE INSTRUCTIONS - machine washable If your ring sling is going to be used in the water, you'll want to follow the guidelines for picking a safe athletic mesh fabric.
A popular choice for ring slings is using a cotton tablecloth. A 60" wide tablecloth that is at least 84" long (ideally closer to 100"+) can be cut in half lengthwise and will only need one raw side hemmed before sewing the rings in for the shoulder. Another good option in the USA is to go to Walmart and look for Waverly brand duck cloth in the upholstery fabrics. It will look a little canvassy, and the bolt tag will have a green circle with the weight "185 gsm" on it. If you are already a member of our Facebook group, check out this poll in the group to see real members' actual opinions and experiences on their favorite materials for a ring sling, or search the group for the hashtag "#fabric" for a number of posts and videos to offer guidance. You can also check this page for people's general opinions about different fabrics' qualities.
2) Buy the right amount of fabric
In general, 3 yards is plenty for almost every size wearer. Remember; you can always chop the tail shorter, but you can't make a too-short sling longer. You need to account for 10%-20% shrinkage and 5"-16" for the shoulder. 3 yards will allow for a 5" shoulder depth and 20% shrinkage and still make an XL sling, so that's a good place to start if you aren't sure.
Do not agonize too much about what size ring sling you need. Aim for the approximate size you think you are. As an example: I am a US size 8-10, 5'7" woman. I wear a small unisex t-shirt and vary between medium and large womens sizes and I can safely use anywhere from an XSmall to an XXLarge sling safely. The usable range is extremely flexible. When in doubt, buy enough fabric for a size up. You can always hem the tail shorter later. A properly sized ring sling can be used easily for either newborns or large toddlers. A ring sling is sized for the wearer, not the child.
| Ring Sling Size Chart |
Finished length rings to tail in meters |
Finished length rings to tail in inches |
Finished length rings to tail in yards |
Total yards needed (includes 5" shoulder depth & 20% shrinkage)
|
|---|---|---|---|---|
| Width | 70cm-80cm | 26"-32" | 0.7y-0.9y | n/a |
| XSmall | 1.7m | 65" | 1.8y | 2.4 (buy 2 1/2y) |
| Small | 1.8m | 70" | 1.9y | 2.5 (buy 2 1/2y) |
| Medium | 1.9m | 75" | 2.1y | 2.7 (buy 2 3/4y) |
| Large | 2.0m | 80" | 2.2y | 2.9 (buy 3y) |
| XLarge | 2.2m | 85" | 2.4y | 3.0 (buy 3y) |
| 2XL | 2.3m | 90" | 2.5y | 3.2 (buy 3 1/4y) |
3) Buy Safe Rings
Most (not all) fabrics for a ring sling will work well in a single layer with 3" large sling rings. Expand below to see a more detailed chart. Always buy unwelded rings DESIGNED for babywearing that have been tested for weight and safe materials. NEVER use rings from a craft store, and we do not recommend any rings from a hardware store.| Large Rings |
Aluminum Ring Dimensions:
|
|
| Medium Rings |
Aluminum Ring Dimensions:
|
|
| Small Rings |
Aluminum Ring Dimensions:
|
|
4) Scour
Scouring is a special deep-cleaning step. If you are using osnaburg, scouring is MANDATORY, even if you are not planning on dyeing the fabric. If you are using any other fabric, you can skip this step.5) Wash & Dry
Make sure to wash and dry all fabrics before sewing. Not only does this ensure you are starting with a clean surface, it will also get any shrinkage out of the way upfront.- Are free of dyes and fragrances (since the fabric will be in direct contact with delicate baby skin)
- Have no added fabric softener (which can coat the fibers and make them slippery)
- Are liquid, not powdered (powdered detergent can build up in the fibers and weaken them)
- Have no optical brighteners*
*Optical Brighteners, or "bluing agents," are often touted to damage fabrics and weaken fibers, but so far there is no scientific data to back this up. The only proven consequence of using a detergeng with OBs is the risk of spotting, plus some fears about having the leftover OBs in the fabric coming in contact with skin. Feel free to do your own research and make your own decisions regarding your family's use of OBs on your baby carriers. Keep in mind that washing a commercial carrier in OBs will drastically reduce resale value, as this is a question many buyers will ask.Washing raw, unhemmed fabric will cause the edges to fray a bit. Unless you are seriously worried about losing an inch or two on the width of your fabric (one reason to wash before cutting), this is not a huge issue. If you are worried about it, you can either use a serger or simply a zigzag stitch on your regular sewing machine along the edges to protect them.
Washing your finished sling: You can wash and dry your finished sling the same way you washed your fabric. The main difference is that you will want to put a dry, clean sock over the rings before putting it in the dryer to keep the rings from knocking around. Never use chlorine bleach or fabric softener on your sling.
6) Dye (Optional)
Dyeing is not nearly as scary or difficult as it may seem, although it is important to make sure to use a fiber-reactive dye when dyeing something that will be in contact with a baby and permanently fix the dye using soda ash.7) Cut to width
Cut the fabric width down to between 28-34 (for a finished hemmed width of 26-32.)Protip: If you have a narrow strip of "waste" fabric leftover after cutting the width, check out the babywearing accessories tutorials, many of which use much smaller pieces of fabric. One great option is to make a coordinating doll sling for an older toddler or young child to wear a babydoll with. This is also a good option if you have an older child who may get jealous of the younger being worn.Note: while "pockets and accents" are listed as an option later in the tutorial, some accents, like a band across the shoulder, edging down the hems, or a band across the tail, may be easier to add before the sling is hemmed and the shoulder is sewn in. Use your best judgement. Pockets, however, I prefer to do at the very end, when I can test the sling and get a feel for exactly how high or low to put the pocket on the tail. If the pocket is too low on the tail, it is nearly impossible to reach while the sling is being worn.
8) Hem your edges
Hem the two long edges of your fabric. If you are confident in your length, you can go ahead and hem the end of the tail as well. Otherwise, you can wait until the very end to hem the end. You can hem the shoulder end, or serge this end (if you have an overlocker) or run a line of zigzag stitches to keep it from unraveling.
 If you really want perfect mitered corners, this is my favorite video that shows how to do it (yes, the video is about dinner napkins. The technique still applies.)
It doesnt matter too much what thread you use for the hems. Any all-purpose thread is fine. Just keep in mind that while polyester thread is stronger, if you plan on dyeing your sling later, polyester wont take dye, so use a thread matching the FINAL color of your sling. Unless you are an experienced sewer, avoid heavy duty thread, as these can jam up your machine and cause all sorts of frustration if you arent used to adjusting the tension. Again, since hems arent structural, feel free to use a straight stitch, zigzag, or even a decorative stitch for your hems. The main point of the hem is just to keep the folded fabric in place.
Depending on the type of extra details (like pockets, or accent fabrics) you want to add to your sling, this may be a good time to sew them onto the fabric, as opposed to trying to add them after the fact.
<iframe frameborder="0" height="315" src="https://www.youtube.com/embed/3uBzwTkUwhY" width="560"></iframe>
If you really want perfect mitered corners, this is my favorite video that shows how to do it (yes, the video is about dinner napkins. The technique still applies.)
It doesnt matter too much what thread you use for the hems. Any all-purpose thread is fine. Just keep in mind that while polyester thread is stronger, if you plan on dyeing your sling later, polyester wont take dye, so use a thread matching the FINAL color of your sling. Unless you are an experienced sewer, avoid heavy duty thread, as these can jam up your machine and cause all sorts of frustration if you arent used to adjusting the tension. Again, since hems arent structural, feel free to use a straight stitch, zigzag, or even a decorative stitch for your hems. The main point of the hem is just to keep the folded fabric in place.
Depending on the type of extra details (like pockets, or accent fabrics) you want to add to your sling, this may be a good time to sew them onto the fabric, as opposed to trying to add them after the fact.
<iframe frameborder="0" height="315" src="https://www.youtube.com/embed/3uBzwTkUwhY" width="560"></iframe>
9) Pick & Sew Your Shoulder
Choose a shoulder style. After folding, ironing and pinning any desired pleats, fold the fabric through the rings and secure it in place with 3 parallel lines of stitching. Use 100% polyester all-purpose thread and a heavy duty needle for this step. If desired, one of your three lines can utilize a "decorative" stitch if your machine does them.Expland below to read about the different shoulder styles. If you are still overwhelmed and can't decide, a hybrid (Eesti) style is a good place to start.
Shoulder styles are a completely personal decision. What works for one wearer may not be comfortable for another, and vice versa. There are infinite ways to sew the shoulder, which further complicates the matter. However you decide to bunch or fold the fabric, just make sure to fold it through the rings and sew it down with 3 parallel lines of stitching extending from one rail to the other. Use 100% polyester all-purpose thread and a new size 14 or 16 denim needle. You may need to drop the tension down on your machine if you are sewing through lots of pleats. The three most popular shoulder styles are Pleated, Hybrid, and Gathered. All three of these can be worn on either shoulder. A little about these:
Pleated

 |
Hybrid (including Eesti)
 |
Gathered (including Floating Gathered)

 |
| Shoulder is pleated evenly across the width to bring width down where it goes through the rings. It is then folded under and three lines of reinforcement stitching are sewn very close to the rings. Uses the least amount of fabric for the shoulder. Lays neatly on the wearer's shoulder - no bunching or tangling. Easy to get the shoulder portion spread evenly, but does not spread very wide. Less likely to have the edges dig, but also does not distribute the weight of the baby quite as much as a gathered would. Generally (but not always) preferred by very small, thin wearers who feel overwhelmed by the wide spread of a gathered shoulder. | A few pleats on each rail, with the center of the wrap left straight to gather naturally. The fabric is folded through the rings and the three lines of reinforcement stitching are typically sewn fairly close to the rings. A "floating eesti" shoulder can be done with the stitching 9"-16" away from the rings; in this situation, you can add stitches lengthwise along the folds of the pleats in order to keep them neat and in place. Qualities are typically a balance between pleated and gathered. Less potentially diggy and spread than a gathered, but better weight distribution than a pleated. "Eesti" is a specific style of hybrid shoulder developed by Karen Hoppis. "Hybrid" in general refers to any shoulder style that incorporates both pleats and an unpleated, gathered portion of the shoulder. | Shoulder is left to bunch/spread naturally. Fabric is pulled through the rings, folded over and can either be sewn straight across with three lines of reinforcment close to the rings (for a traditional gathered shoulder) or further away (9"-16") for a floating gathered. Easiest style to sew. Can be more finicky to adjust on the shoulder; floating gathered especially, due to the double layer over the shoulder, can get bunched and tangled. Floating gathered has two layers of fabric across the shoulder, which adds cush and padding. While a poorly adjusted gathered shoulder can result in diggy rails, a well-adjusted gathered will give the best, most even weight distribution for longer wearing. |
10) Pockets and Accents (Optional)
 Pockets and accent pieces are a great option if your desired fabric pattern is only available in a thin, unsafe fabric like quilter's cotton. Sew decorative patterned accents onto a coordinating thicker, wrap-safe fabric.
11) "Breaking in" or softening your sling
A brand new sling (especially DIY) will likely be stiff and difficult to adjust through the rings. Softening the fabric through gentle use and abuse will help. Do not use fabric softener to "soften" a wrap or sling.12) Learn to use it
 Always follows TICKS rules for safe babywearing, and practice a few times with a doll or weighted purse before trying with a child. Clicking here will start a playlist of my favorite ring sling videos.
- "How to Thread a Ring Sling" by WrappingRachel
- "(basics) Newborn ringsling 'classic'" by WrapYouInLove
- "How to use a Ring Sling with a Newborn" by WrappingRachel
- "Babywearing (basics) : Ringsling (classic)" by WrapYouInLove (Same technique as above but with an older child)
- "How to do a hip carry in a ring sling with an older baby" by WrappingRachel
- "Ring Sling Troubleshooting: Getting a Great Seat" by WrappingRachel
- "Ring Sling Troubleshooting: Keeping the rings at corsage level" by WrappingRachel
- Ring Sling Front Carry by Nosi me s ljubavlju (Good for those who are hearing impaired or non-English-speaking)
| | | | |
Dye Safety
| | | | | |
All of the information on this page was assembled in collaboration with the Facebook group Dyed Baby Carriers. If you have more questions regarding dyeing your baby carrier, join their group for assistance!
Acceptable Dyes for Babywearing
For something to be baby-safe, you want a dye that bonds permanently with the fibers of the fabric. These are called "fiber reactive" dyes. The following are examples of safe dyes.
- Dylon Permanent
- Dylon Hand
- Dylon Cold
- Dylon Machine Dye
- Tulip powdered dye
- Lumi Inkodyes
- Dharma Trading Co Procion MX Dye
Unacceptable Dyes
Many dyes on the market are not fiber reactive and simply sit on top of the fibers. Not only does this mean that the dye can bleed and fade, but it also means that it can be transfered onto baby's skin or mouth by contact. While many of these dyes claim to be "non-toxic," it is still considered best practice not to use a dye that could be ingested later. The following dyes should never be used on a baby carrier.- RIT dyes
- iDye
- Pre-mixed liquid dye
- Dylon Multi Purpose
- Tintex
Safety Equipment
The safety of dye on skin has not been thoroughly investigated, and powdered dyes can irritate the respiratory system if breathed in. Whenever you are dyeing, please use proper protection.- Gloves (non-optional)
- N95 mask (non-optional)
- Long sleeves (optional, but recommended)
- Eye protection (optional, but recommended)
Color Remover
Bleach is never safe to use on any type of carrier, sling or wrap. Bleach weakens fibers over time when not properly neutralized. Even when bleach is neutralized, however, there is no way to measure the amount of damage done to the fibers by the bleaching process. Sudden, catastrophic failure can result. Color remover or color stripper is safe to use for cotton and linen woven wraps, but should never be done to a structured carrier. Keep in mind that color strippers do not always bring a wrap back to white or natural colored. Some colors may be completely removed, some muted, some randomly changed, and some untouched. Color stripping is a highly unpredictable process. For more on color stripping, click here.Natural Dyes
While it is tempting to go as natural as possible when making something for your baby, dyeing a baby carrier is one instance in which it is not recommended. There are several reasons for this:- Highly concentrated amounts are needed to achieve desired color, which can lead to toxic levels of ingestion
- Many natural "dyes" are merely stains sitting on the fabric. These are not colorfast, can be absorbed through the skin or into their mouths.
- To make natural dyes colorfast, you often need to use a highly-toxic mordant.
- Paula Burch "About Natural Dyes"
- Top Five Plants to Never Use for Natural Dyes
- The Maiwa Guide to Natural Dyes
| | | | |
Selecting Safe Fabric For Babywearing
Any fabric used for babywearing should pass 4 simple rules for fabric selection. It must pass all four - if it fails just one rule, it should not be used. If you still feel overwhelmed by choosing a fabric based on these four rules, look for one of the " suggested fabrics" listed after the 4 Rules - just always go back to compare it to the 4 Rules to be sure.Related Links:The Four Rules of Fabric Selection
- Printable reference: 4_Rules_of_Fabric_Selection_Printable.pdf
- Live Video - selecting fabric for a wrap or sling (DIY Babywearing group members only)
- Live Video - shopping for fabric at Walmart (DIY Babywearing group members only)
- Live Video - shopping for fabric at JoAnn's (DIY Babywearing group members only)
- Poll
- Live Video - shopping for fabric with Kim (DIY Babywearing group members only)
- Live Video - Part 2 of shopping for fabric with Kim (DIY Babywearing group members only)
- Live Video - Cotton vs Polyester Burn Test (DIY Babywearing group members only)
- Poll Results - Fabric comparisons for woven wraps
- Fiber Content - Natural fibers
- Weave - Woven without any stretch, thick visible fibers, tight weave
- Weight - Thick like denim or a sturdy tote bag
- Care instructions - Machine washable
Suggested Fabrics
- Osnaburg
- Duck Cloth
- Bottom Weight Linen
- Bottom Weight Cotton
- Cotton Tablecloths
- Colimaçon et Cie or Honeycomb Loom
4 Rules of Fabric Selection
Rule 1: Fiber Content
Fabric used for babywearing should be natural fibers, like cotton or linen. Rayon is okay if it is mixed half and half with cotton or linen. Avoid polyester, acrylic, or nylon. Never use fabric with ANY spandex or lycra unless you are making a long, 3-pass stretchy wrap.| Fiber Type | Recommended? | Details | Exceptions |
|---|---|---|---|
| Cotton | Yes | Cotton is a common, inexpensive fiber. It is usually breathable and easy to care for. It will, however, shrink quite a bit, so always buy 20% extra. | n/a |
| Linen, Flax | Yes | Linen is a very strong fiber and, depending on the weave, typically the most breathable fiber for the heat. It is easy to care for but may get crunchy and stiff with over-drying. Recommended to tumble dry until 80% dry and then steam iron the rest of the way dry. Linen will shrink a bit, so buy 10% extra. | Always check the fiber content on linen. A lot of fabrics sold as "linen" or "linen-look" are actually cotton, rayon, or even polyester. |
| Hemp | Yes | Hemp is incredibly strong, and a great choice for a toddler-worthy wrap. It can be difficult to "break in" or soften. Often hard to find in a light enough weight to use. | n/a |
| Wool | Yes | Softness and breathability depends on weave. Can potentially be very soft and breathable for wearing in the summer. Much higher maintenance; cannot be machine washed. Must be gently hand washed and laid flat to dry. | n/a |
| Silk | Yes | Real silk made from the silkworm (such as shantung or dupioni) is safe to use. | Lightweight silks such as charmeuse are too light and slippery. "Silkessense" sold at JoAnn Fabrics and most "silk brocades" are actually polyester or rayon. |
| Rayon, Bamboo, Viscose | Sometimes | Rayon is a semi-synthetic fiber. It can be made from a variety of plants, including bamboo. Rayon can be very strong and incredibly breathable, but it can also be thin and slippery. It depends on the weave. It is best to purchase rayon somewhere you can feel the fabric in person to judge it, and is prefered mixed under 40% with a "grippier" and stronger fiber like cotton or linen. It is praised for its breathability in the heat. Rayon is incredibly weak when wet. Note: All bamboo is rayon, but not all rayon is bamboo. This is a common misconception. |
|
| Spandex, Lycra | No | Avoid for use in woven wraps, ring slings, or structured carriers like meh dais and SSCs. Even 1% Spandex content is too much for these applications. | A small percentage (5%) is fine in a stretchy wrap. A water wrap worn like a stretchy wrap with 3 reinforcing passes can be made from 100% lycra "swimsuit" fabric. |
| Polyester, Nylon | No | Polyester is typically hot, sweaty, and not breathable. It does not hold knots well and slips through ring sling rings. It is "safe" for use in buckle carriers but will make the carrier extremely hot and sweaty. A blend of less than 40% is okay, but ideally polyester content should be at 20% or below. | Water carriers should be made from 100% polyester or nylon. They won't absorb water the way natural fibers will, and the moisture will help add grip to the rings or knots. |
| "Other Fibers" "mixed fibers" | No | No mysteries allowed in your carrier! If it doesn't list what the fibers are, don't buy it, unless you are willing to do a burn test to determine the content and risk wasting money on unusable fabric. | n/a |
Rule 2: Weave
Fabric for woven wraps, slings, and seamed carriers should have moderately thick, clearly visible threads, a tight weave, and no stretch along with length or width. Woven wraps can be made with slightly looser weaves (since they don't have any structural seams) but interior body panels for structured carriers need to be particularly tightly woven. You should not be able to see between the threads, and the individual threads should not look fuzzy, like flannel or brushed twill does.Exception: A stretchy wrap can stretch it all four directions, but should always have 3 spread passes supporting baby to compensate and is never safe for back carries.The weave should be made of thicker, visible fibers. You should clearly be able to see the individual threads. The weave should not look "fuzzy" like flannel, fleece, or "brushed" twill. Fuzzy threads indicate a pre-distressed fabric which is weaker and more prone to damage. A lower threadcount is more desirable than a high threadcount. Quilter's cotton and bedsheets have tiny threads in a high threadcount (making them very smooth to the touch) and are therefore prone to ripping easily. Imagine - which will support more weight: one tow chain, or a dozen gold chain necklaces?
You should not be able to see straight through the weave of the fabric and the fabric should allow minimal light to pass through it.

Rule 3: Weight
Fabric for babywearing should be "bottomweight." If you are shopping by feel, they should feel equivalent to a pair of jeans, men's slacks, or a sturdy tote bag. Avoid fabrics that feel closer to a dress shirt, bedsheets or a handkerchief. If you can locate osnaburg in your fabric store, this should be your gauge for the absolute MINIMUM weight of an appropriate fabric for a wrap or sling. Denim trousers should be the minimum weight for a seamed or structured carrier.
Rule 4: Care Instructions
Fabrics for babywearing should be labeled as machine washable. Avoid fabrics that specify "wipe clean with a damp cloth" or "dry clean only."Suggested Fabrics
Obviously this isn't every possibility, but these are the most common and most easily located fabrics. If you are overwhelmed with the possibilities at the fabric and feel like everything you pick up fails the 4 Rules listed above, choose one or two of these to specifically look for to narrow down your search.Osnaburg
Osnaburg is a fabric similar to muslin, with thicker threads and a coarser weave. It is too thin for structured carriers, but is great for wraps and slings and is praised for its low price point in the USA and its breathability in the heat. It does require a special cleaning process before use. Osnaburg is typically 100% cotton (although it can be linen, and some has a negligible amount of polyester.) It looks similar to muslin, but the threads are much thicker. It comes in a natural off-white color with light brown flecks. It feels slightly scratchy/pilly when new. Once it is broken in, it is nearly as breathable as linen, a great option for hot weather, and blanket soft. It can be used natural colored or as a dye blank as it takes color like a dream.
It can be found at most fabric stores in the USA (JoAnn 's, Hobby Lobby, Walmart, Hancock) but is notoriously difficult to find outside of the USA. Check the Materials Sourced by Country page to locate a good source or substitute in your country. In most stores, it will be sorted with the burlap and other "utility fabrics." Most fabric store employees have not heard of it and will not be able to help you find it. Just search all the bolts for a fabric that looks right and check the bolt tag - osnaburg will be clearly labeled as such. If the bolt tag does not say osnaburg, it is NOT osnaburg. (In Europe, heavyweight calico is a rough approximation that can be fine to use if it passes the 4 Rules, but is not actually the same fabric. In the US, calico means something different and is never safe to use.) One of its key selling points is the low cost. It can typically be found around $3/yard at Walmart, although for stores like JoAnn 's or Hobby Lobby you'll want to use a 40% off coupon to get this price. You can find decent deals online, and can get a particularly good price if you are willing to buy it by the bolt off of Amazon.
A note about osnaburg: most fabrics go through a lot of processing to get them bleached and dyed or printed. Osnaburg is sold in a very raw state, which means it is still gunked up with lots of mysterious chemicals and dirt. That simply means that osnaburg needs to be scoured before using or dyeing. It sounds more difficult than it is and is actually a fairly simple process involving $5 worth of materials (or less), an hour of hands-off soaking time, and can be done in an insulated cooler or kitchen sink.
In addition, osnaburg tends to shrink a Lot. Unless your bolt specifies "preshrunk," always buy 20% more fabric than you need. 6 yards of osnaburg will easily shrink up to only 5 yards long. Preshrunk osnaburg will still shrink about 10% so take that into account when purchasing your fabric.
Osnaburg is typically 100% cotton (although it can be linen, and some has a negligible amount of polyester.) It looks similar to muslin, but the threads are much thicker. It comes in a natural off-white color with light brown flecks. It feels slightly scratchy/pilly when new. Once it is broken in, it is nearly as breathable as linen, a great option for hot weather, and blanket soft. It can be used natural colored or as a dye blank as it takes color like a dream.
It can be found at most fabric stores in the USA (JoAnn 's, Hobby Lobby, Walmart, Hancock) but is notoriously difficult to find outside of the USA. Check the Materials Sourced by Country page to locate a good source or substitute in your country. In most stores, it will be sorted with the burlap and other "utility fabrics." Most fabric store employees have not heard of it and will not be able to help you find it. Just search all the bolts for a fabric that looks right and check the bolt tag - osnaburg will be clearly labeled as such. If the bolt tag does not say osnaburg, it is NOT osnaburg. (In Europe, heavyweight calico is a rough approximation that can be fine to use if it passes the 4 Rules, but is not actually the same fabric. In the US, calico means something different and is never safe to use.) One of its key selling points is the low cost. It can typically be found around $3/yard at Walmart, although for stores like JoAnn 's or Hobby Lobby you'll want to use a 40% off coupon to get this price. You can find decent deals online, and can get a particularly good price if you are willing to buy it by the bolt off of Amazon.
A note about osnaburg: most fabrics go through a lot of processing to get them bleached and dyed or printed. Osnaburg is sold in a very raw state, which means it is still gunked up with lots of mysterious chemicals and dirt. That simply means that osnaburg needs to be scoured before using or dyeing. It sounds more difficult than it is and is actually a fairly simple process involving $5 worth of materials (or less), an hour of hands-off soaking time, and can be done in an insulated cooler or kitchen sink.
In addition, osnaburg tends to shrink a Lot. Unless your bolt specifies "preshrunk," always buy 20% more fabric than you need. 6 yards of osnaburg will easily shrink up to only 5 yards long. Preshrunk osnaburg will still shrink about 10% so take that into account when purchasing your fabric.
Duck Cloth or Home Decor Fabric
Duck is a type of canvas. Printed canvas designed for light upholstery can be used for wraps, slings, or structured carriers. Duck with printed patterns has a blank wrong side that some people don't find desireable. Some brands of solid colored duck canvas are too thick to use for wraps or slings, so be sure to judge the weight of by feel.Bottom Weight Linen
100% linen or flax fabric is praised for its strength and it's incredible breathibility in the heat. It can be more expensive than cotton counterparts.Bottom Weight Cotton
"Bottom weight" apparel cotton fabric designed for making pants (like denim, twill, and the like) can make for wonderful wraps, slings, or structured carriers.Tablecloths
So long as they pass the 4 Rules listed at the top of this page, tablecloths can be a cheap source of beautiful fabric. Jacquard tablecloths will feel like a commercial woven wrap, where printed tablecloths will be similar to working with duck cloth.Woven Wrap Fabric by the meter
Some companies sell the same type of fabric used for commercial woven wraps by the meter. These can be used for wraps, slings, or structured carriers and are praised for their softness. Referred to as "C&C" fabric, Colimaçon et Cie sells woven wrap material by the meter. You can buy either 75cm wide (which is standard wrap or sling width) or 150 cm wide (double width.) Since it is a 220gsm broken twill weave, it will feel exactly like many purpose-woven commercial wraps. It makes great wrap-conversion meh dais and structured carriers, too. You can also buy a natural or white finished wrap as a dye blank if you prefer. It is on the thin side for commercial woven wraps, and on the heavier side for most DIY fabrics used for woven wraps. (If you choose to dye C&C fabric, we recommend scouring it like you would osnaburg, as it has a reputation for taking dye unevenly otherwise.)
To the right is a picture of Colimaçon et Cie's color selection. At this point they only offer solid colors in cotton, solid colors in a cotton/silk blend, and a few solid colors with a one sided glitter finish in cotton.
The Honeycomb Loom is another company that sells woven wrap fabric by the meter. Their fabric is slightly more expensive, but has an interesting pattern and a bit more grip to it. It has a much higher gsm (closer to 270gsm), but feels similar in hand to the C&C. If you are a member of our Facebook group, I did a video talking about some of the differences between these two brands and their (perceived) wrap qualities (with the disclaimer that I have not used either of these to wrap with yet.)
Referred to as "C&C" fabric, Colimaçon et Cie sells woven wrap material by the meter. You can buy either 75cm wide (which is standard wrap or sling width) or 150 cm wide (double width.) Since it is a 220gsm broken twill weave, it will feel exactly like many purpose-woven commercial wraps. It makes great wrap-conversion meh dais and structured carriers, too. You can also buy a natural or white finished wrap as a dye blank if you prefer. It is on the thin side for commercial woven wraps, and on the heavier side for most DIY fabrics used for woven wraps. (If you choose to dye C&C fabric, we recommend scouring it like you would osnaburg, as it has a reputation for taking dye unevenly otherwise.)
To the right is a picture of Colimaçon et Cie's color selection. At this point they only offer solid colors in cotton, solid colors in a cotton/silk blend, and a few solid colors with a one sided glitter finish in cotton.
The Honeycomb Loom is another company that sells woven wrap fabric by the meter. Their fabric is slightly more expensive, but has an interesting pattern and a bit more grip to it. It has a much higher gsm (closer to 270gsm), but feels similar in hand to the C&C. If you are a member of our Facebook group, I did a video talking about some of the differences between these two brands and their (perceived) wrap qualities (with the disclaimer that I have not used either of these to wrap with yet.)
For those interested in the wrap qualities of the suggested fabrics, check out these charts!
| | | | |
| | | |
Scouring Osnaburg
| | | | | |
All of the information on this page was assembled in collaboration with the Facebook group Dyed Baby Carriers. If you have more questions regarding dyeing your baby carrier, join their group for assistance!
What is scouring?
Scouring is a deep cleaning process. It is typically used to prep raw, unprocessed fibers or fabric for accepting dye evenly, but it is also done on raw fabric that will be used for a baby in order to clean all of the buildup in the fibers. While most bolt fabric has already been processed and dyed, raw fabrics like osnaburg need to be cleaned first. DO scour:- osnaburg (whether you plan to dye it or not)
- Commercial wraps
- Stretchy wraps
- Knit fabrics
- Clothing
- Structured/seamed carriers
- Sling rings

Supplies needed
Stainless Steel or Enameled Pot not used for food (ideal) or a utility tub, large sink, or hard plastic cooler
Blue Dawn Dish Soap OR Synthropol OR Fairy (dependent on country)
Soda Ash ( click here for more info)
Stovetop Instructions
-
Half a teaspoon (2 gm) of soda ash per pound of fabric
-
Half a teaspoon (2.5 ml) of Synthropol/Dawn/Fairy per pound of fabric
-
Add enough water so fabric can move freely
-
Bring to a simmer and scour for an hour
-
Drain off visibly dirty water
-
Rinse with clean water. Using the washing machine for this step is acceptable- no added soaps or detergents. Spin dry and then your fabric is ready for the soda ash soak, or you can let it dry completely and hem it before soaking and/or dyeing.
Utility Tub/Sink/Cooler Instructions
-
Half a teaspoon (2 gm) of soda ash per pound of fabric
-
Half a teaspoon (2.5 ml) of Synthropol/Dawn/Fairy per pound of fabric
-
Add enough BOILING HOT water so fabric can move freely
-
Close lid or cover to keep heat in and scour for an hour
-
Drain off visibly dirty water
-
Rinse with clean water. Using the washing machine for this step is acceptable- no added soaps or detergents. Spin dry and then your fabric is ready for the soda ash soak, or you can let it dry completely and hem it before soaking and/or dyeing.
TWiki Site Statistics
| Month | Webs Total |
Webs Viewed |
Webs updated |
Topics Total |
Topics Viewed |
Topics Updated |
Attach- ments |
Topic Views |
Topic Updates |
Files Uploads |
Data Size MB |
Pub Size MB |
Disk Use |
Users | Groups | Plugins | Top Viewers | Top Contributors |
|---|---|---|---|---|---|---|---|---|---|---|---|---|---|---|---|---|---|---|
| 2020-05 | 4 | 3 | 0 | 746 | 718 | 0 | 905 | 22593 (1 unique users) |
0 (0 unique users) |
0 (0 unique users) |
644.4 | 270.8 | 10% | 6 | 3 | 19 | 22593 TWikiGuest | 0 |
| 2020-04 | 4 | 3 | 0 | 746 | 719 | 0 | 905 | 64098 (1 unique users) |
0 (0 unique users) |
0 (0 unique users) |
629.1 | 270.8 | 8% | 6 | 3 | 19 | 64098 TWikiGuest | 0 |
| 2020-03 | 4 | 3 | 0 | 746 | 719 | 0 | 905 | 22507 (1 unique users) |
0 (0 unique users) |
0 (0 unique users) |
605.0 | 270.8 | 8% | 6 | 3 | 19 | 22507 TWikiGuest | 0 |
| 2020-02 | 4 | 3 | 0 | 746 | 719 | 0 | 905 | 27760 (1 unique users) |
0 (0 unique users) |
0 (0 unique users) |
589.3 | 270.8 | 8% | 6 | 3 | 19 | 27760 TWikiGuest | 0 |
| 2020-01 | 4 | 3 | 0 | 746 | 719 | 0 | 905 | 45288 (1 unique users) |
0 (0 unique users) |
0 (0 unique users) |
570.1 | 270.8 | 8% | 6 | 3 | 19 | 45288 TWikiGuest | 0 |
| 2019-12 | 4 | 3 | 0 | 746 | 719 | 0 | 905 | 17126 (1 unique users) |
0 (0 unique users) |
0 (0 unique users) |
549.4 | 270.8 | 7% | 6 | 3 | 19 | 17126 TWikiGuest | 0 |
| 2019-11 | 4 | 3 | 0 | 746 | 719 | 0 | 905 | 51848 (1 unique users) |
0 (0 unique users) |
0 (0 unique users) |
540.2 | 270.8 | 7% | 6 | 3 | 19 | 51848 TWikiGuest | 0 |
| 2019-10 | 4 | 3 | 0 | 746 | 719 | 0 | 905 | 13646 (1 unique users) |
0 (0 unique users) |
0 (0 unique users) |
519.3 | 270.8 | 7% | 6 | 3 | 19 | 13646 TWikiGuest | 0 |
| 2019-09 | 4 | 3 | 0 | 746 | 719 | 0 | 905 | 17135 (1 unique users) |
0 (0 unique users) |
0 (0 unique users) |
509.2 | 270.8 | 7% | 6 | 3 | 19 | 17135 TWikiGuest | 0 |
| 2019-08 | 4 | 3 | 0 | 746 | 719 | 0 | 905 | 19753 (1 unique users) |
0 (0 unique users) |
0 (0 unique users) |
496.5 | 270.8 | 7% | 6 | 3 | 19 | 19753 TWikiGuest | 0 |
| 2019-07 | 4 | 3 | 1 | 746 | 719 | 2 | 905 | 21610 (2 unique users) |
2 (1 unique users) |
0 (0 unique users) |
484.8 | 270.8 | 7% | 6 | 3 | 19 | 21604 TWikiGuest 6 AlyssaLeonard |
2 AlyssaLeonard |
| 2019-06 | 4 | 3 | 0 | 746 | 719 | 0 | 905 | 21504 (1 unique users) |
0 (0 unique users) |
0 (0 unique users) |
471.4 | 270.8 | 7% | 6 | 3 | 19 | 21504 TWikiGuest | 0 |
| 2019-05 | 4 | 3 | 0 | 746 | 719 | 0 | 905 | 21279 (1 unique users) |
0 (0 unique users) |
0 (0 unique users) |
457.7 | 270.8 | 7% | 6 | 3 | 19 | 21279 TWikiGuest | 0 |
| 2019-04 | 4 | 3 | 0 | 746 | 719 | 0 | 905 | 15758 (1 unique users) |
0 (0 unique users) |
0 (0 unique users) |
443.2 | 270.8 | 7% | 6 | 3 | 19 | 15758 TWikiGuest | 0 |
| 2019-03 | 4 | 3 | 0 | 746 | 719 | 0 | 905 | 42007 (1 unique users) |
0 (0 unique users) |
0 (0 unique users) |
428.6 | 270.8 | 7% | 6 | 3 | 19 | 42007 TWikiGuest | 0 |
| 2019-02 | 4 | 3 | 1 | 746 | 719 | 1 | 905 | 36911 (2 unique users) |
1 (1 unique users) |
0 (0 unique users) |
405.9 | 270.8 | 8% | 6 | 3 | 19 | 36910 TWikiGuest 1 AlyssaLeonard |
1 AlyssaLeonard |
| 2019-01 | 4 | 3 | 0 | 746 | 719 | 0 | 905 | 60376 (1 unique users) |
0 (0 unique users) |
0 (0 unique users) |
364.6 | 270.8 | 8% | 6 | 3 | 19 of 242 | 60376 TWikiGuest | 0 |
| 2018-12 | 4 | 3 | 0 | 746 | 719 | 0 | 905 | 52072 (1 unique users) |
0 (0 unique users) |
0 (0 unique users) |
320.2 | 270.8 | 7% | 6 | 3 | 19 of 242 | 52072 TWikiGuest | 0 |
| 2018-11 | 4 | 3 | 0 | 746 | 719 | 0 | 905 | 70617 (1 unique users) |
0 (0 unique users) |
0 (0 unique users) |
288.7 | 270.8 | 7% | 6 | 3 | 19 of 242 | 70617 TWikiGuest | 0 |
| 2018-10 | 4 | 3 | 1 | 746 | 719 | 1 | 905 | 123027 (2 unique users) |
1 (1 unique users) |
0 (0 unique users) |
259.1 | 270.8 | 7% | 6 | 3 | 19 of 242 | 123026 TWikiGuest 1 AlyssaLeonard |
1 AlyssaLeonard |
| 2018-09 | 4 | 3 | 0 | 746 | 719 | 0 | 905 | 92765 (1 unique users) |
0 (0 unique users) |
0 (0 unique users) |
225.5 | 270.8 | 7% | 6 | 3 | 19 of 242 | 92765 TWikiGuest | 0 |
| 2018-08 | 4 | 3 | 0 | 746 | 719 | 0 | 905 | 61319 (1 unique users) |
0 (0 unique users) |
0 (0 unique users) |
194.1 | 270.8 | 6% | 6 | 3 | 19 of 242 | 61319 TWikiGuest | 0 |
| 2018-07 | 4 | 3 | 0 | 746 | 719 | 0 | 905 | 68961 (1 unique users) |
0 (0 unique users) |
0 (0 unique users) |
166.0 | 270.8 | 6% | 6 | 3 | 19 of 242 | 68961 TWikiGuest | 0 |
| 2018-06 | 4 | 3 | 1 | 746 | 719 | 2 | 905 | 24747 (3 unique users) |
9 (1 unique users) |
3 (1 unique users) |
147.6 | 270.8 | 6% | 6 | 3 | 19 of 242 | 24717 TWikiGuest 27 AlyssaLeonard 3 TWikiAdminUser |
12 AlyssaLeonard |
| 2018-05 | 4 | 3 | 1 | 746 | 719 | 1 | 902 | 79345 (2 unique users) |
2 (1 unique users) |
2 (1 unique users) |
142.3 | 269.7 | 6% | 6 | 3 | 19 of 242 | 79343 TWikiGuest 2 AlyssaLeonard |
4 AlyssaLeonard |
| 2018-04 | 4 | 3 | 1 | 746 | 719 | 4 | 900 | 51868 (2 unique users) |
8 (1 unique users) |
2 (1 unique users) |
115.8 | 266.6 | 6% | 6 | 3 | 19 of 242 | 51850 TWikiGuest 18 AlyssaLeonard |
10 AlyssaLeonard |
| 2018-03 | 4 | 3 | 1 | 746 | 719 | 2 | 899 | 71186 (2 unique users) |
2 (1 unique users) |
0 (0 unique users) |
100.7 | 266.4 | 6% | 6 | 3 | 19 of 241 | 71184 TWikiGuest 2 AlyssaLeonard |
2 AlyssaLeonard |
| 2018-02 | 4 | 3 | 0 | 746 | 719 | 0 | 898 | 57354 (1 unique users) |
0 (0 unique users) |
0 (0 unique users) |
85.4 | 260.5 | 5% | 6 | 3 | 19 of 241 | 57354 TWikiGuest | 0 |
| 2018-01 | 4 | 3 | 1 | 746 | 719 | 3 | 898 | 69658 (2 unique users) |
14 (1 unique users) |
9 (1 unique users) |
76.6 | 260.5 | 5% | 6 | 3 | 19 of 241 | 69616 TWikiGuest 42 AlyssaLeonard |
23 AlyssaLeonard |
| 2017-12 | 4 | 3 | 1 | 746 | 719 | 16 | 896 | 57262 (2 unique users) |
18 (1 unique users) |
0 (0 unique users) |
67.2 | 259.1 | 5% | 6 | 3 | 19 of 241 | 57221 TWikiGuest 41 AlyssaLeonard |
18 AlyssaLeonard |
| 2017-11 | 4 | 3 | 0 | 746 | 719 | 0 | 896 | 28583 (1 unique users) |
0 (0 unique users) |
0 (0 unique users) |
58.4 | 259.1 | 5% | 6 | 3 | 19 | 28583 TWikiGuest | 0 |
| 2017-10 | 4 | 3 | 1 | 746 | 719 | 20 | 896 | 23299 (2 unique users) |
34 (1 unique users) |
7 (1 unique users) |
53.4 | 259.1 | 5% | 6 | 3 | 19 | 23235 TWikiGuest 64 AlyssaLeonard |
41 AlyssaLeonard |
| 2017-09 | 4 | 3 | 0 | 737 | 710 | 0 | 889 | 24741 (1 unique users) |
0 (0 unique users) |
0 (0 unique users) |
49.1 | 248.4 | 5% | 6 | 3 | 19 | 24741 TWikiGuest | 0 |
| 2017-08 | 4 | 3 | 0 | 737 | 710 | 0 | 889 | 17808 (1 unique users) |
0 (0 unique users) |
0 (0 unique users) |
44.5 | 248.4 | 5% | 6 | 3 | 19 | 17808 TWikiGuest | 0 |
| 2017-07 | 4 | 3 | 1 | 737 | 706 | 16 | 889 | 17650 (2 unique users) |
47 (1 unique users) |
20 (1 unique users) |
41.0 | 248.4 | 5% | 6 | 3 | 19 | 17567 TWikiGuest 83 AlyssaLeonard |
67 AlyssaLeonard |
| 2017-06 | 4 | 3 | 1 | 736 | 709 | 6 | 866 | 28624 (2 unique users) |
31 (1 unique users) |
19 (1 unique users) |
38.2 | 207.5 | 5% | 6 | 3 | 19 | 28598 TWikiGuest 26 AlyssaLeonard |
50 AlyssaLeonard |
| 2017-05 | 4 | 3 | 1 | 736 | 709 | 19 | 847 | 16191 (2 unique users) |
38 (1 unique users) |
11 (1 unique users) |
33.5 | 196.5 | 5% | 6 | 3 | 19 | 16128 TWikiGuest 63 AlyssaLeonard |
49 AlyssaLeonard |
| 2017-04 | 4 | 3 | 1 | 736 | 709 | 50 | 838 | 28732 (2 unique users) |
110 (1 unique users) |
15 (1 unique users) |
31.1 | 186.7 | 5% | 6 | 3 | 19 | 28478 TWikiGuest 254 AlyssaLeonard |
125 AlyssaLeonard |
| 2017-03 | 4 | 3 | 1 | 732 | 705 | 10 | 809 | 9333 (2 unique users) |
26 (1 unique users) |
5 (1 unique users) |
24.7 | 154.0 | 5% | 6 | 3 | 19 of 241 | 9264 TWikiGuest 69 AlyssaLeonard |
31 AlyssaLeonard |
| 2017-02 | 4 | 3 | 1 | 729 | 702 | 16 | 806 | 7828 (3 unique users) |
55 (2 unique users) |
2 (1 unique users) |
23.3 | 143.3 | 5% | 6 | 3 | 19 of 241 | 7690 TWikiGuest 123 AlyssaLeonard 15 TWikiAdminUser |
50 AlyssaLeonard 7 TWikiAdminUser |
| 2017-01 | 4 | 3 | 1 | 723 | 696 | 4 | 789 | 16509 (2 unique users) |
7 (1 unique users) |
1 (1 unique users) |
21.2 | 135.8 | 5% | 6 | 3 | 19 of 241 | 16492 TWikiGuest 17 AlyssaLeonard |
8 AlyssaLeonard |
| 2016-11 | 4 | 3 | 0 | 718 | 502 | 0 | 779 | 10553 (1 unique users) |
0 (0 unique users) |
0 (0 unique users) |
16.6 | 127.0 | 4% | 6 | 3 | 19 of 241 | 10553 TWikiGuest | 0 |
| 2016-10 | 4 | 3 | 1 | 718 | 689 | 5 | 779 | 12502 (2 unique users) |
5 (1 unique users) |
0 (0 unique users) |
15.4 | 127.0 | 4% | 6 | 3 | 19 of 241 | 12483 TWikiGuest 19 AlyssaLeonard |
5 AlyssaLeonard |
|
|
- Do not edit this topic, it is updated automatically. Update now.
- When updating statistics of previous months, the following items cannot be measured and will be set to 0: Webs, Topics, Users, Data Size, Pub Size, Disk Use, Plugins.
- Charts are automatically shown at the top if the TWiki:Plugins.ChartPlugin is installed and enabled (it is not) and if there are at least two months of statistics data. ChartPlugin version 2011-04-27 or later is required.
- TWikiSiteTools explains how to enable automatic updates of the statistics pages.
| | | | |
Safe Rings for Ring Slings, Onbuhimos & More
Ring Sources
If you need rings to use for a baby carrier, you want to make sure that your rings are both designed for weight bearing and are made from baby-safe materials. Rings from a craft store are NOT designed for weight bearing and should never be used as such. Rings from the hardware store have not been tested for baby-safe materials and may have weld lines which can wear your fabric unevenly. Sources for baby-safe sling rings:- Slingrings.com (USA)
- BabyweaRings.ca (Canada)
- Slingrings.ca (Canada)
- Two Mothers (Edmonton, Canada)
- Babes in Arms (Calgary, Canada)
- Tiny Tree Hugger (Winnipeg, Canada)
- ringsforbabyslings.co.uk (UK, international shipping)
- Oscha (Scotland based; ships internationally)
- FrangipaniBaby (Australia)
- Karri Tree Lane (Australia)
- The Sleepstore (Australia)
- Woven (New Zealand)
- Snugglebugs (Ireland)
If you are looking for a local place to buy safe sling rings, check a cloth diaper shop or an upscale baby boutique. If your local babywearing group has a buy/sell/trade group, one of the caregivers there may have extras they are willing to sell as well.
If you buy your rings from Amazon or elsewhere, please do so with extreme caution. Make sure your rings have been weight tested and are made from baby-safe materials. Our group does not recommend any Amazon sources at this point.
Ring Materials
Slingrings.com sells both nylon and aluminum rings. Both of these are equally safe to use and are both tested and weight rated the same. In general, most people find that aluminum rings are both easier to adjust and hold fabric better, but some people prefer nylon rings as well, especially for water slings, or in situations when you might be going through metal detectors (like an airport) and want to minimize the chances that you will have to remove the sling.Ring Sizes
| Size | Inner Diameter (Aluminum) |
Outer Diameter (Aluminum) |
Inner Diameter (Nylon) |
Outer Diameter (Nylon) |
Recommended Uses |
|---|---|---|---|---|---|
| Large | 3" | 3.5" | 3" | 3.625" | Most ring slings. Good for tablecloths, wrap conversions, twill, duck, etc. Ideal for beginners or those who prioritize easy adjustment. |
| Medium | 2.5" | 3" | 2.75" | 3.325" | Some ring slings. Good for linen, osnaburg, single layer dupioni silk. Ideal for more advanced wearers who prioritize a grippy ring that won't slip. |
| Small | 2" | 2.5" | 2.25" | 3" | Good for water slings made from athletic mesh. Good for onbuhimos, reverse onbuhimos, and ring-waist meh dais. Usable for toys loops or ring-waist pouches. |
If you contact Slingrings via e-mail, you can special order 1.75" mini rings, or 1.5" super mini rings. These could be useful for things like chest "clips" for structured carriers.
In a pinch
Slingrings.com has notoriously fast shipping (most with the "free shipping" option tend to arrive within 3-4 days) but if you simply NEED rings sooner than that, you can sometimes find sling rings for sale at a local cloth diaper shop, or ask the moms in your local moms group or babywearing group if they any have any spare rings laying around that they could sell you. NEVER use rings purchased from a craft store or fabric store. These rings are not rated for weight bearing and would put your baby in danger. As a last resort, you can use large o-rings from a hardware store. Look for large (preferably 3") rings with a very smooth weld - any kind of bump or raised texture on the weld line will wear your fabric down unevenly and could eventually cause a tear. Keep in mind that hardware rings are not made with babies in mind, so they could be chewing on just about any type of metals. Plus, as one mama in our Facebook support group shared, hardware rings are significantly heavier than official aluminum sling rings and will be much more difficult to adjust.
Colors
Different sources for sling rings may offer different color (for example, the UK source above offers both shiny and matte finish rings and more colors) but here is an example of the colors available in aluminum rings from slingrings.com. Keep in mind that their colors vary from batch to batch (especially turquoise, purple, and bronze) but this should give you at least a vague idea of what to expect. Top row, left to right: Green, Turquoise, Blue, Purple, Pink, Red, Orange
Bottom row, left to right: Black, Slate, Silver, Gold, Bronze
--
Top row, left to right: Green, Turquoise, Blue, Purple, Pink, Red, Orange
Bottom row, left to right: Black, Slate, Silver, Gold, Bronze
-- | | | |
Soda Ash
| | | | | |
All of the information on this page was assembled in collaboration with the Facebook group Dyed Baby Carriers. If you have more questions regarding dyeing your baby carrier, join their group for assistance!
What is Soda Ash? Do I really need it?
Soda Ash (also known as Washing Soda, pH Up or Sodium Carbonate) is a dye fixative that raises the pH of the water, causing fiber reactive procion dyes to permanently bond with the fabric. For ideal results, a dye bath needs to reach a pH of 10.5-11. Soda ash is necessary for dyeing, scouring, and stripping. It should not be left out for any reason. Safety Note: Sodium Carbonate is caustic and not edible. Make sure the wear gloves while handling it, and use a mask to avoid inhaling any stirred up dust.Some of the cheaper brands of dye, like Tulip and Dylon, do not mention soda ash in their dye instructions because the packets do actually include a small amount in them. However, the amount included in the packet is not really enough to properly raise the pH of the water to get ideal results, and so it is recommended to add soda ash to the dye bath or do a soda ash soak beforehand in order to achieve better results.
Where to Get Soda Ash
Sodium Carbonate (Soda Ash or Washing Soda) is not the same thing as Sodium Bicarbonate (Baking Soda.) While Baking Soda will raise the pH of the dye bath, it will not raise it enough for proper dye bonding.For bulk amounts, one of the cheapest options for soda ash is to buy "pH up" or "pH plus" online, at a home improvement store, or at a local pool/spa supply store. Make sure to check the ingredients for Sodium Carbonate. "Washing Soda" can be find in the laundry aisle of big box stores like Walmart and some grocery stores. (In the US, the common brand is "Arm & Hammer Super Washing Soda.") In a pinch, you can chemically convert baking soda (sodium bicarbonate) into soda ash (sodium carbonate) by baking it.
When to Use It
There are three methods for introducing soda ash into the dye process:- A pre-soak before dyeing
- Adding it into the dye bath itself
- In a post-dye soak
How to Soda Soak (pre- or post-dye)
Mix enough watter to completely submerge your fabric. Uneven soaking will lead to uneven soda ash distribution, which will effect dye saturation. For every 1 gallon of water, add:- 1 cup of pH up
- OR 1 + 1/3 cup of Washing Soda (commercial or homemade)
It is fine to let the soda-soaked fabric air-dry. There is no need to resoak before dyeing. Do not put soda-soaked fabric in the dryer, as soda ash can be flammable. If you do a soda soak, do a layer of dye, and rinse, then you will need to do another soda soak if you want to do another layer/color of dye on top.
Adding Soda Ash to a Dye Bath
To add soda ash directly to the dye bath, Dharma Trading recommends 1/3 cup of soda ash per every 3 gallons of water. You can add more if you are unsure, or you can buy pH testing strips if you want to be exact. The ideal level is between 10.5-11.A Note About Sling Rings
If you are dyeing a carrier with aluminum sling rings, keep in mind that while soda ash will not harm the safety of the rings, it will completely ruin the finish on them. It is easiest to dye the fabric before constructing it, but if you must dye something with the rings sewn in, the recommendation is to wrap the rings carefully with plastic cling wrap (rotating so even the ring inside the fabric is wrapped) and then wrap that in duct tape or electrical tape.Outside Links
More about soda ash:
--| | | |
Accessories for Structured Carriers
Ways to dress up a carrier! Most of these work well with most buckle carriers, meh dais, and onbuhimos. Some are brand-specific, but may give you some ideas for how to adapt the method for your carrier. Feel free to suggest additions in our Facebook group! Keep in mind that while you will want to pay attention to making sure your fabric is not treated or coated (since it will be in contact with baby), accessories are not weight bearing and therefore you don't have to worry about the weight of the fabric used. This is a great place for quilter's cotton, flannel, repurposed bedsheets, etc!Slip Covers
- Beco Gemini
- KJAJ Mommy & Me Reversible Tula Cover
- Barefoot & Pregnant No-Sew Tula Slipcover (Frozen Edition!)
- Pitcher Family Adventures Tula Cover
- Made with love Ergo Slip Cover
- Drafting a slipcover pattern for SSC or Meh Dai (includes hood info too!)
- How to make a reversible meh dai slipcover
Suck Pads & Drool Bibs
- Katie's KPs Corner Suck Pads (the printable "Tula" pattern is universal & fit most SSCs and meh dais; the Kinderpack pattern is for wider straps)
- Katie's KPs "Easy Peasy" Straight Suck Pads (universal; fit most SSCs)
- Square Peg Farm Lillebaby Drool Bib/Headrest Cover
- Katie's KPs Drool Pads tips & tricks (not a full tutorial; just troubleshooting)
- Lillebaby Drool Bib (reversible)
- Ergo Drool Bib Tutorial & Video
Choosing fabric for suck pads
Most suck pads are three layers thick: the decorative layer, an interior (absorbent) layer, and a back layer. For the decorative layer, quilter's cotton or flannel is a popular choice.
If the suck pads are simply for decorative purposes and your baby is not a chewer, the interior layer can be omitted, but to actually absorb moisture, good options are flannel, microfiber (the kind used for cloth diaper liners), cut up receiving blankets, or even thin terry cloth. Keep in mind that terry cloth (wash cloths) can be a beast to sew with.
For the back layer, you can do a different pattern of quilter's cotton or flannel to make your suck pads reversible, or if you have a very heavy drooler, you can even use a water resistent backing like PUL to protect the carrier.
Hoods
Et cetera
- "The Extender" SewToot Padded Waist Webbing Cover (covers raw webbing SSC waistband to prevent "muffin top" and digging)
- "Sailor Bow Tutorial" (this style of bow works great for the end of reach straps)
- Underarm SSC Pads
- Katie's KPs Simple Reach Straps
- Katie's KPs Embroidered Reach Straps
- Fine and Fair Blog: Narrow Based Carrier to Ergonomic Carrier Scarf Hack
- How to Attach KAMsnaps (great for a removable hood or suck pads)
- SSC Leg Extenders (specifically Ergo, snap on extensions to widen a body panel for a long legged child)
Don't know where to start? Start here.
So you want to wear your baby, and you want to do it yourself...but where to start? Start here. All the links will open up in a new tab/window so you can keep coming back to this page to get to the next step.Step 1: What kind of carrier?
Start by reading through the different types of carriers. Pay attention to the pros and cons of each. For example, some are only good for newborns through the first couple months. Others can't be used at all until baby is sitting independently. Some may require a steep learning curve to learn how to make them. It may help to also read about some specific comparisons as far as ease of construction, age appropriateness, and ease of use. If you don't have a sewing machine and you are getting discouraged, don't give up! We have a page dedicated to what you can make without a sewing machine!Step 2: Read through a tutorial
On the main page, there are tutorials listed for every major type of carrier. Some of these will provide links to external tutorials, and some we have local tutorials for. Read through the tutorial so you get a sense of what you are getting yourself into and what materials you will need.Step 3: Acquire materials
The hardest part is the fabric. Read through the Four Rules of Safe Fabric Selection (which also includes some specific suggestions for types of fabrics to look for.) Keep that page bookmarked on your phone while you are shopping. If you aren't sure where to shop, check out this page which lists some good sources depending on what country you live in.Step 4: Review Construction Basics
This page is not terribly organized, and references techniques for a lot of carriers, but is a good reference to skim through regarding how to safely hem fabric, reinforce straps, what thread to use, etc. Even questions regarding how many body panel layers you need for a buckle carrier or mei tai.Step 5: Sew!
Go back to your tutorial, read it over one more time, and then go! Try! If you get stuck, come back to the Facebook group with questions or troubleshooting.Step 6: Learn to use it
Review the TICKS Rules for Safe Babywearing before you start (and memorize it!) Nearly every section in the carrier types page includes links to YouTube videos to learn to use your carrier. Check these out, and practice over a soft surface, like your bed. Check yourself in a mirror. If possible, get help from your local Babywearing International Chapter (in person at a meeting, or simply by posting a picture in their Facebook group for a "fit check" so they can help address safety concerns and make sure you and baby are as comfortable as possible.) If you don't have a local chapter, you can also join a global group like Everyday Babywearing. That particular group is full of Volunteer Babywearing Educators ready to lend a hand! Remember than any carrier will take practice to learn to use it and be comfortable in. If you have never worn a baby regularly before, you may experience some soreness while you build up those specific muscles. If baby seems unhappy with being worn, start by getting a fit check at a BWI meeting or with some selfies on a Facebook babywearing group. This will make sure you are doing everything to make you and baby as comfortable as possible. After that, try wearing baby for short spurts every day to get him/her used to it. As soon as baby is up and secure, a change of scenery and brisk walking (like walking to the mailbox) can help distract baby and help him/her appreciate their new view! --| |
Stretchy Wrap Tutorial
Long stretchy wraps are a great snuggly choice for newborns* and small babies. You can pre-tie and pop baby in and out as needed, plus they are excellent for nursing. However, although most commercial stretchy wraps are safety rated up to 30+ lbs, most moms agree that after 15 lbs, they become almost unusably saggy and uncomfortable. So dont spend a ton of money on something youll only use for a few months. Stretchy wraps for water use need a different fabric, and because being in the water supports a lot of baby's weight, can be used more comfortably up to 30lbs or so. That said, although DIY is usually a lot cheaper for most carriers, it can often be cheaper to find a second hand Moby or Boba in a thrift store or online yard sale group unless you can find a really great deal on fabric (although keep in mind that, due to width, however much fabric you buy may make 2 or even 3 stretchy wraps.) Check both DIY and second hand prices to make sure you are making the best decision!Talk to your doctor before using a stretchy wrap with a premature infant or infant with low muscle tone. Stretchy wraps often do not provide the support they need and you may be better off with a woven wrap or ring sling. For healthy, full-term babies, however, stretchy wraps can be used from birth.
1) Pick your fabric
The best/easiest choice is too look for 100% cotton jersey (the same material as a t-shirt.) You preferably want fabric that stretches because of its weave, not added lycra/spandex/etc. Jersey is great because it is widely available, inexpensive, and does not need to be hemmed. Another popular option is cotton interlock. A little bit of added spandex is okay (especially under 5%) but because this can change the way fabric stretches, I would only recommend buying fabric with added spandex in person where you can feel it and compare its stretch to a normal men's t-shirt. If you are ordering online, I would try as much as possible to look for 100% cotton. Picking fabric for a water wrap: You CAN use 100% lycra/swimsuit material for a water wrap; just know that these tend to sag even more than a regular stretch wrap. The best material for a water wrap is athletic mesh/football mesh with stretch only from rail to rail (none from tail to tail) - this material can be used for either a short traditional sling carry or a long wrap - but if you use something with 4-way stretch it needs to be a long wrap with 3 reinforcing passes going over baby for support (like a Pocket Wrap Cross Carry.) Remember to always wash and dry your fabric before starting any project.NEVER use cotton/linen/wool/silk/rayon etc (or a blend thereof) in the water. Rayon gets exponentially weaker when wet, and the other fibers all will absorb water and become MUCH heavier, saggier, and diggier. Think about how much dry jeans weigh compared to soaking wet jeans. In addition, chlorine from a pool can damage the fibers of your wraps.
2) Determine your length
For a stretchy wrap to be safe, it must be worn on the front or hip with 3 spread passes supporting your baby. The most popular ways to tie them is in a PWCC or FWCC (Moby calls a PWCC a Hug hold.) Most women can FWCC with 5 yards of fabric, but a standard Boba wrap is 5.8 yards, a MOBY wrap is 6 yards, and the MOBY plus size wrap is a full 6.6 yards. Remember, you can always trim down, but you cant add length, so always buy a little more than you think you'll need.It is perfectly safe (and actually recommended by Babywearing International) to wear newborns legs-out from birth, with the two cross passes going under their knees and the horizontal pass supporting under their bum, and their lower legs exposed. That said, if your newborn is still in a tight fetal position with his/her knees tucked up under his/her body, it is fine to wrap them up with the passes going under their bum and legs and their feet inside the carry. Just makes sure that their weight is resting on their bottom, not on their feet, and switch them to a legs-out carry as soon as they start to relax their legs. For some babies, this only takes days, and for others, it may be several weeks.
3) Cut to width
While woven wraps are typically close to 30 wide, stretchy wraps are usually much narrower. A MOBY wrap is only 24 wide, and a Boba comes in at only 20 wide. With 3 passes and smaller babies, the width isnt quite as crucial as it is with woven wraps. If you bought 45 wide fabric, the easiest option would be to simply cut it in half. If you bought 60" wide fabric, you might be able to get 3 wraps out if it as long as it doesn't shrink with the initial wash and dry.BONUS: Save your extra wraps as backup carriers in your car. (Just keep them out of the sun, as sunlight can damage fabric fibers.)
4) Learn to use it
The standard carry for stretchy wraps is a PWCC. Its pre-tied, so you can just leave it tied onto yourself while you take baby in and out as needed. That way you arent trying to wrap 6 yards of fabric in a parking lot. Just remember that when pre-tying, the wrap needs to fit you quite snugly without the baby. Pre-tied, the wrap should fit snug against your chest, with none of the passes sagging below your natural waist. The fabric will stretch to make room, but you want all the support you can get to prevent baby from sagging or slumping. WrapYouInLove has a good video for learning to tie a Pocket Wrap Cross Carry.Safety Tip: Make sure when you pop baby into the wrap, all three passes support baby all the way from shoulder level down to under bum and from knee-pit to knee-pit.
5) TICKS Safety Reminder
- Tight
- In View
- Close enough to Kiss
- Keep chin off chest (clear airway)
- Supported back (if you lean forward, baby should not come off your chest)
Safety Reminder: Stretchy wraps are NEVER safe to use for back carries and ALWAYS need three passes over the child to be safe. Make sure you always tie off in a double knot.
6) This is just way too much fabric!
Love the idea of a stretchy wrap but get overwhelmed by dealing with 6 yards of fabric? Try the No-Sew T-shirt Carrier!7) My baby is too heavy for a stretchy wrap...what now?
If you love the feel of wrapping, perhaps youd be up for trying a woven wrap. There is a distinct learning curve when switching from a stretchy wrap to a woven, but woven wraps are infinitely versatile, can be used for front, hip and back carries, and have nearly unlimited weight limits. Plus...if you decide wrapping isnt for you, most woven wraps can be converted into a ring sling, meh dai, or buckle carrier so the fabric doesnt go to waste. --| | | |
Stripping Color
| | | | | |
All of the information on this page was assembled in collaboration with the Facebook group Dyed Baby Carriers. If you have more questions regarding dyeing your baby carrier, join their group for assistance!
Safety Considerations
Color remover is designed for a single length of fabric or woven wrap. Do not use color remover on the following:- Wool
- Bamboo
- Rayon
- Silk
- Structured/Seamed Carriers
- Stretchy Wraps
- Knit Fabrics
Chemicals for Removing Color
Approved color removers:- Dharma's Dyehouse Color Remover
- RIT Color Remover (requires 4-6 packets to achieve similar result to Dharma)
- Jacquard deColourant (can be used to spot-remove color)
- ProChem Thiox
Materials Needed
- Protective Gloves
- Full-face respirator with the proper filters (Multi-Gas/P100 cartridges)
- Large pot (no longer food-safe after used for color removing)
- Stove
- Proper Ventilation (open windows, fan, etc)
- Spoon long & strong enough for moving around fabric
- Color Remover (approved color removers listed above)
Although manufacturer instructions require cooking over a stovetop, some members in Dyed Baby Carriers have had some success with simply mixing the ingredients with boiling hot water and letting it soak for an hour instead of actively cooking (same as the cooler method when scouring.) If you'd like to ask more about this method, join the Dyed Baby Carrier group and tag Astrid Turner and Valene Hoover in your post - both of these members have experimented with this method.
Outside Links
For more information:Expected Results
Stripping color can be an unpredictable process, in which some colors may be removed completely, others may be lightened, and still others may completely change or be left untouched. The following commercial wraps have been tested by members of Dyed Baby Carriers.| Known Strippers Strip down to light yellow, beige, cream or white. |
Partial Strippers Colors either lighten or change to lighter colors. |
Stubborn Strippers Colors Do Not Change |
|---|---|---|
| Natibaby Black/Gray Gears - retains contrast Diva Linen Oscha Caprica Roses Helios Roses Danna Natibaby Olive Silk Pontia Natibaby Alma Mater Storch Leo Noah in Wonderland (needs 2 strippers) Oscha Eden Cooper Beach Nautilus Papaya Didymos Prima Loden Natibaby Perla Amazonia Oscha Nouveau Honeycomb Natibaby Bahama Natibaby Calahari Katia with wool Natibaby Marine Fern Cogs Acero Storch Leo Natur Didymos Moss, Azur Diamond Weave Jade Mild Mati Elves Oscha Raven Oscha Starry Night Midnight (bamboo blend) Braid Pine Didymos Rosalinde Oscha Triskele Honey Leo Rouge Zara Sophia Gray Neobulle Nati Eosin (gray/pink)
|
Cherry Blossoms (only pink stripes) Natibaby Green/Red Sea (only the red stripes) Nebbia Fish (Green/Yellow strips; black does not) Caride Latimeria Fish Didymos Swing Oscha JKGC Knots Oscha Knots Fern Natibaby Blue Linen Swallows Storch Inka (pink/purple strips; blues/yellows do not budge) Storch Leo Violet (red strips; blue does not budge) |
Didymos Aqua Waves Didymos Rosalinde Didymos Pink Pfau Didymos Violet Pfau (linen blend) Didymos Petrol Pfau Didymos Black Pfau (hemp) Didymos Violet Prima (hemp) Didymos Violet Prima (linen) Didymos Petrol Prima (hemp) Lago OS 1975 Didymos Purple Waves Lago OS Ruby/Gold Vat Denim Whales Jeans Ninos Sus Tendrils (hemp blend) Oscha ABB Leo Turkis Didymos Kiesel Prima Didymos Jack |
» TWiki Administrator Group
This is a super user group that has access to all content, regardless of access control. This group has also access to the configure script to do system level configuration.- Member list (comma-separated list):
- Set GROUP = AlyssaLeonard
- Persons/group who can change the list:
- Set ALLOWTOPICCHANGE = TWikiAdminGroup
How to login as TWikiAdminUser
- Login as the internal TWiki administrator:
- internal admin login (use the username suggested and the password set in configure).
- Logout from Administrator:
lib/LocalSite.cfg file and deleting the line that starts with $TWiki::cfg{Password} and then set it again by saving your settings in configure.
If you haven't previously set up an administrator, follow these steps:
- Authenticate as the internal TWiki administrator:
- internal admin login (use the username suggested and the password set in configure).
- Edit this topic
- Insert the wikinames of admin users in the TWiki Administrator Group by listing them in the GROUP setting
(example* Set GROUP = JohnSmith, JamesBond) - Save this topic
- Logout from the Internal TWikiAdminUser
- Verify that new members show up properly in the group listing at TWikiGroups
- Make sure always to keep this topic write protected by keeping the already defined ALLOWTOPICCHANGE setting
- The ALLOWTOPICHANGE and ALLOWTOPICRENAME settings in TWiki.TWikiPreferences and Main.TWikiPreferences have already been set to this group (TWikiAdminGroup), restricting edit of site-wide preferences to the TWiki Administrator Group
TWiki Administrator User
The TWikiAdminUser has been added to TWiki to make it possible to login without needing to create a TWiki User, or to temporarily login as TWikiAdminUser using the password set in configure, and then log back out to the same User and Group as before. This means it is no longer necessary to add yourself to the TWikiAdminGroup, and you will be able to quickly change to Admin User (and back to your user) only when you need to.How to login as TWikiAdminUser
- Login as the internal TWiki administrator:
- internal admin login (use the username suggested and the password set in configure).
- Logout from Administrator:
lib/LocalSite.cfg file and deleting the line that starts with $TWiki::cfg{Password} and then set it again by saving your settings in configure.
Prerequisites
-
Security Setup : Sessions : {UserClientSession}needs to be enabled in configure - A configure password (otherwise the Admin login is automatically disabled.)
- If your TWiki is configured to use ApacheLoginManager, you will need to log in as a valid user first.

Ideas, requests, problems regarding TWiki? Send feedback